Before moving any further, we are going to save our design. To do that:
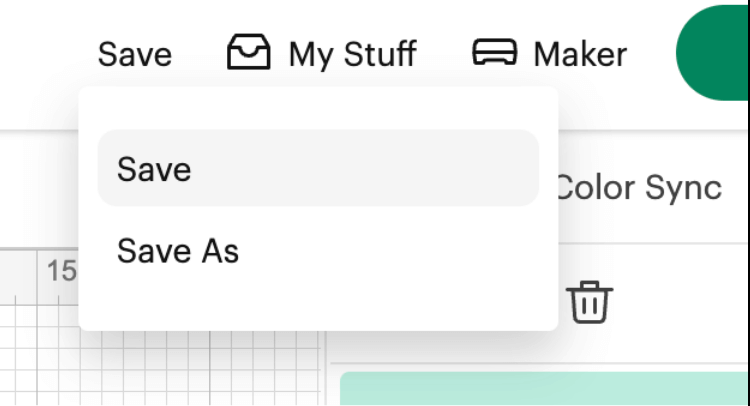
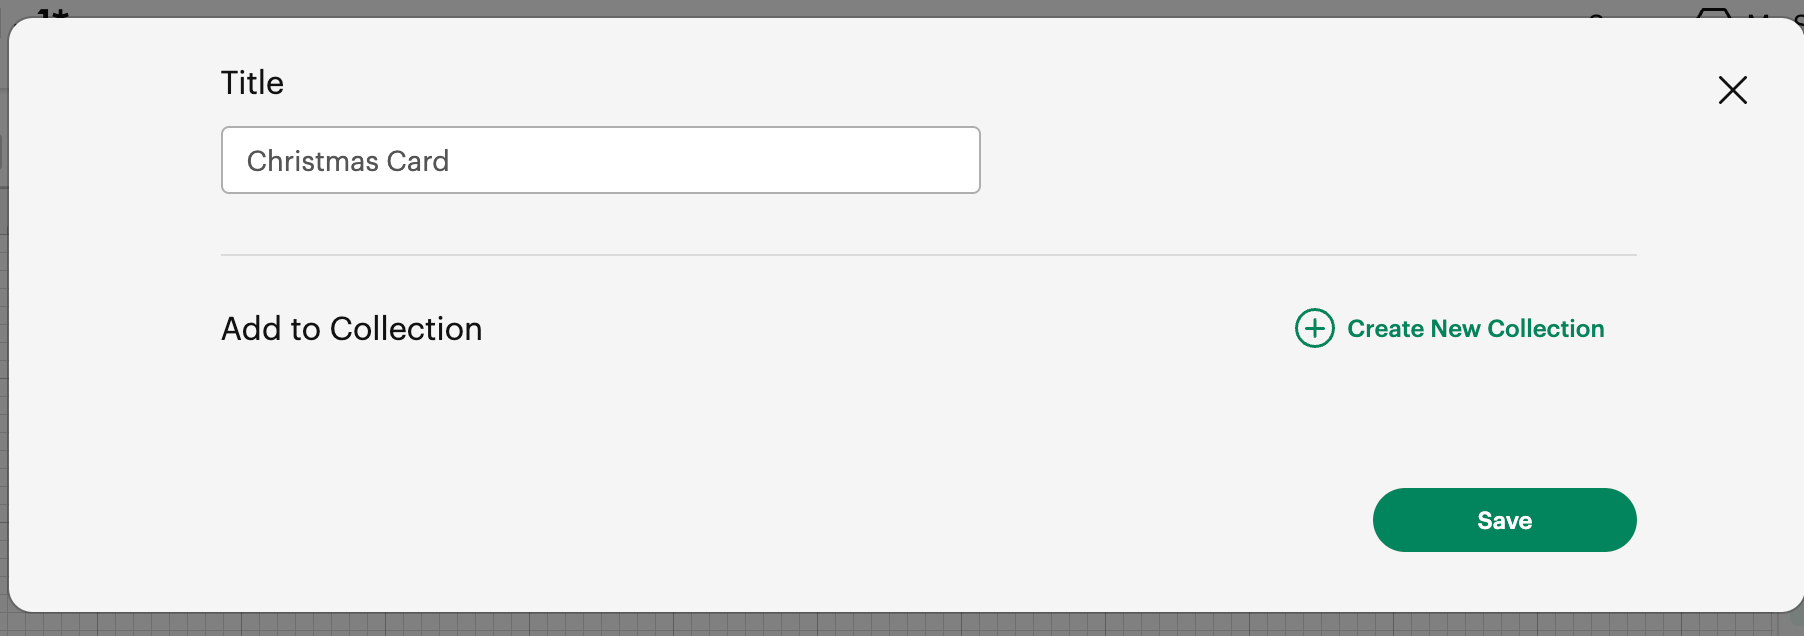
1- Click on Save link on the top right corner of the Design Space and Add a descriptive name and click on Save Green Button.
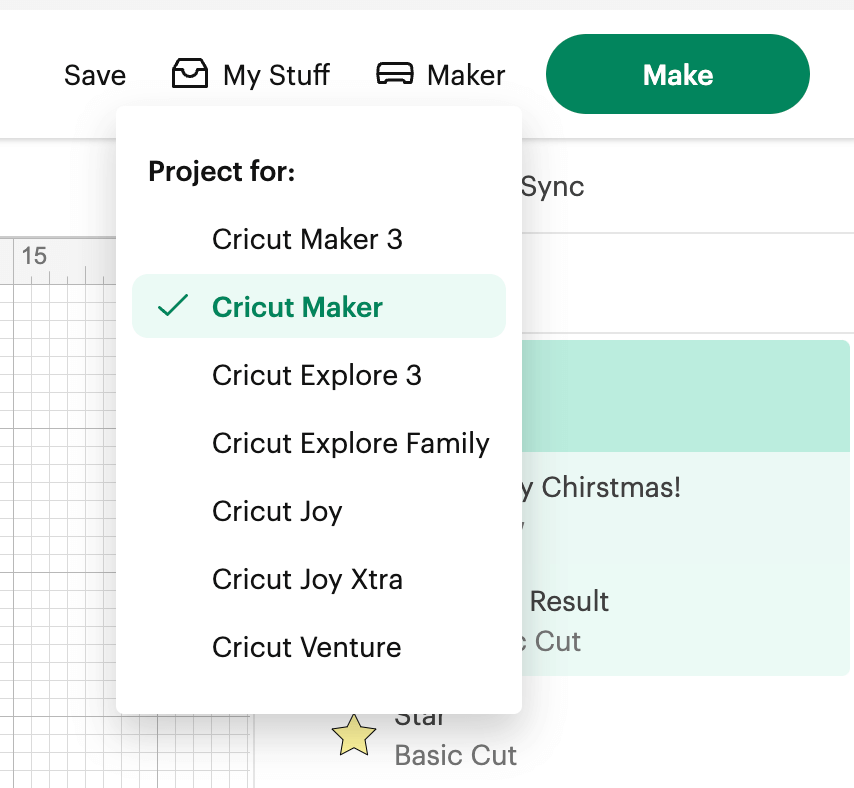
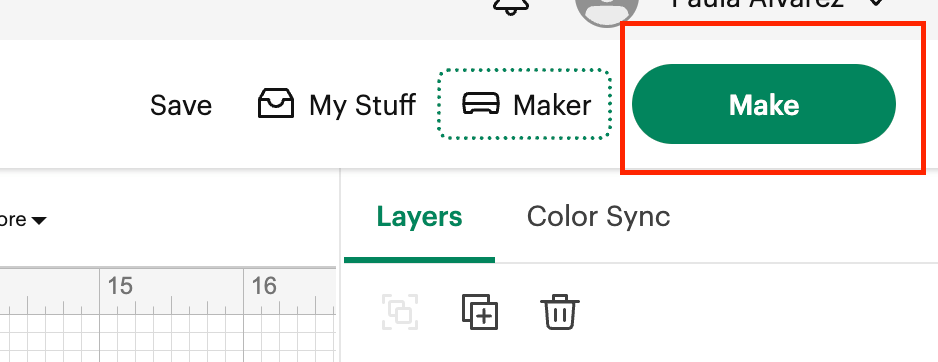
2- Now that our project is saved, we need to make sure that our right machine is selected, to that, we click on the link next to the Make Green Button and from the options listed, we choose the one that we are going to use. In our case it is the Maker.
3- Let’s start Cutting and Drawing our Project!!!!! By clicking on Make Green Button.
4- We are going to see on the next page, that we have 1 page per color of the card.
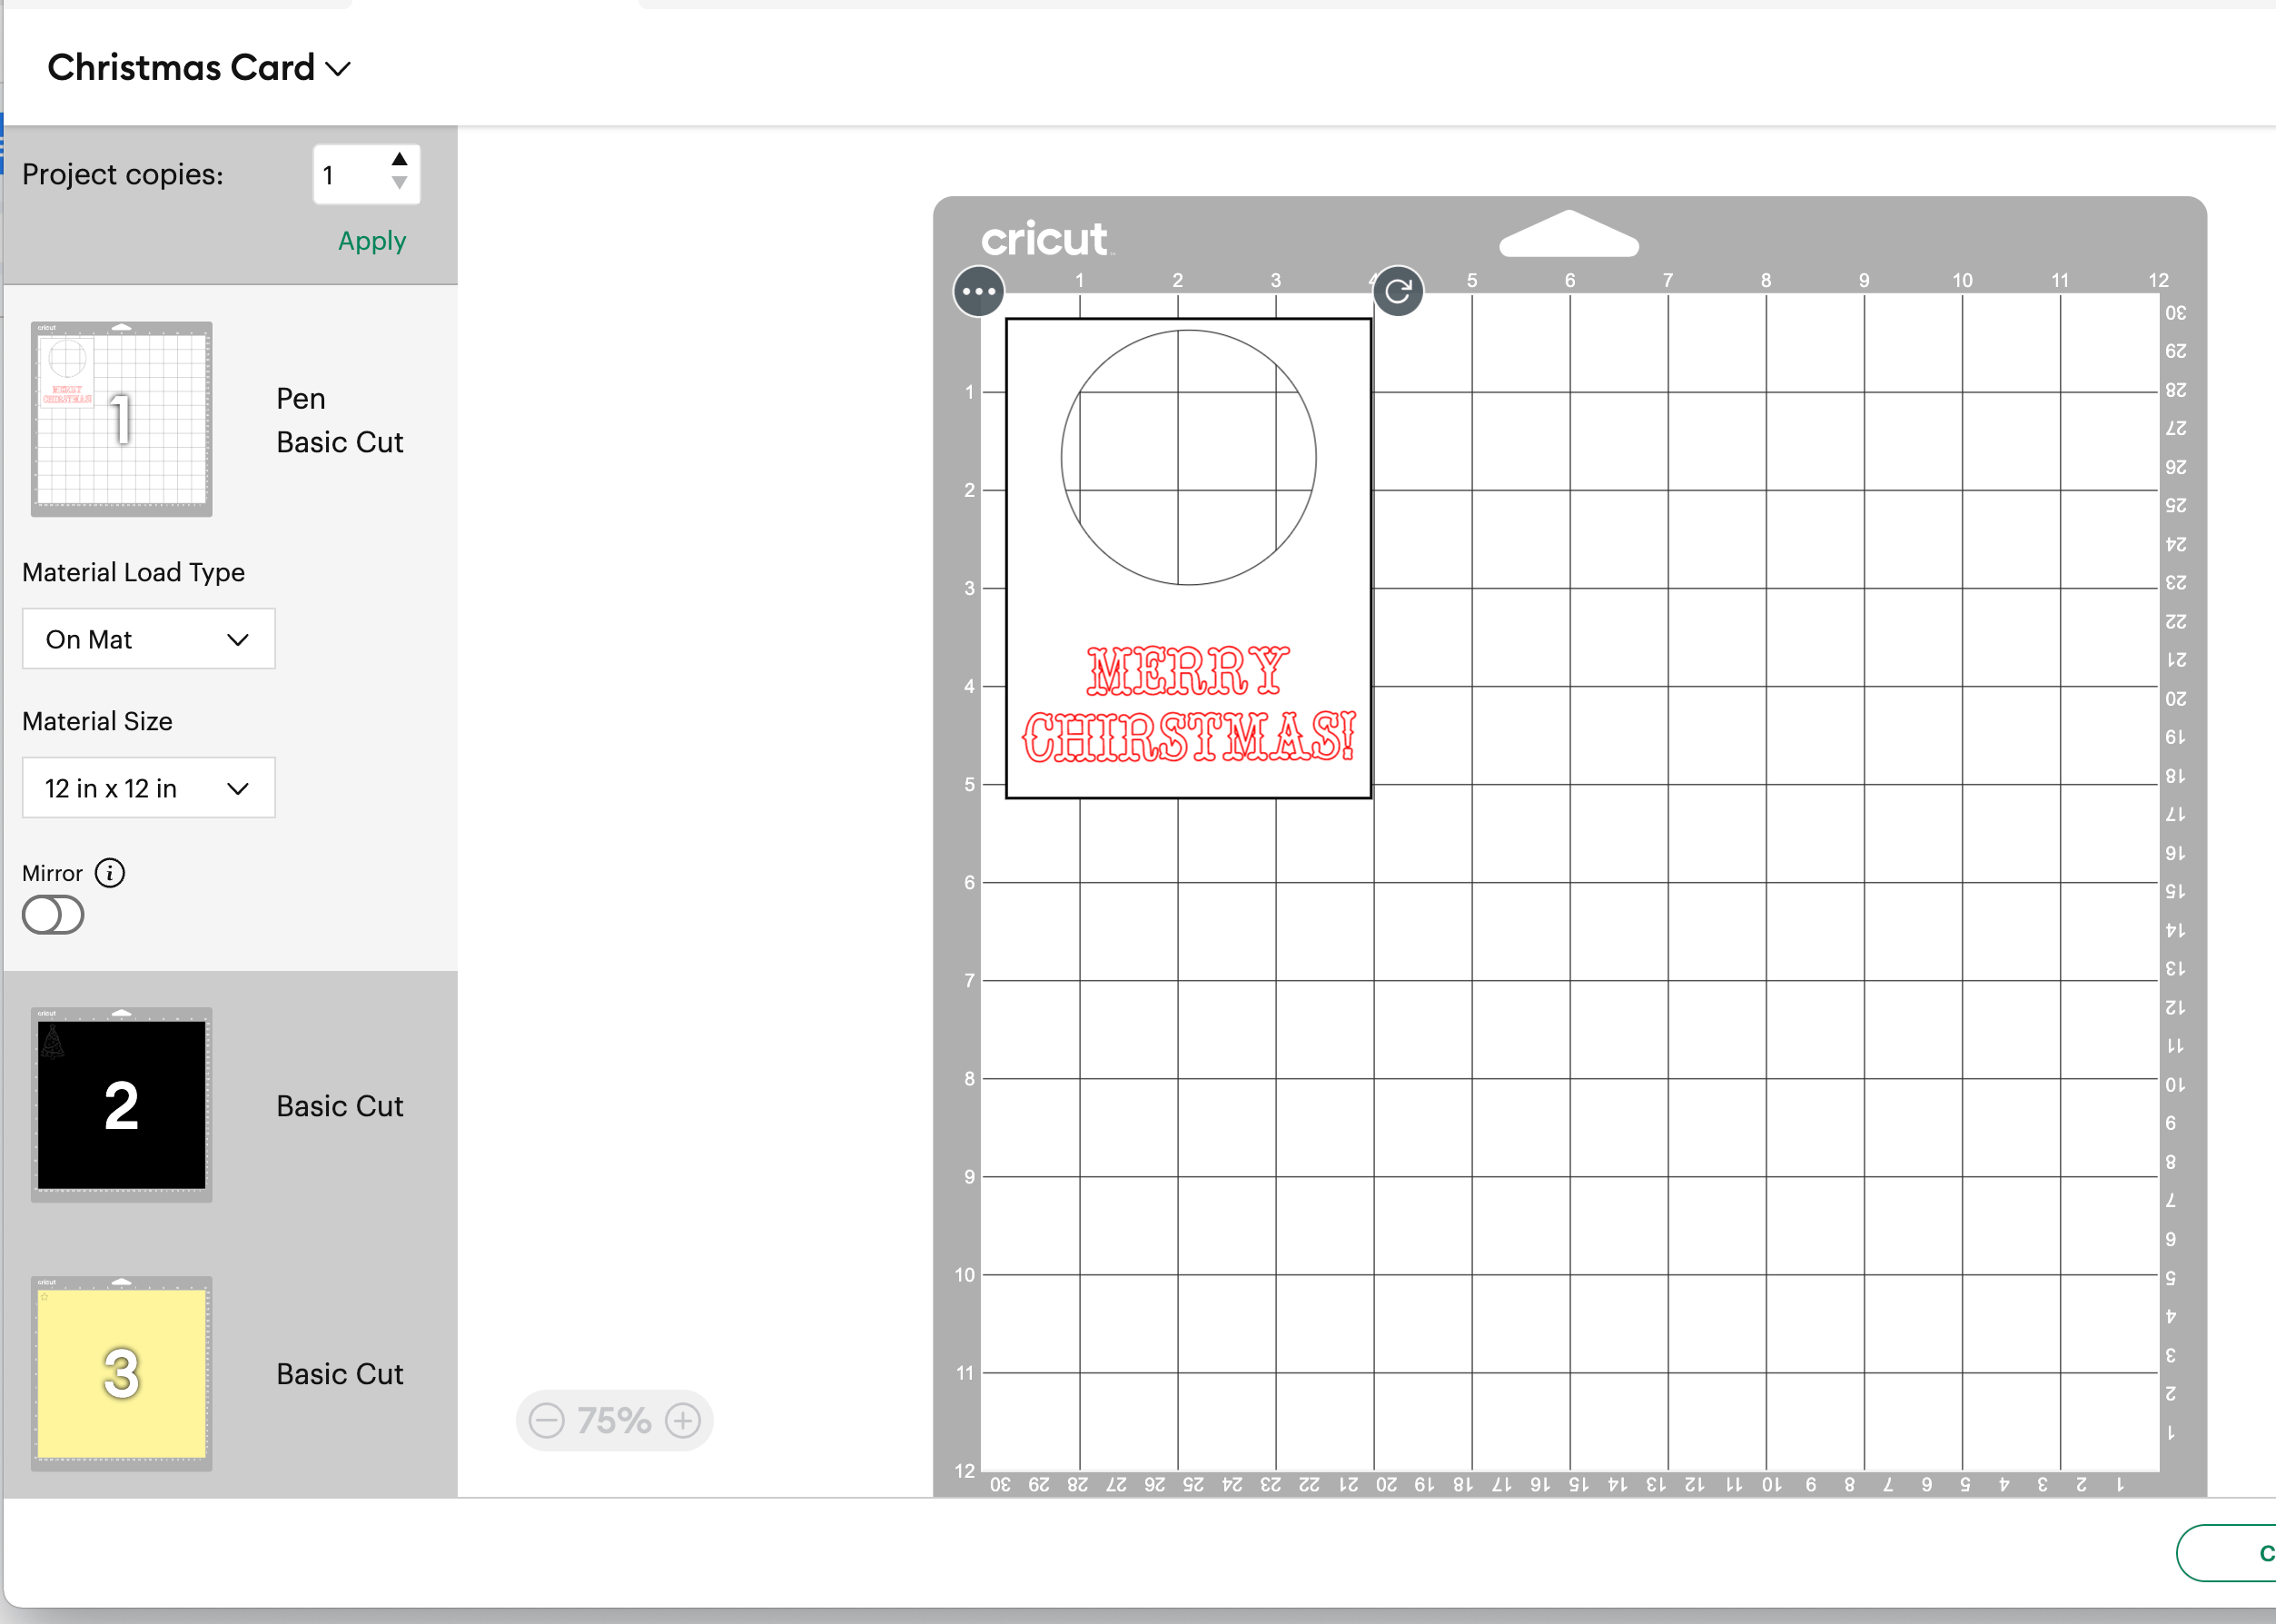
5- You need to check the Material Load type and the Material Size. In our scenario, we are using a Light Blue cutting mat 12 x 12. So there is no need to change the configuration.
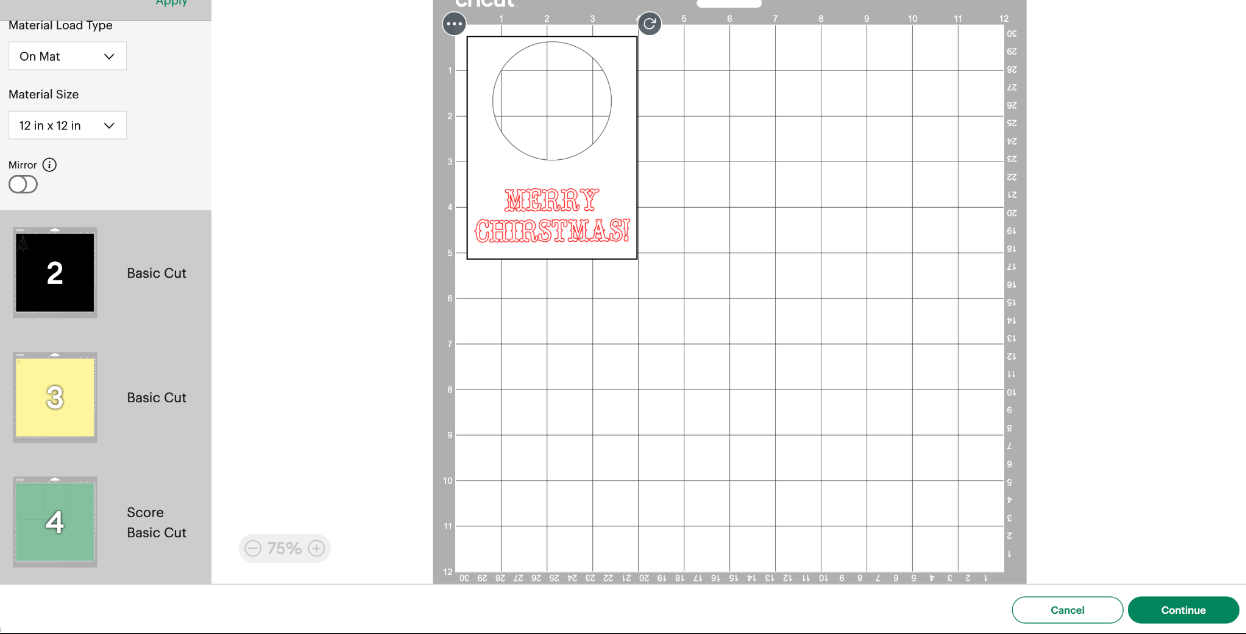
6 – We are going to click on Continue to be able to choose the material type that we are going to use and start cutting and drawing.
7- Since we are using the same paper but different colors, we can keep the same configuration.
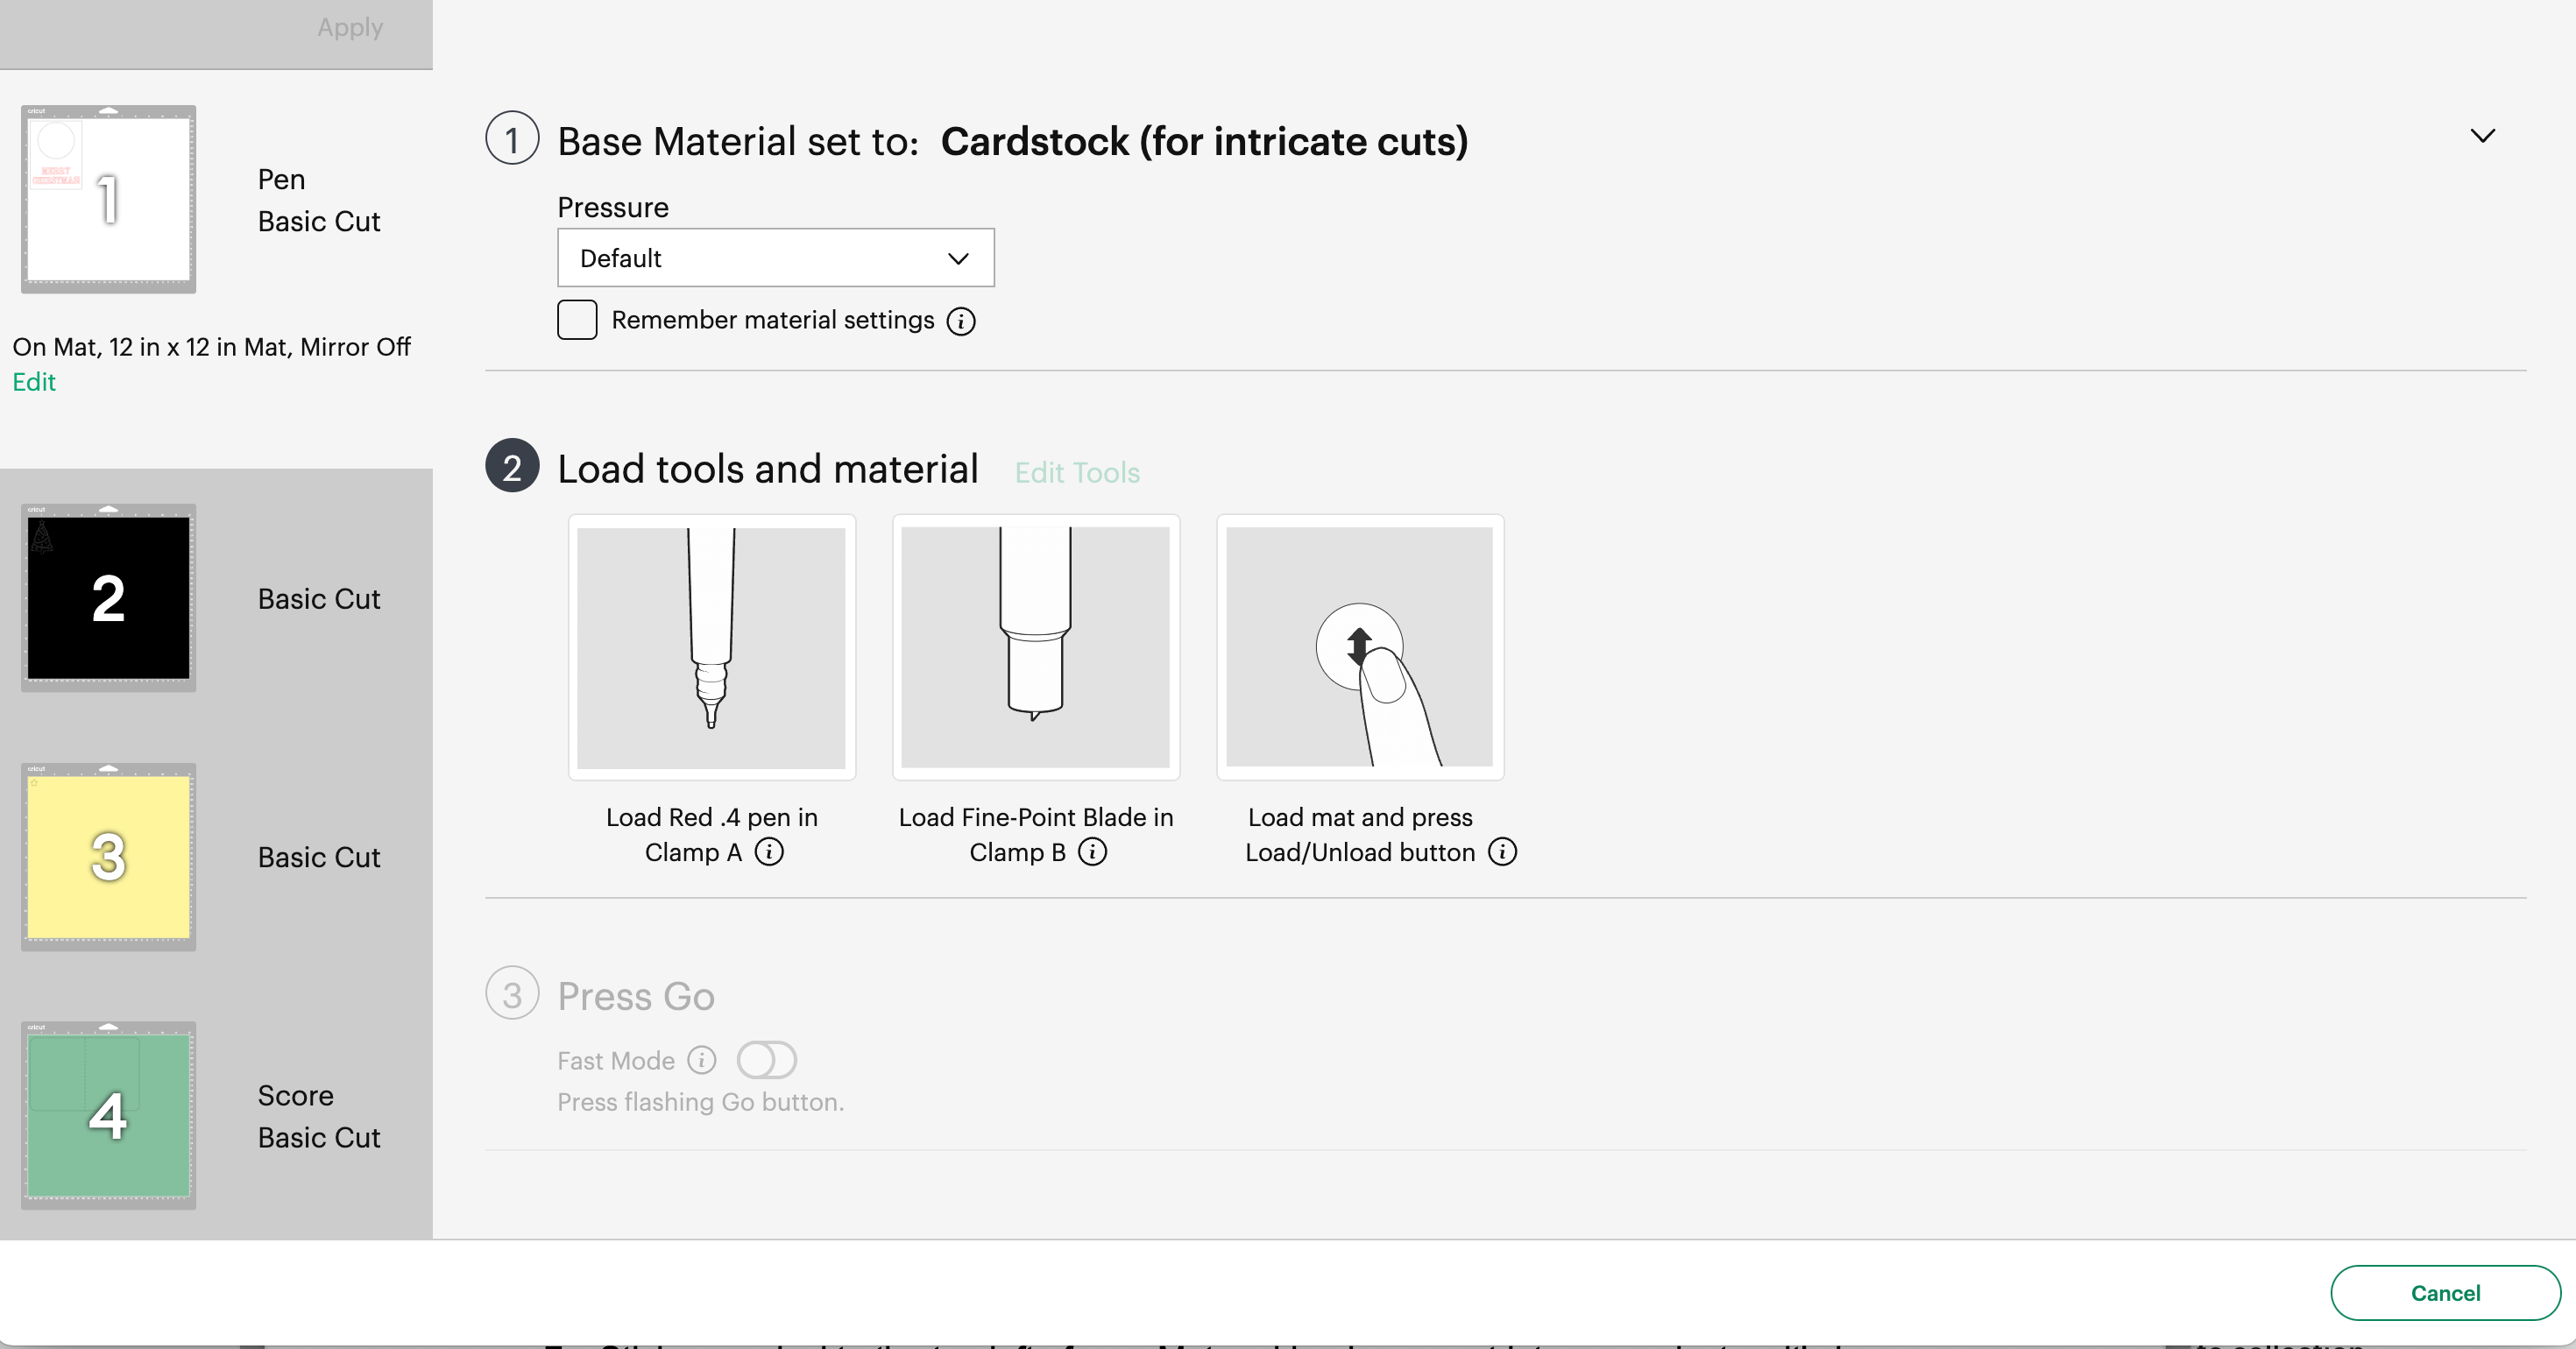
8 – We can start cutting. If this is your first time, please check the following document with the steps on how to add your mat to the machine and start cutting.
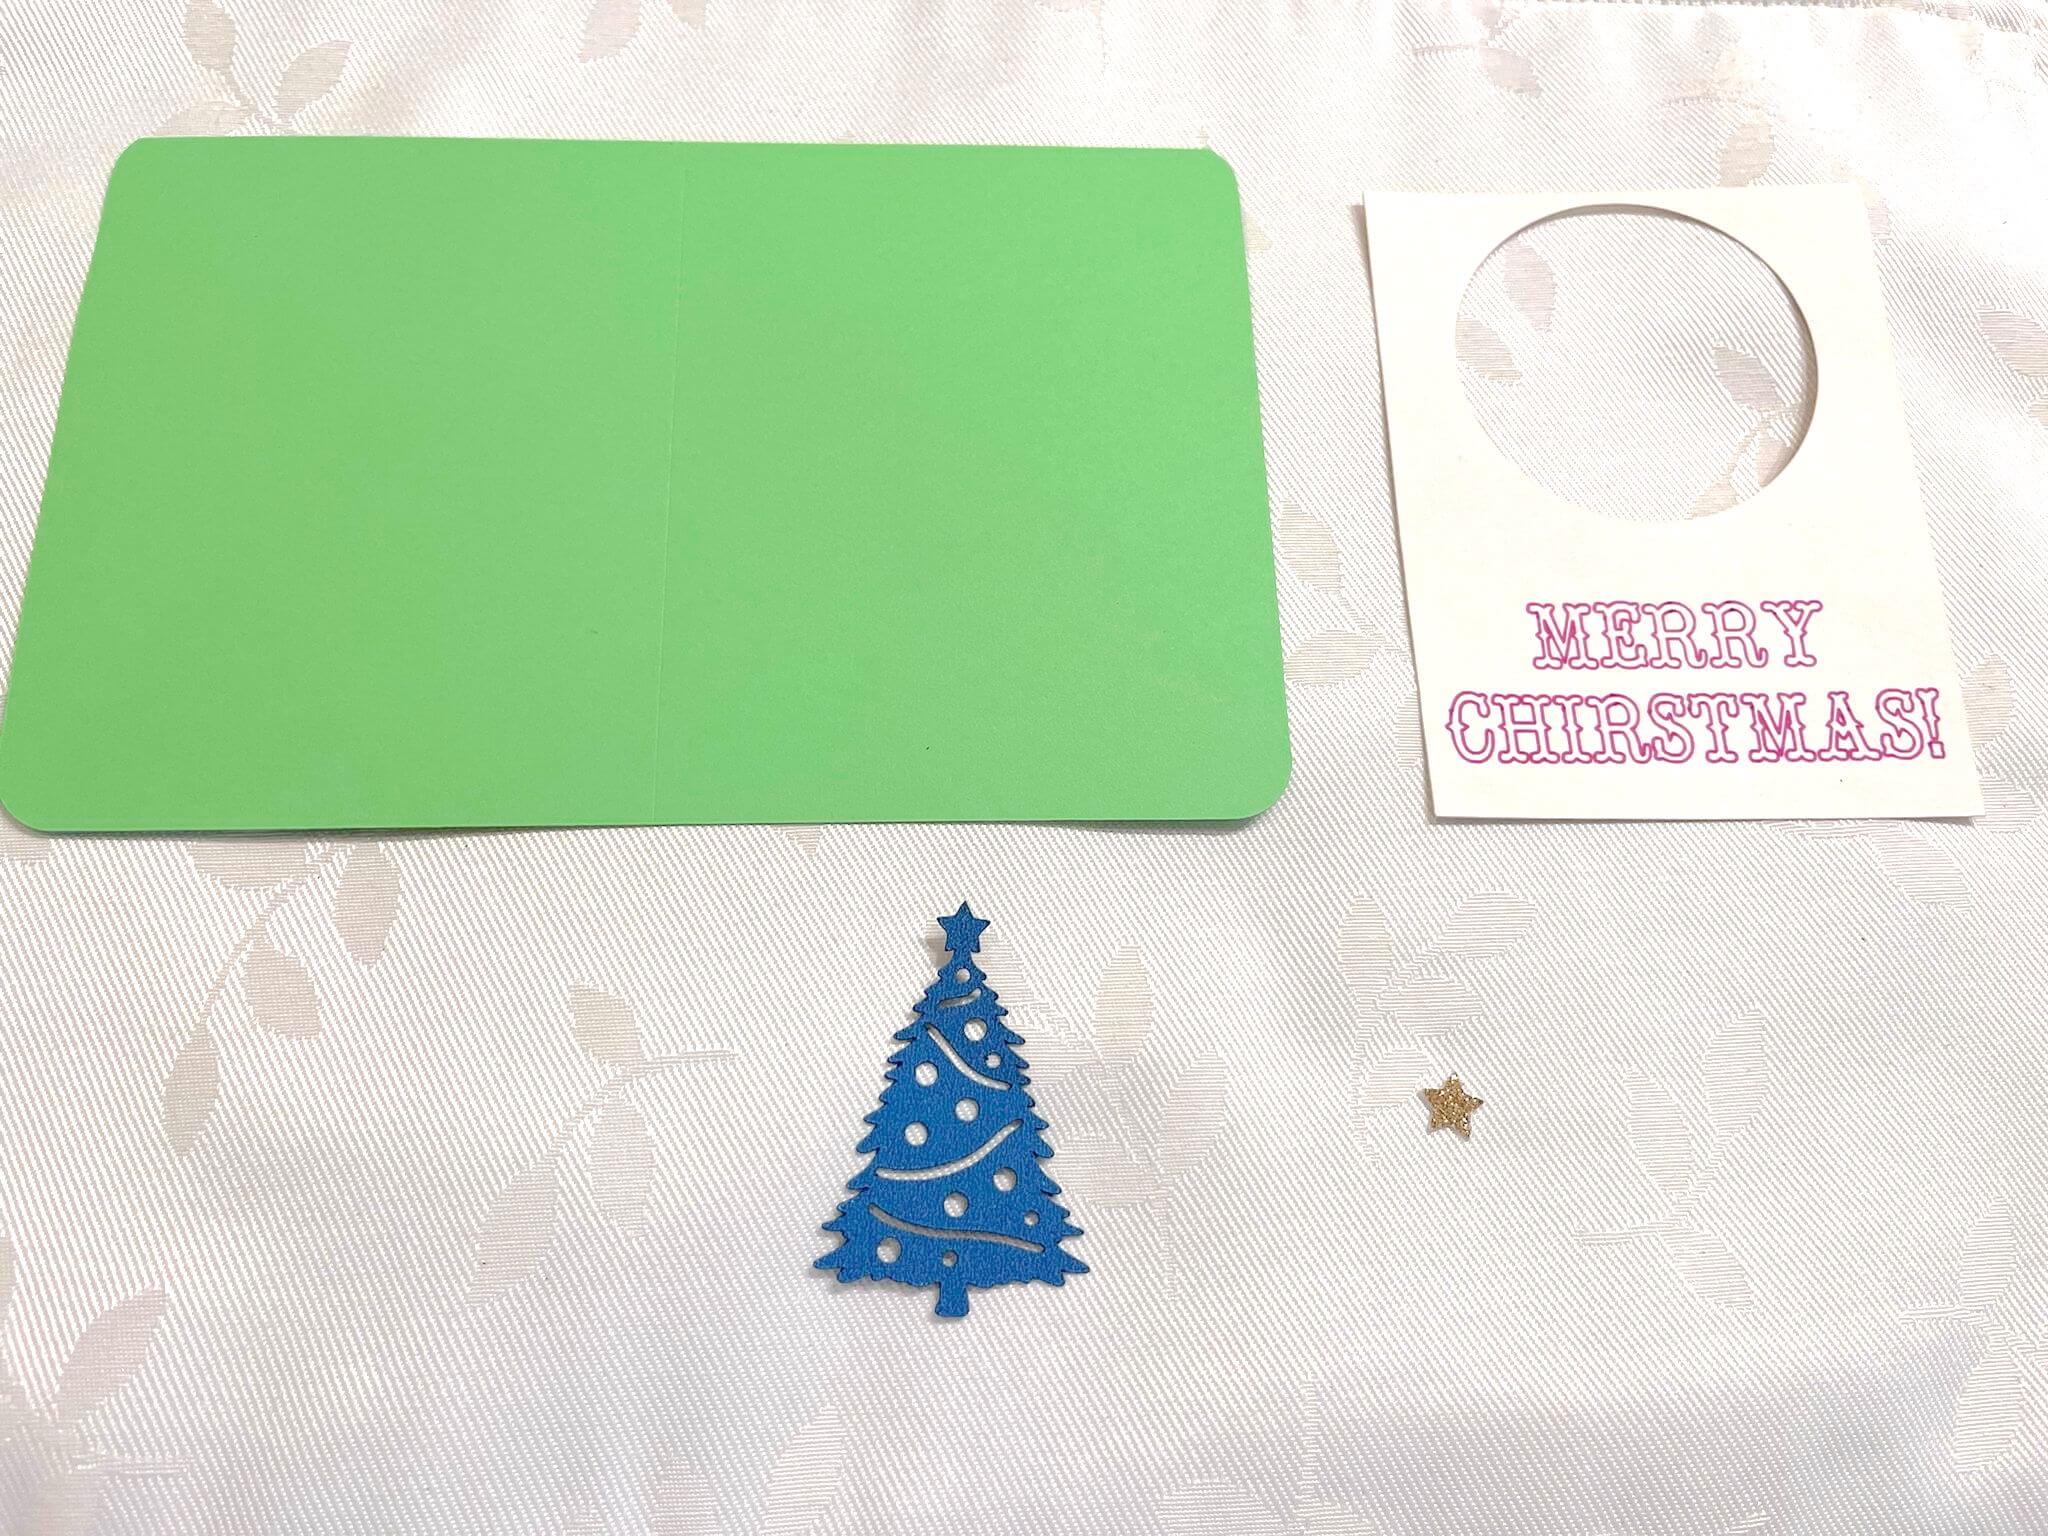
9- After all the cuts are done, we are going to obtain 4 different parts: