Step 1: Create the Design
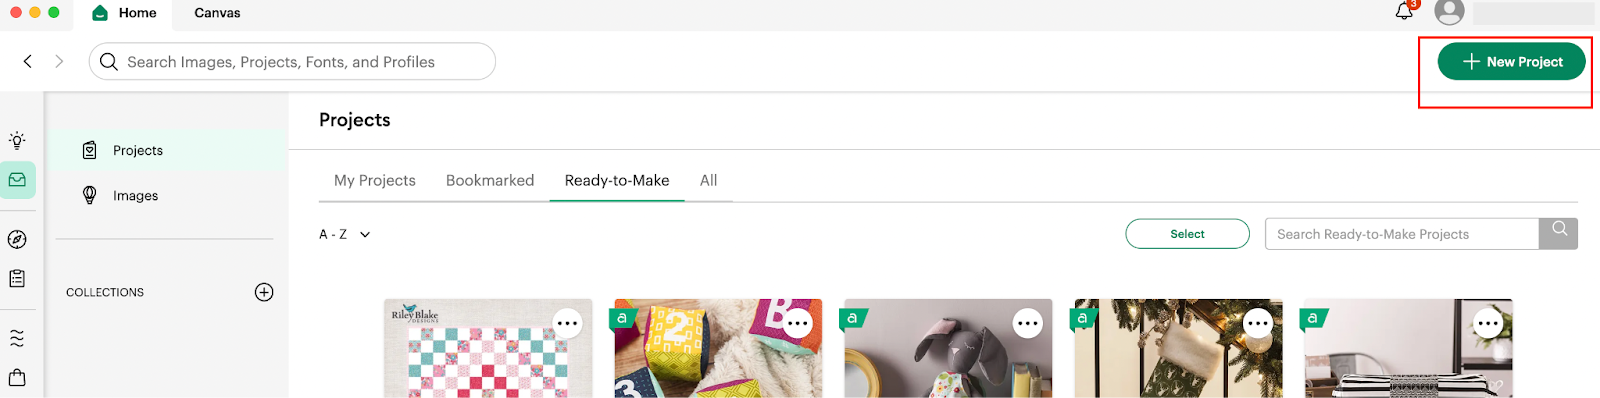
1: In order to be able to start our Design, we are going to access our Design
Space application and in there we are going to click on the + New Project Green button located on the top Right corner of our screen.
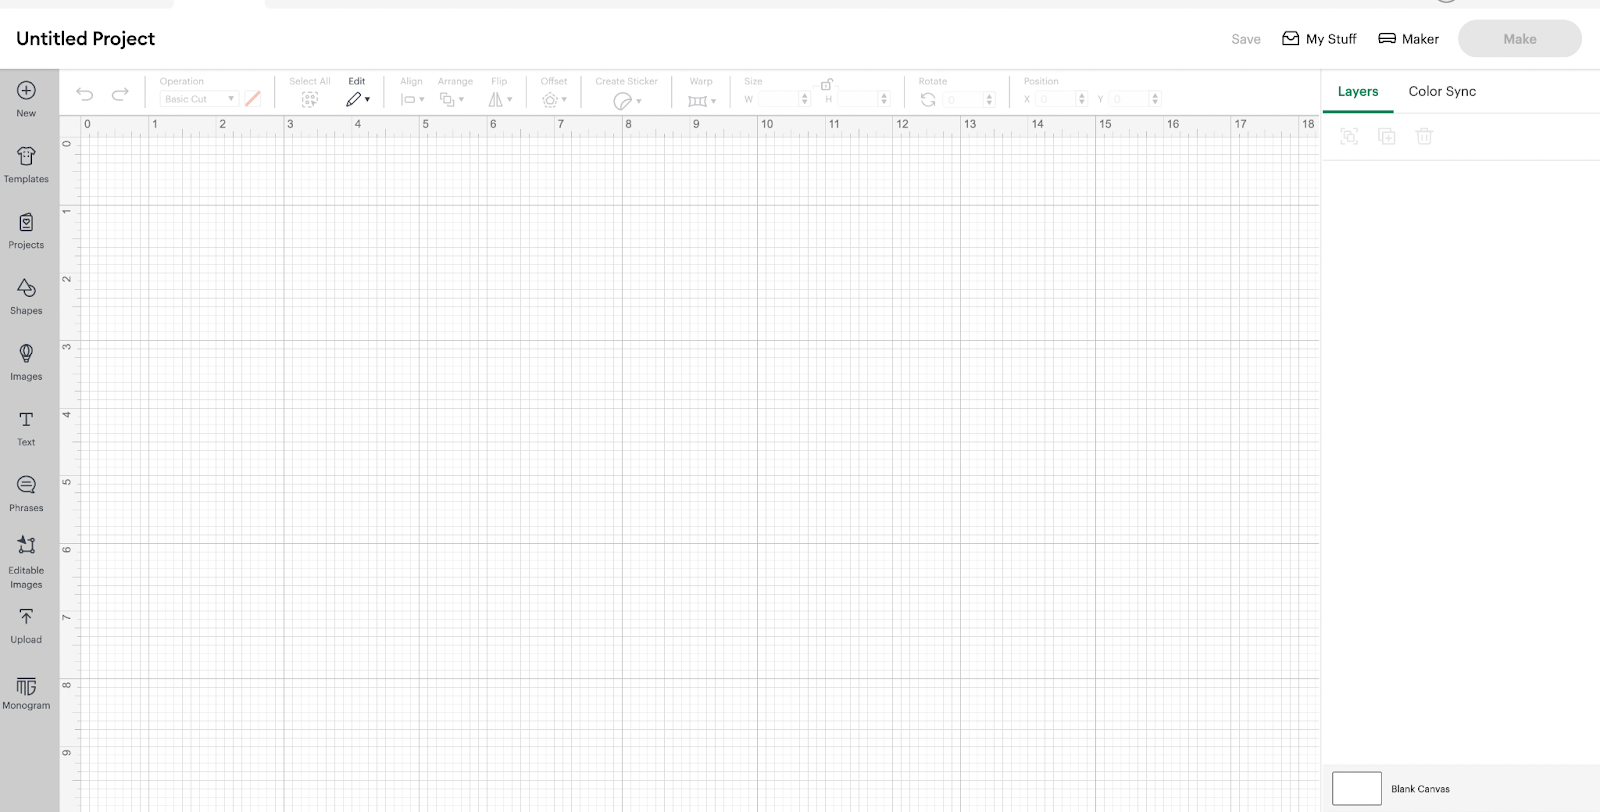
2: After we clicked in there, we are going to be able to access our Blank Canvas, in where we are going to start creating our Design:
3: We are going to use the shapes functionality to add a square and we are going to add them to the canvas:

After we added the shape to our canvas:
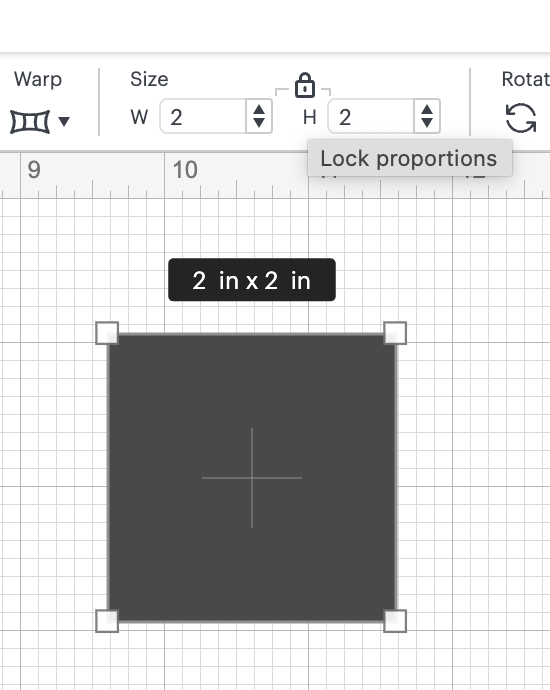
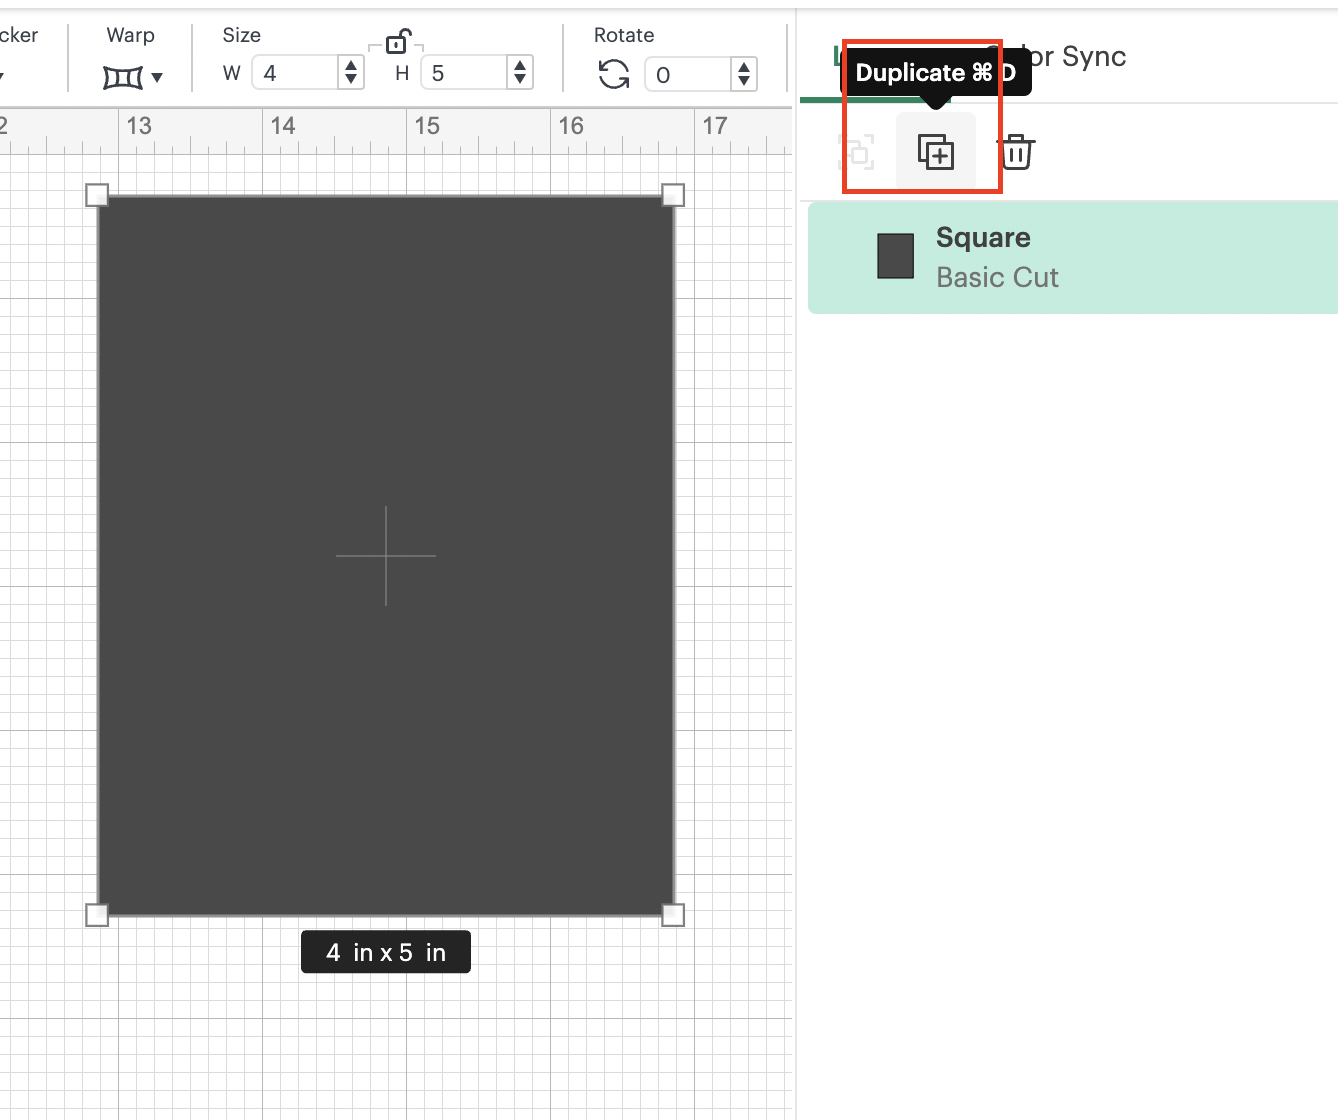
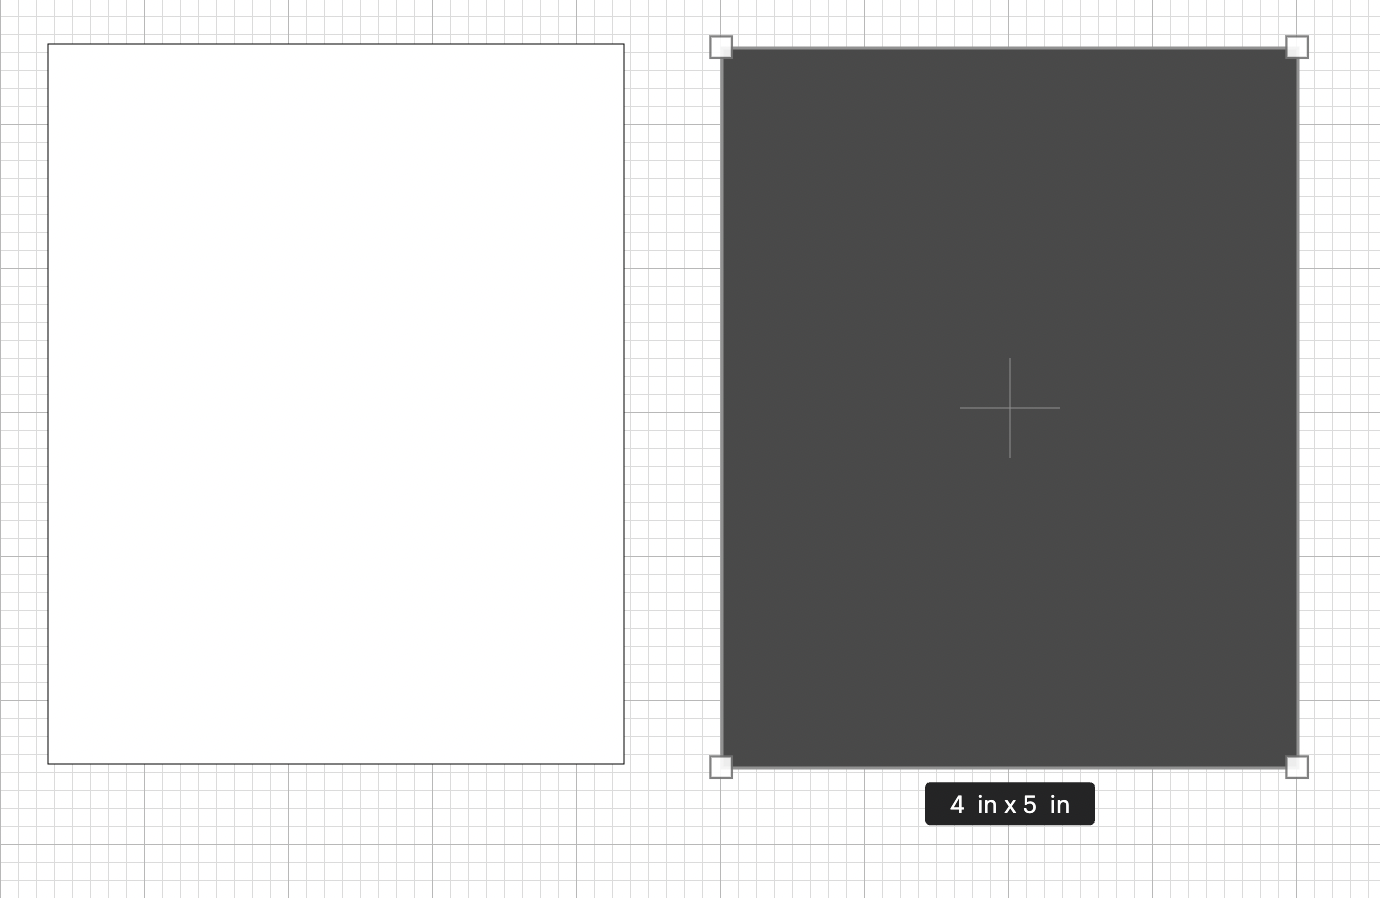
4: We are going to resize our square by first clicking on the lock that is located in the size functionality on the top bar:

💡Tip: This lock, allow us to add the W and the H independently based on the desire size that we want to add.
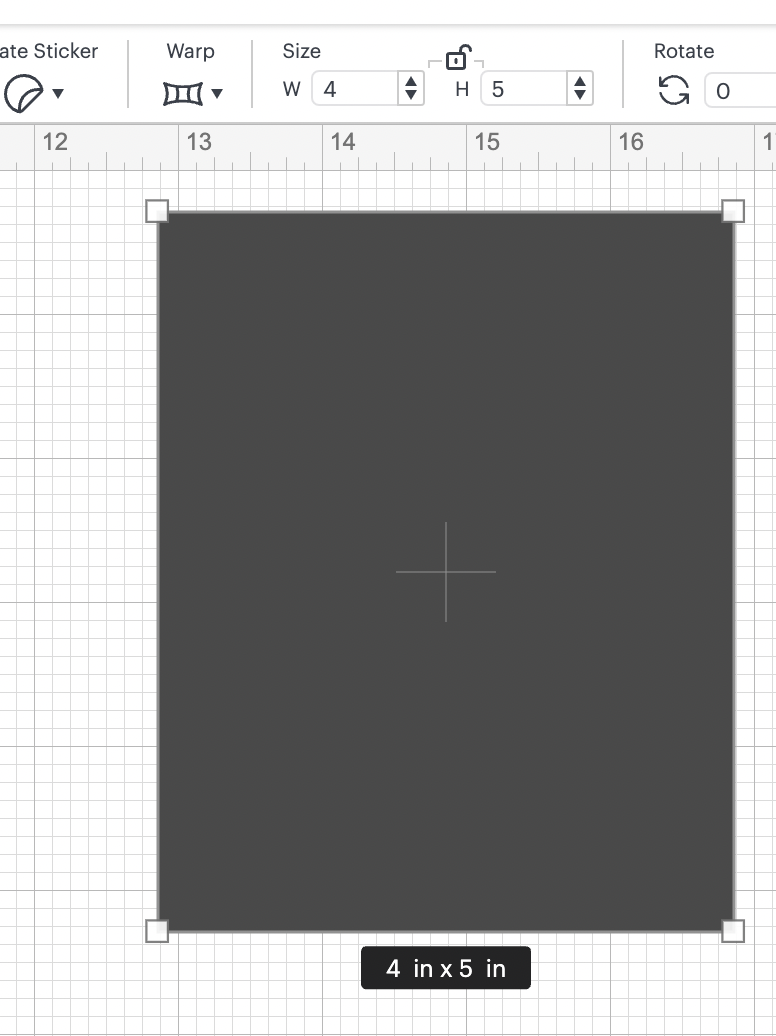
We are going to change the size of the square to the following: W: 4” and H” 5”, you should have something like:
💡Tip: Remember that the measurements are just a guide, you can choose any size based on the place that you are going to hang the banners.
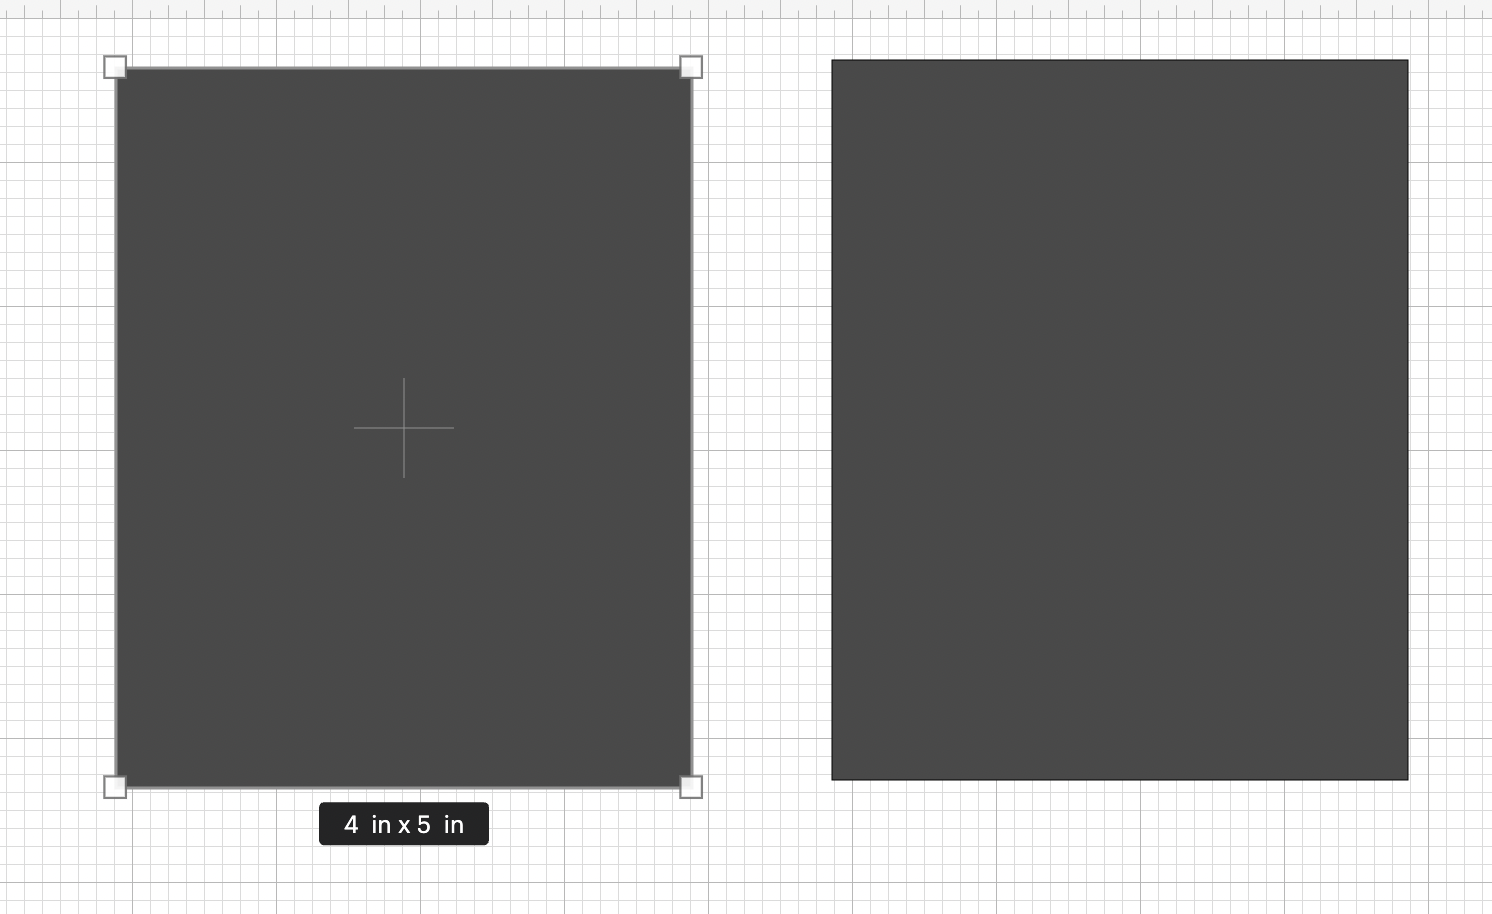
5: We are going to select our square (now rectangle) and we are going to duplicate it by clicking on the duplicate button:
After you duplicate the element you should have:
💡Tip: Another option is to add the rectangle with the same process as we did previously by using the shapes functionality and resizing it.
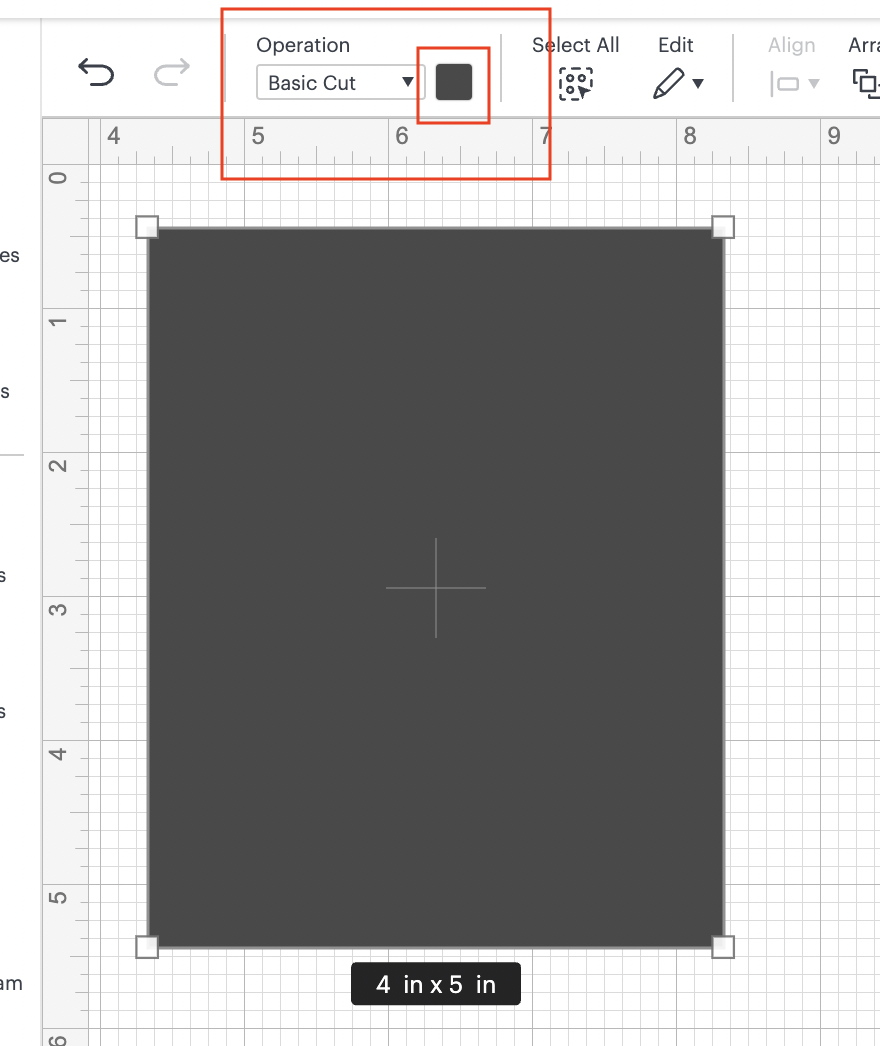
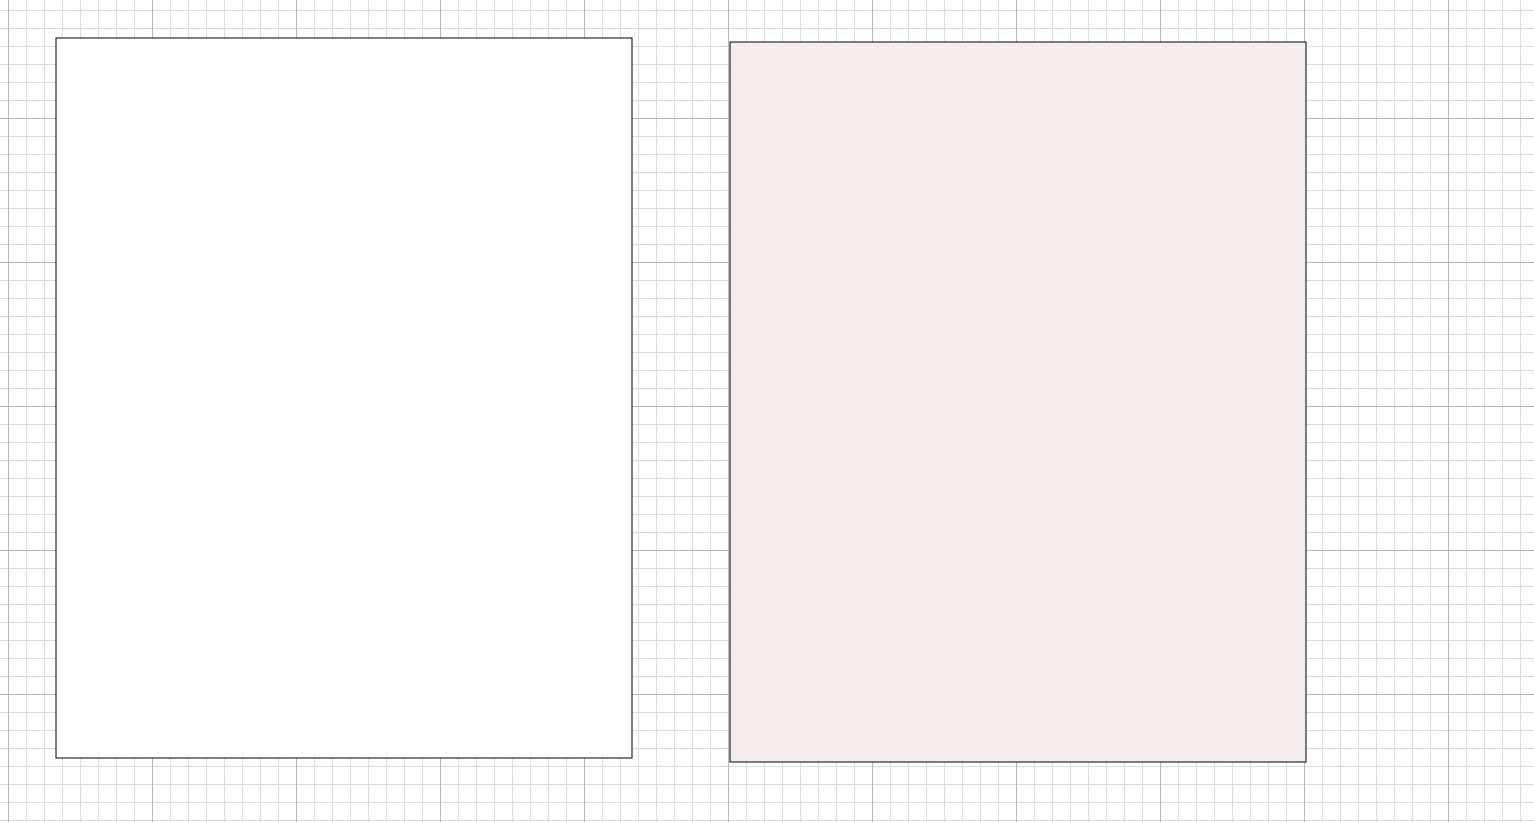
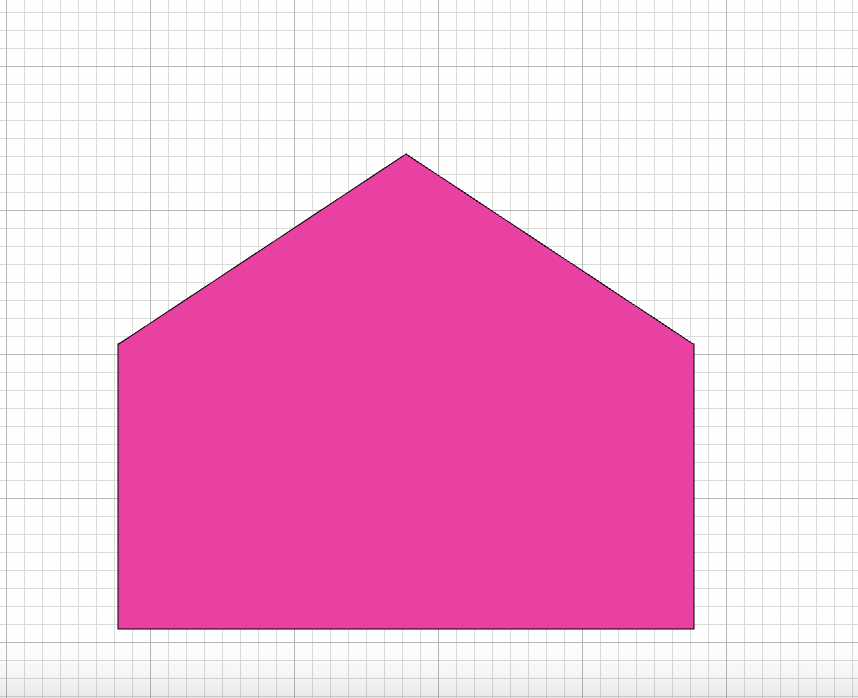
6: Now, we are going to select one of our element and we are going to change the color to white, in order to do this, we are going to locate the operation functionality in the top bar menu and we are going to click on the square that is showing in black /dark gray color:
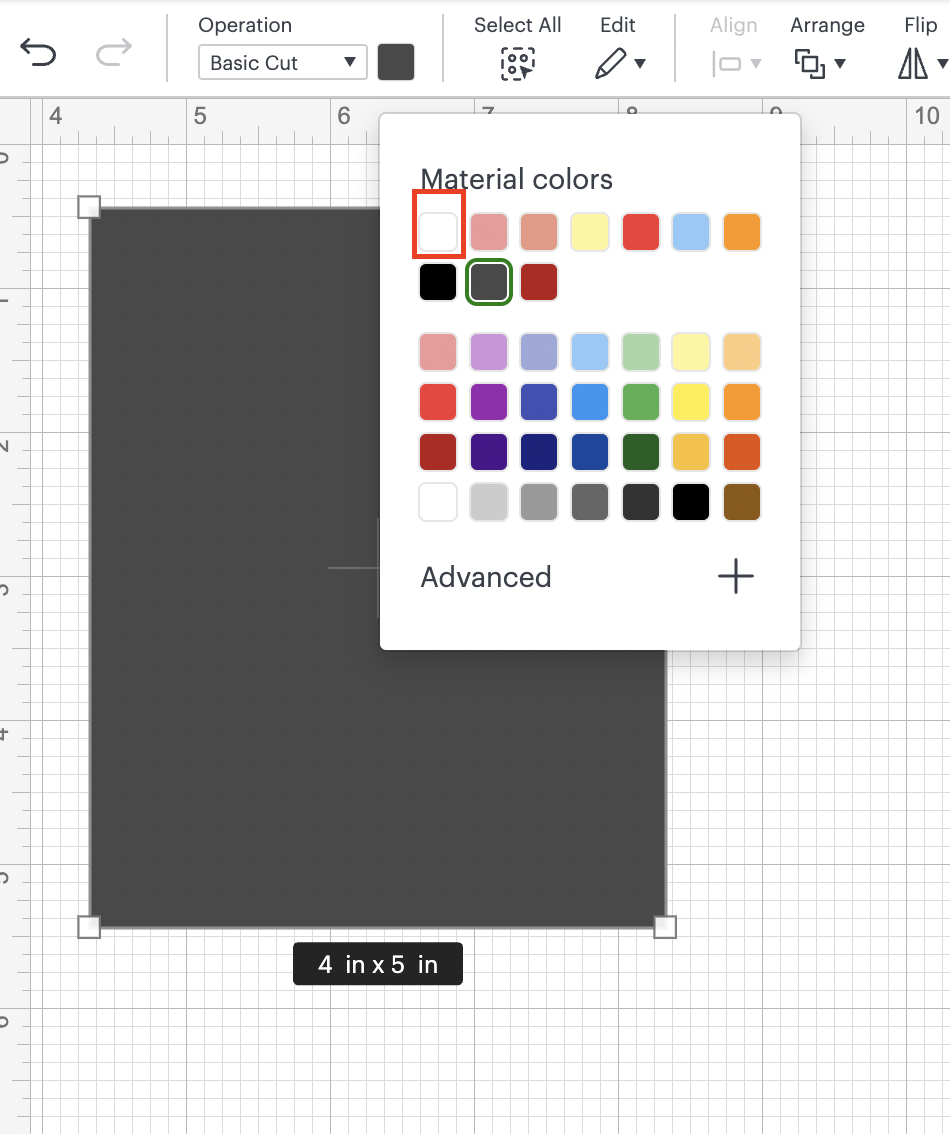
And inside there we are going to choose the color, in our case, one of our base colors for the banner is going to be white:
After changing the color you should have:
💡Tip: You can choose any other color, this is for reference only since the final color is going to be related to the cardstock color that we are going to cut.
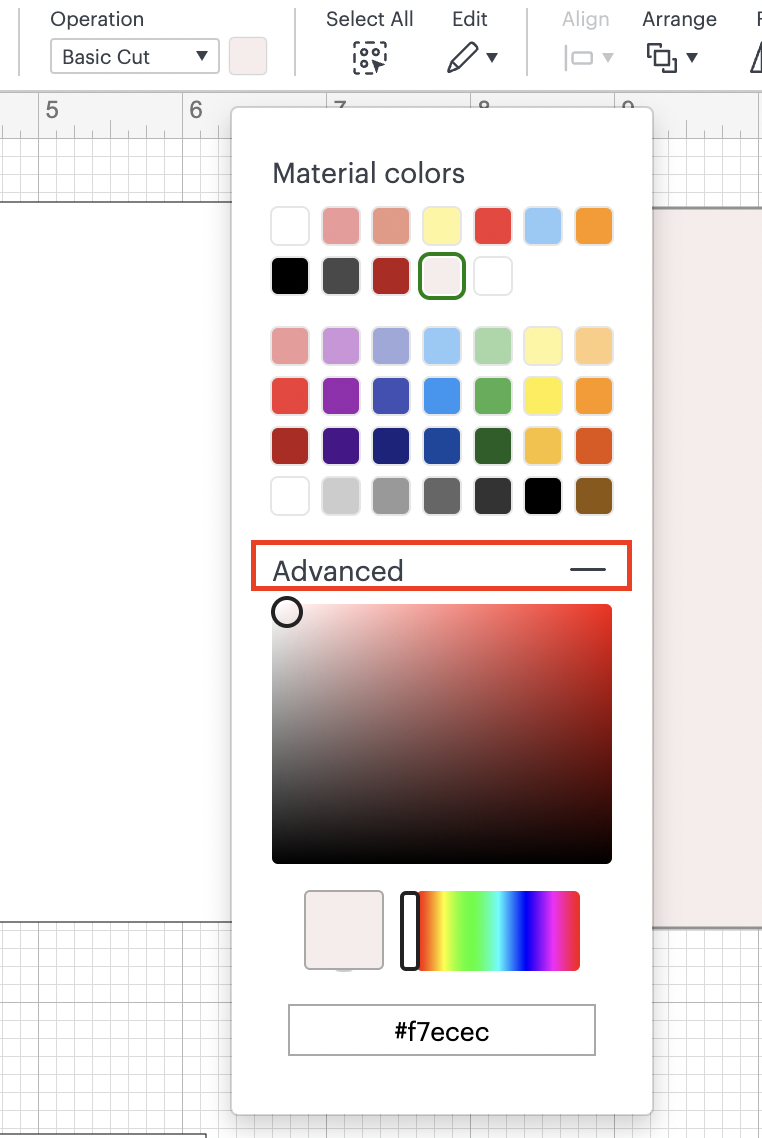
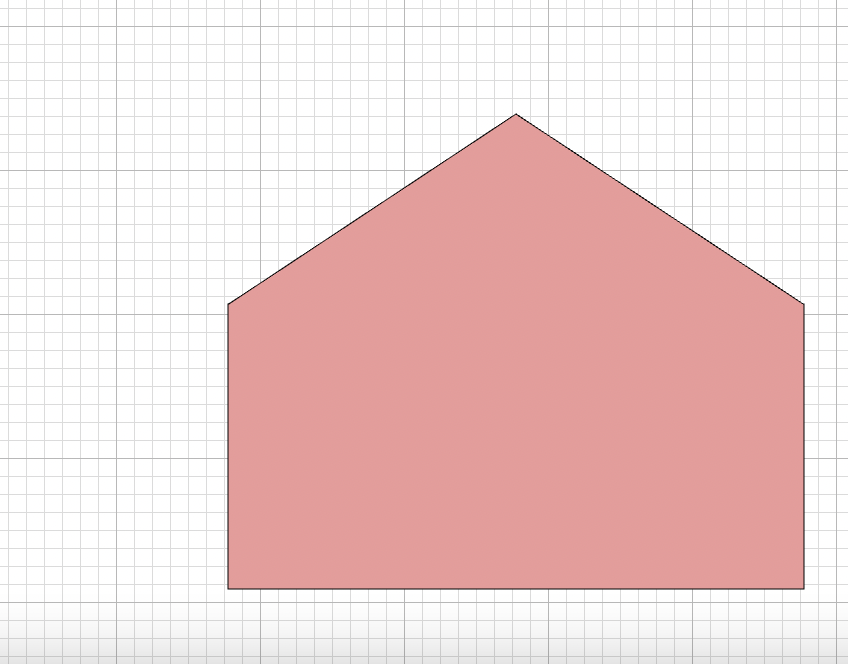
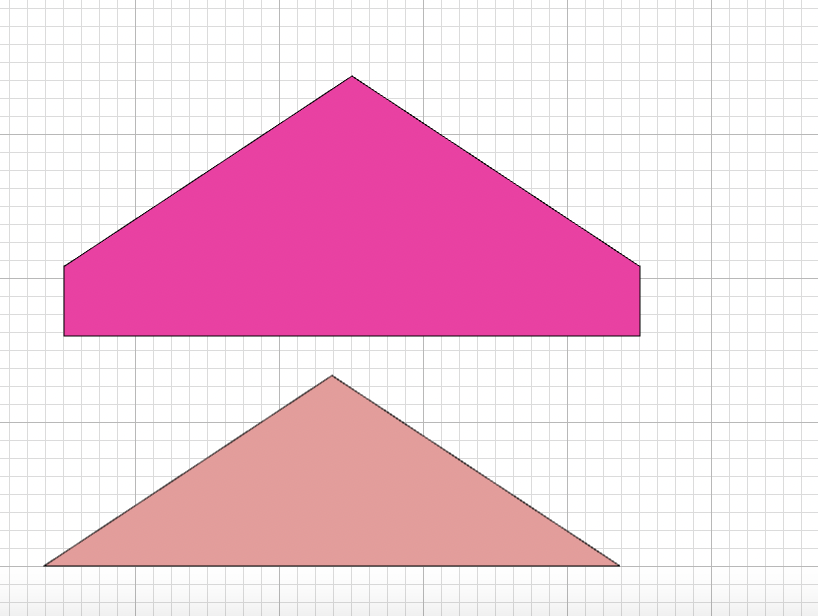
7: We are going to do the same process and change the color of the other element in this case to a very light pink color, you should have something like:
💡Tip: To change colors to a different color than the ones showing as default, click on the advanced option and in there you can just drag the circle to the desire color or add the right code of the color that you want to use.
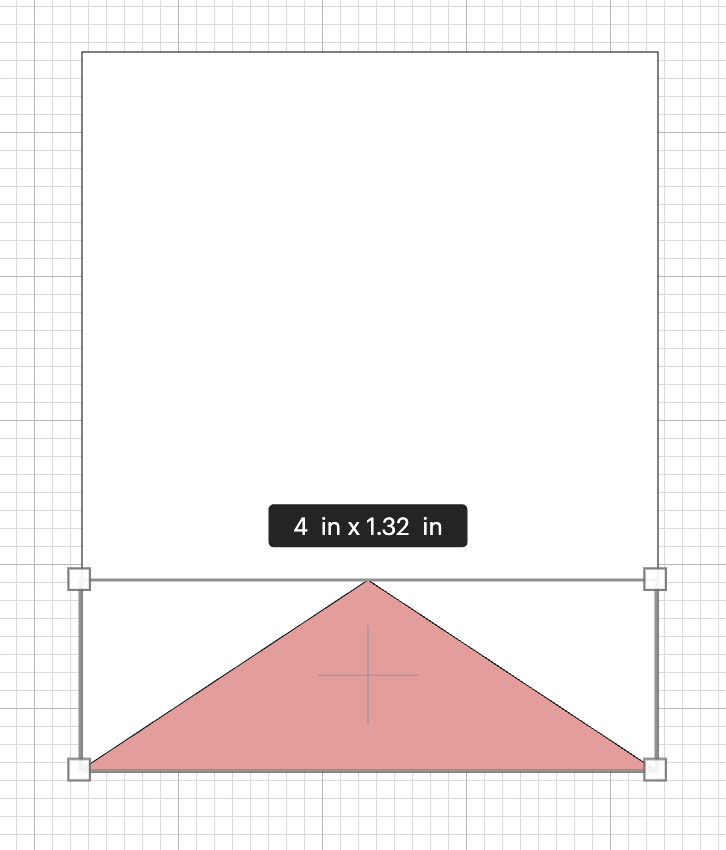
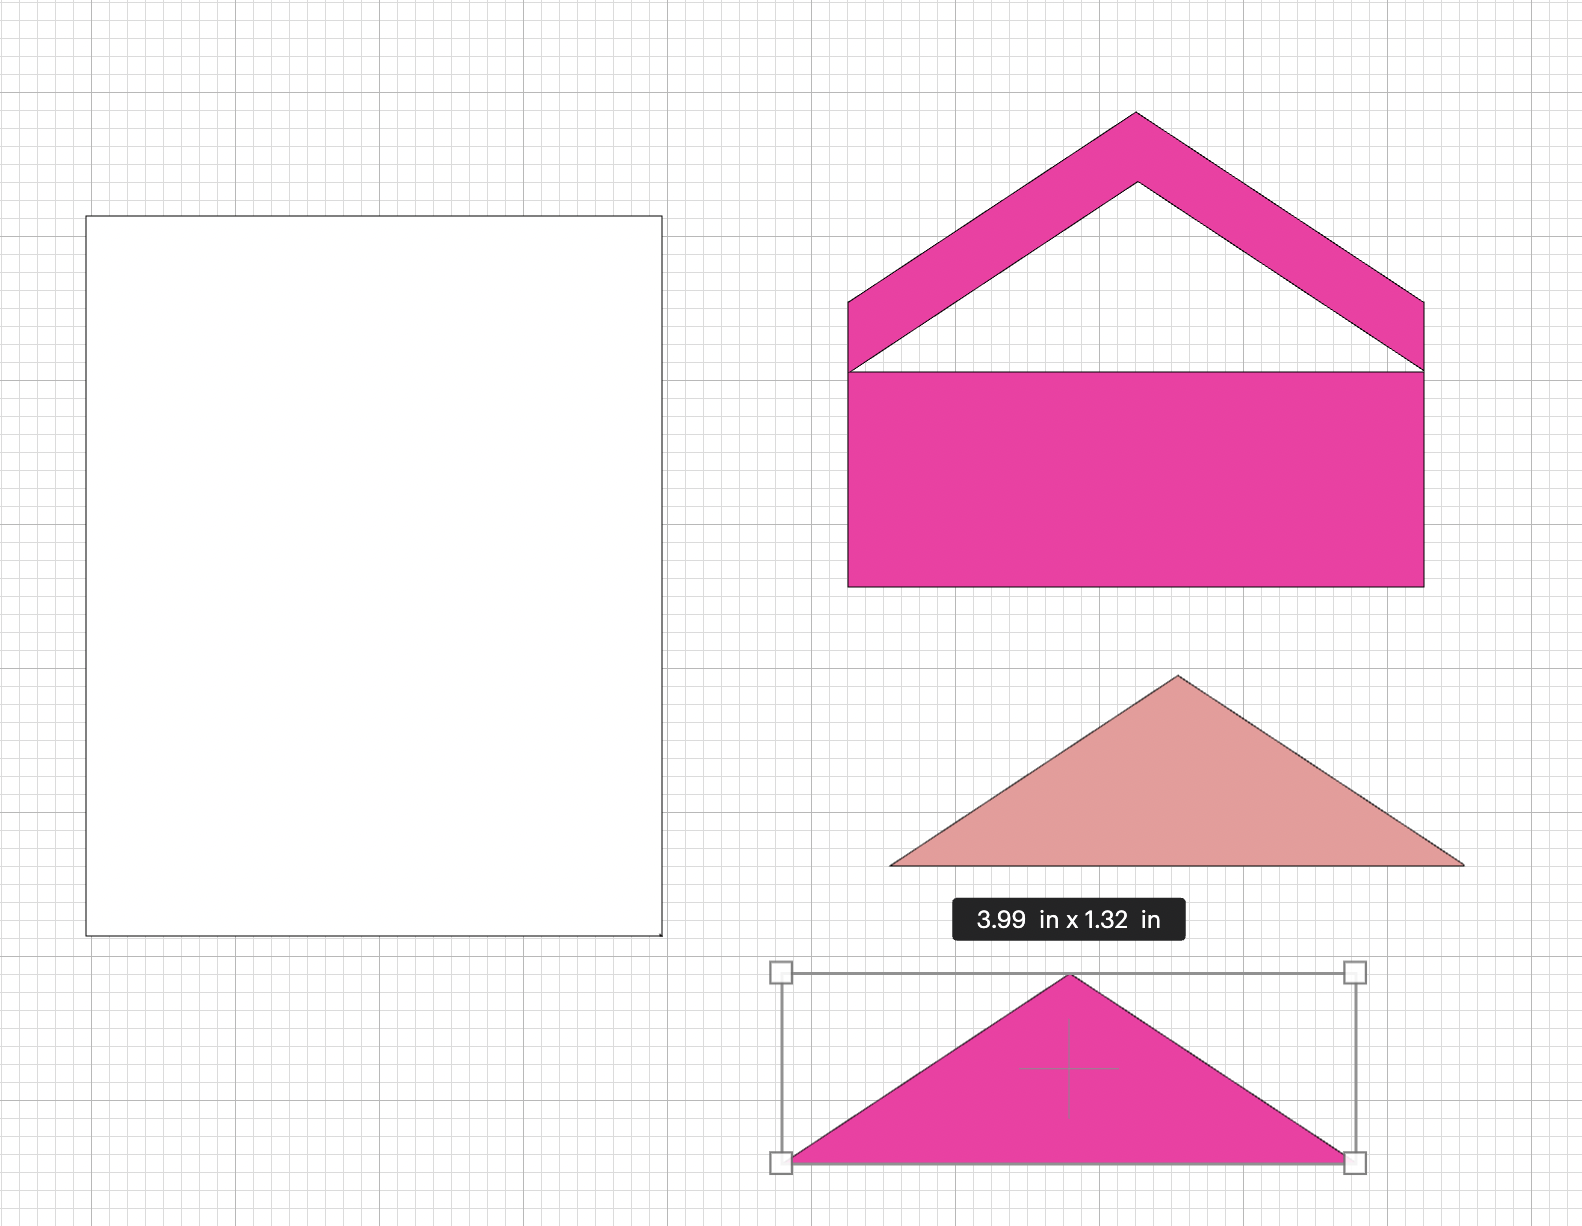
8: Using the shapes functionality we are going to add the following shape:
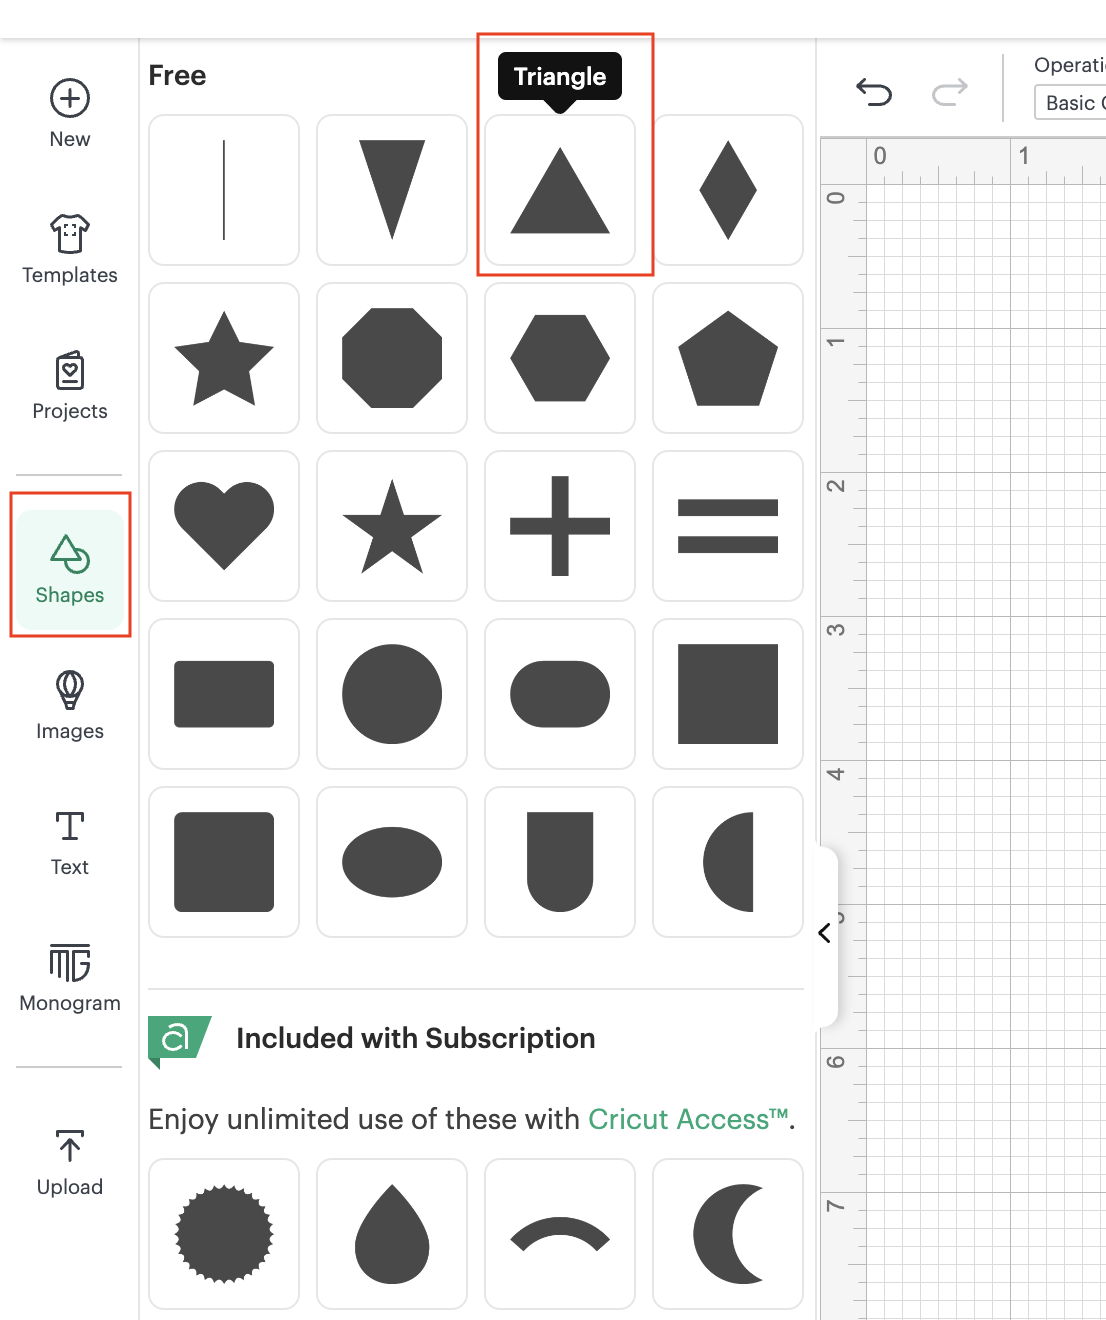
And we are going to resize it to: W: 4” and H: 1.32” and we are going to change the color to pink, you should have something like:
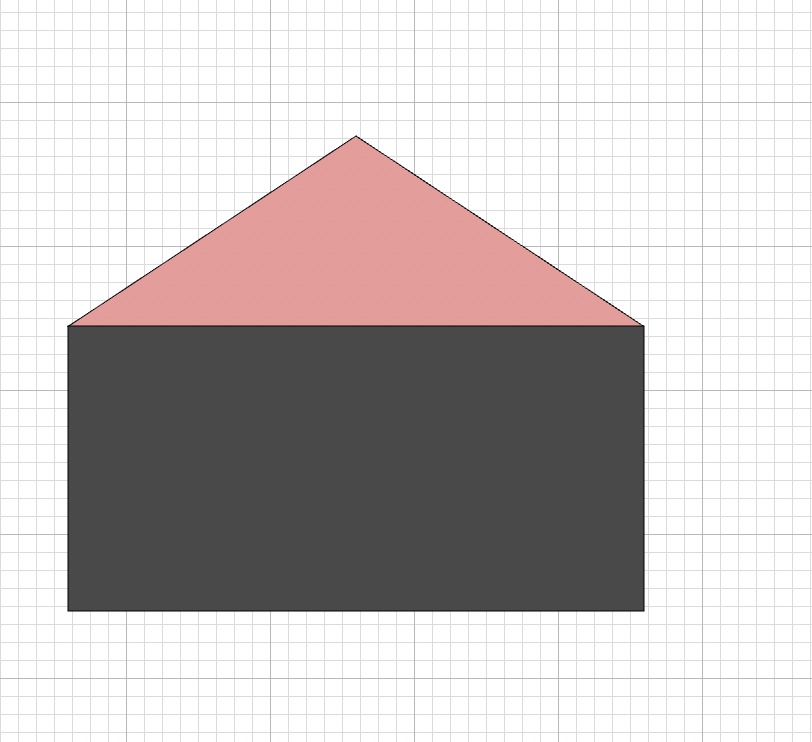
9: We are going to duplicate our triangle and add a rectangle and we are going to resize it to the same Width as the triangle and we are going to put the triangle over the rectangle, something like:
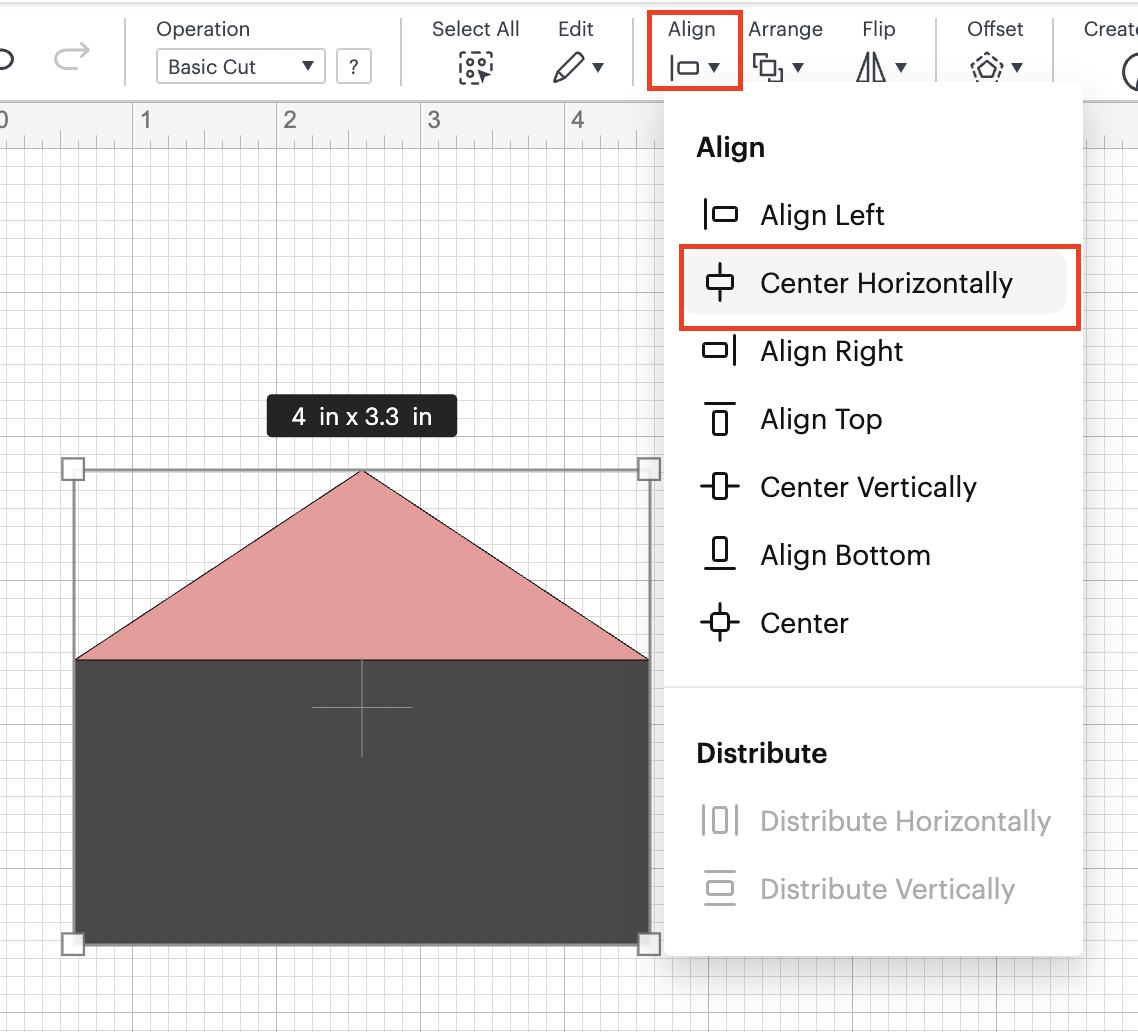
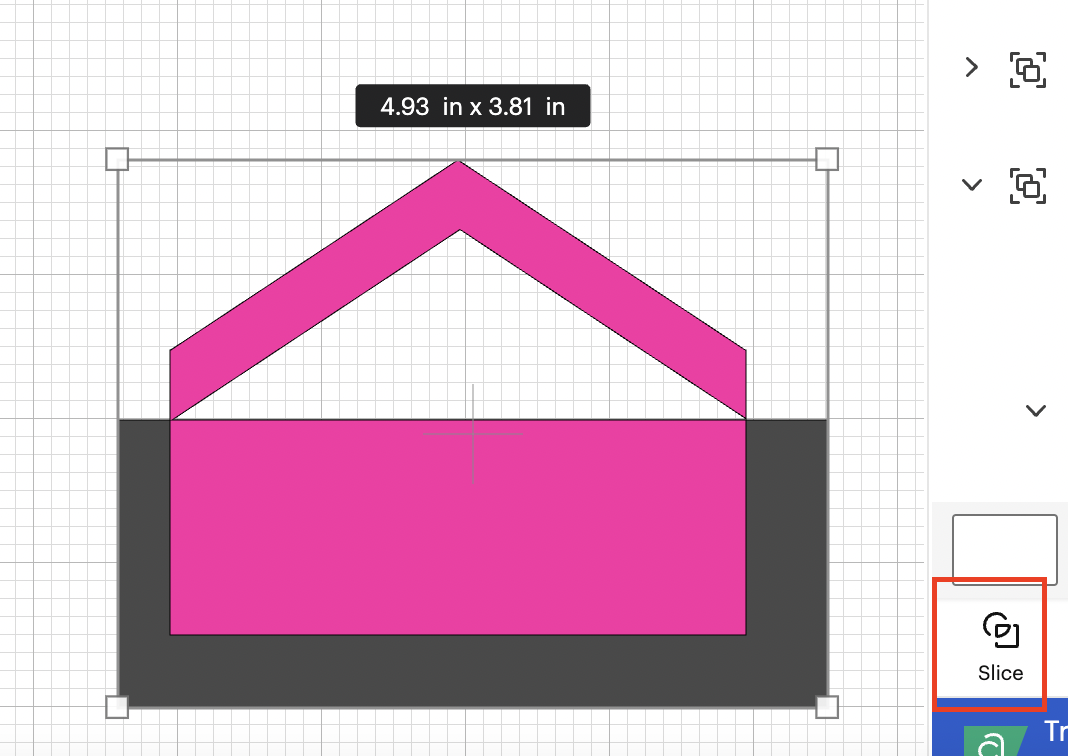
10: We are going to make sure that the 2 elements are center horizontally by using the align functionality:
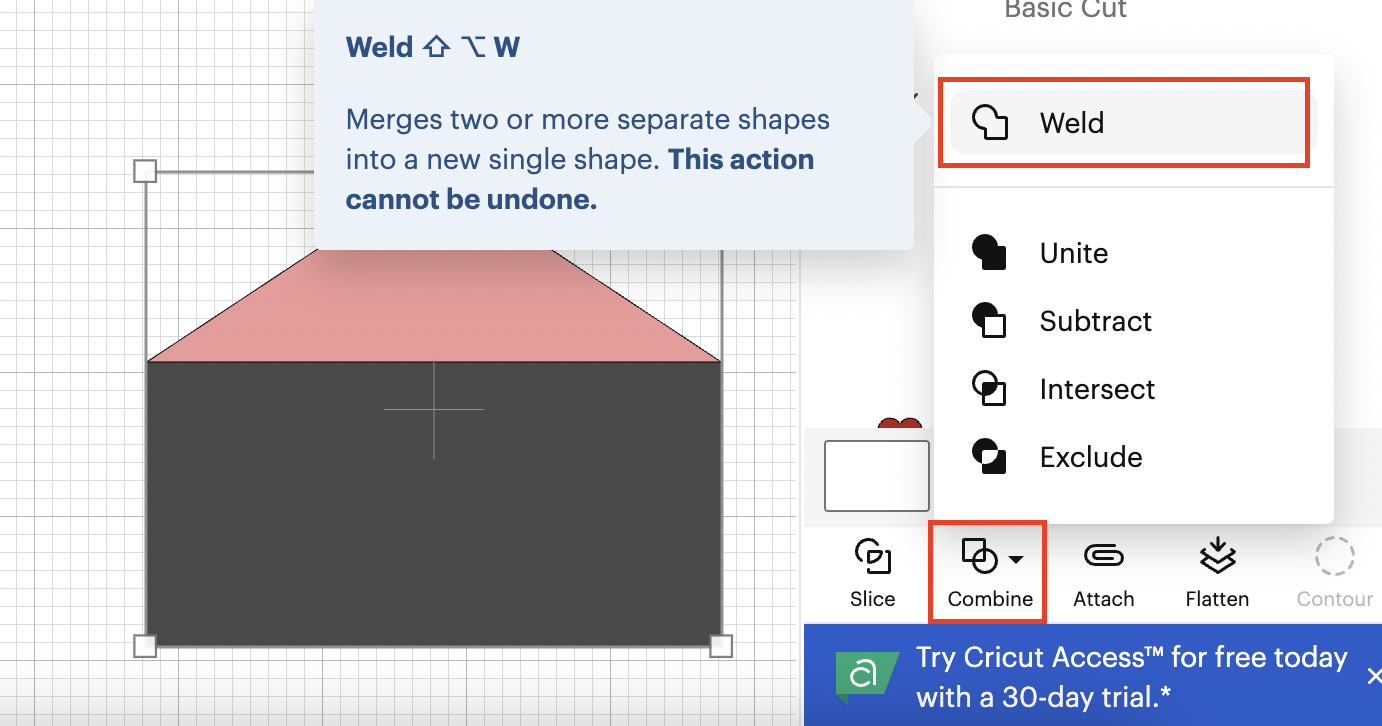
11: We are going to weld both elements:
We are going to have something like:
And we are going to change the color to a more fuchsia or dark pink using the same process as before:
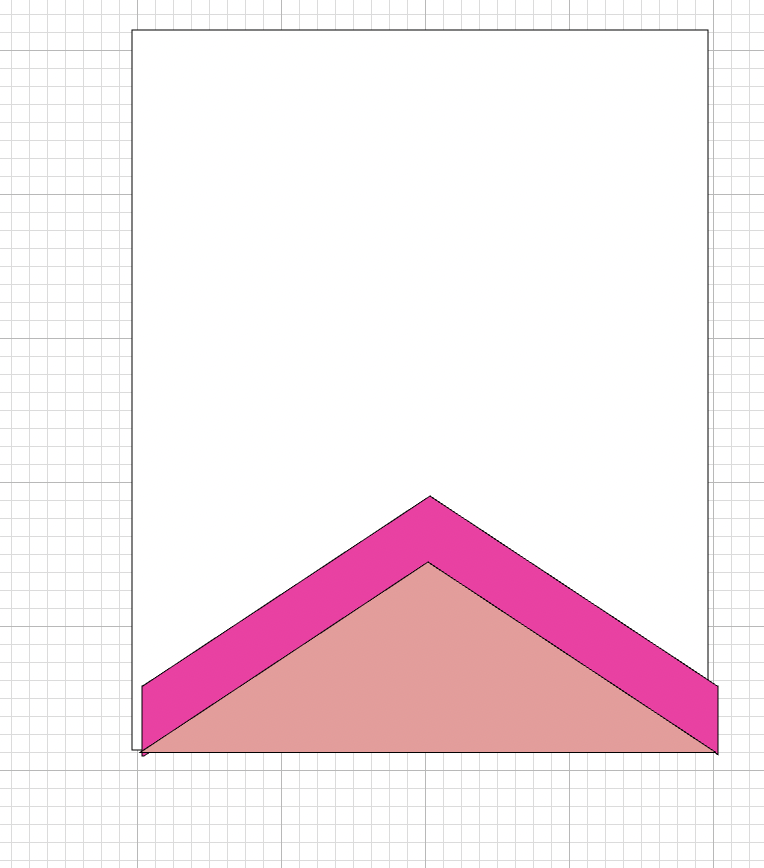
12: We are going to place our elements all together as follow:
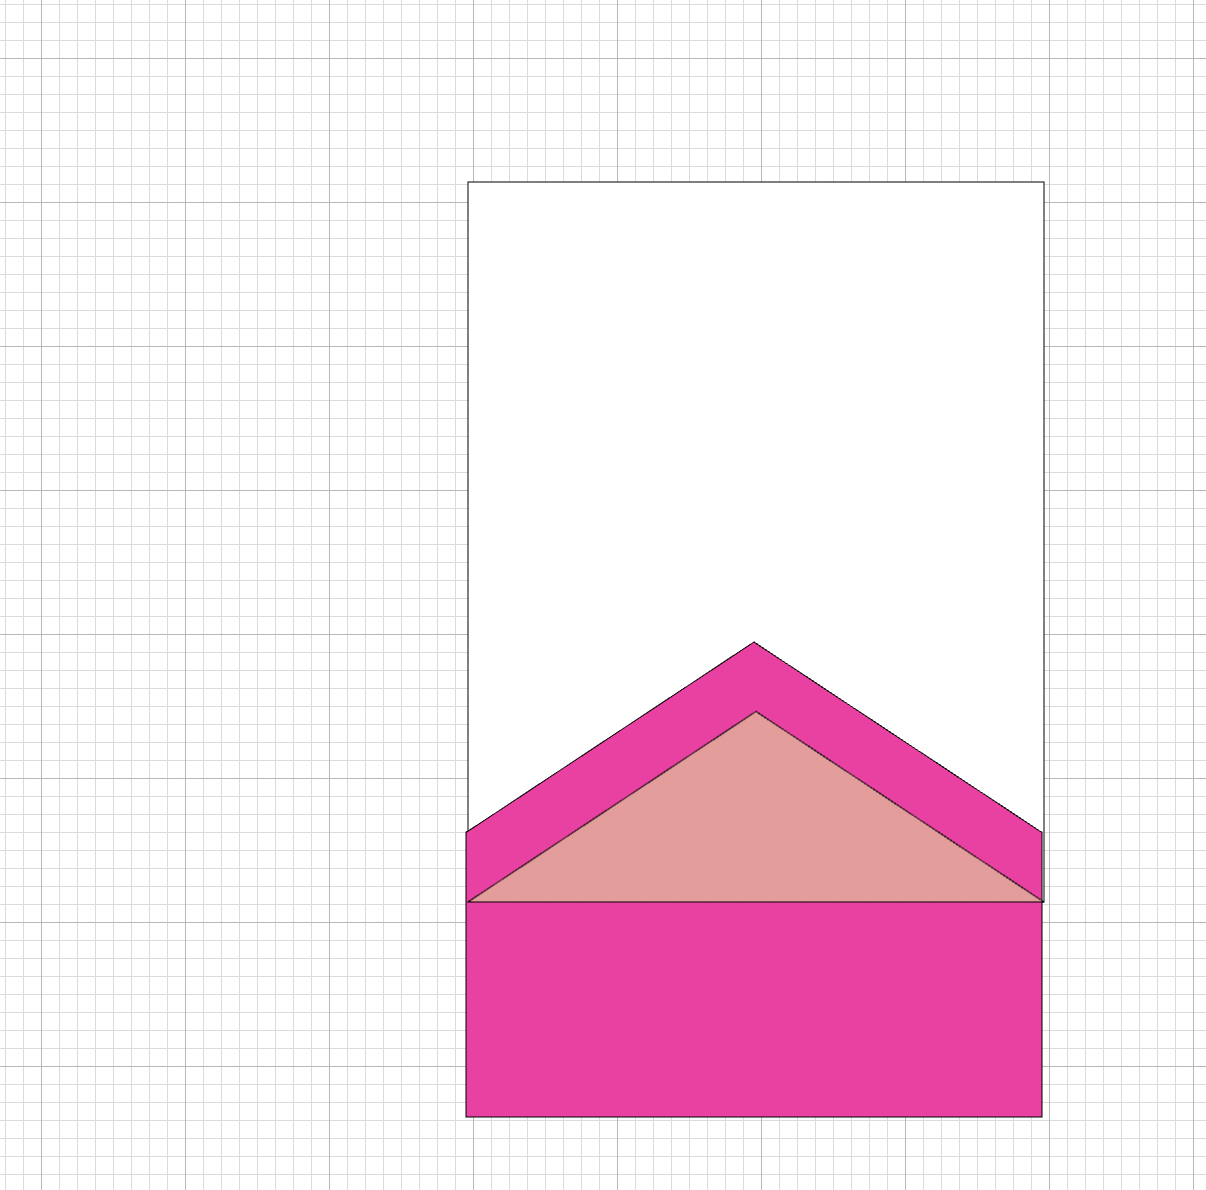
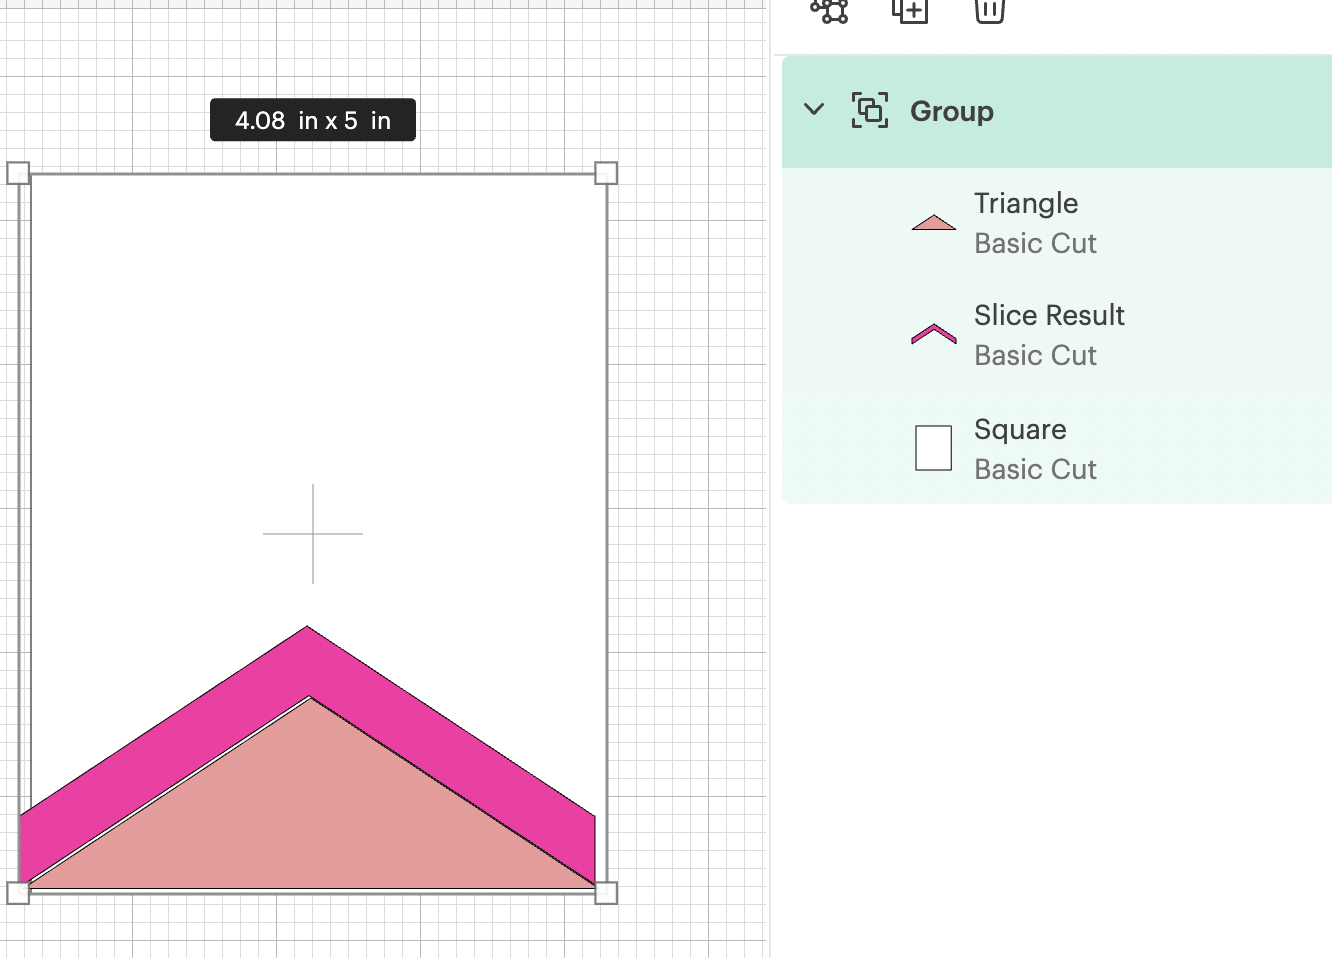
13: We are going to move the fuchsia element as we like, making sure that the 3 elements are centered horizontally and making sure that the light pink triangle with the base of our banner is aligned at the bottom. When we are happy with how is looking like, we are going to select our triangle and the fuchsia element and we are going to slice them:
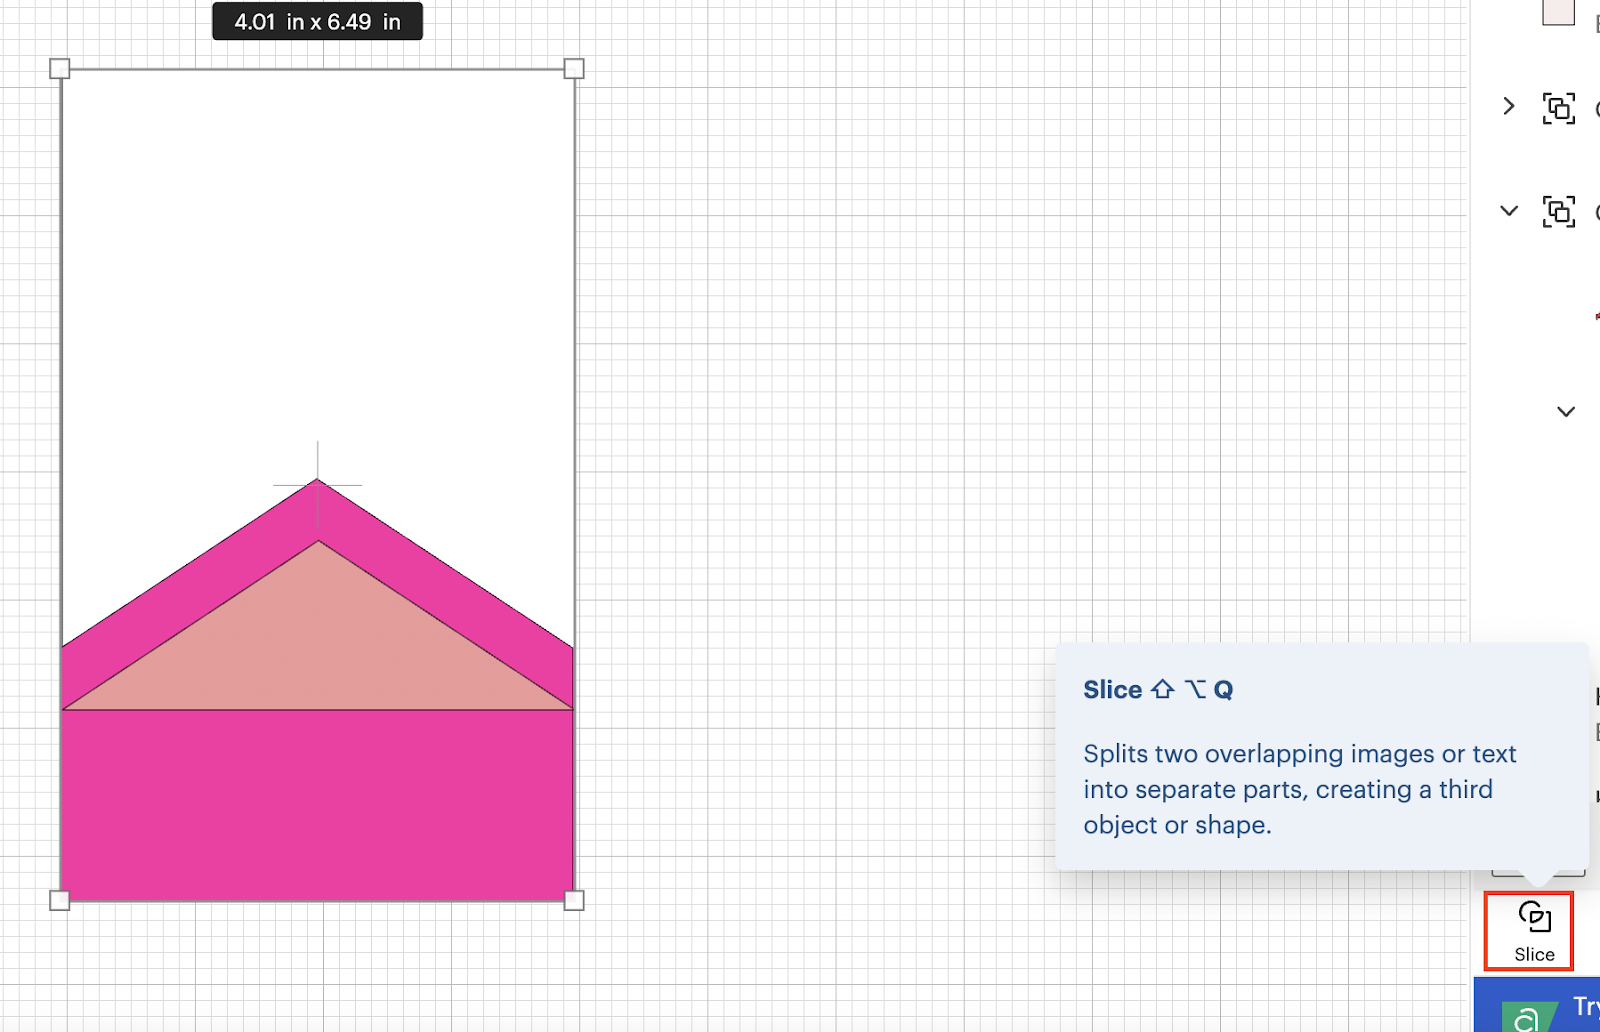
After slicing the elements:
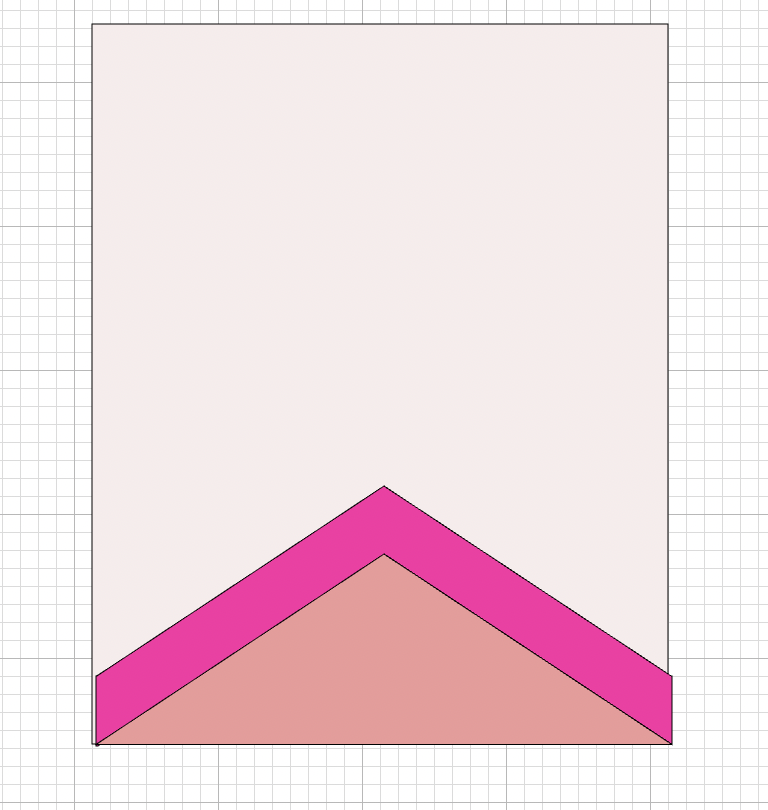
14: We are going to add a square and we are going to slice the bottom part of the fuchsia element:
After slicing:
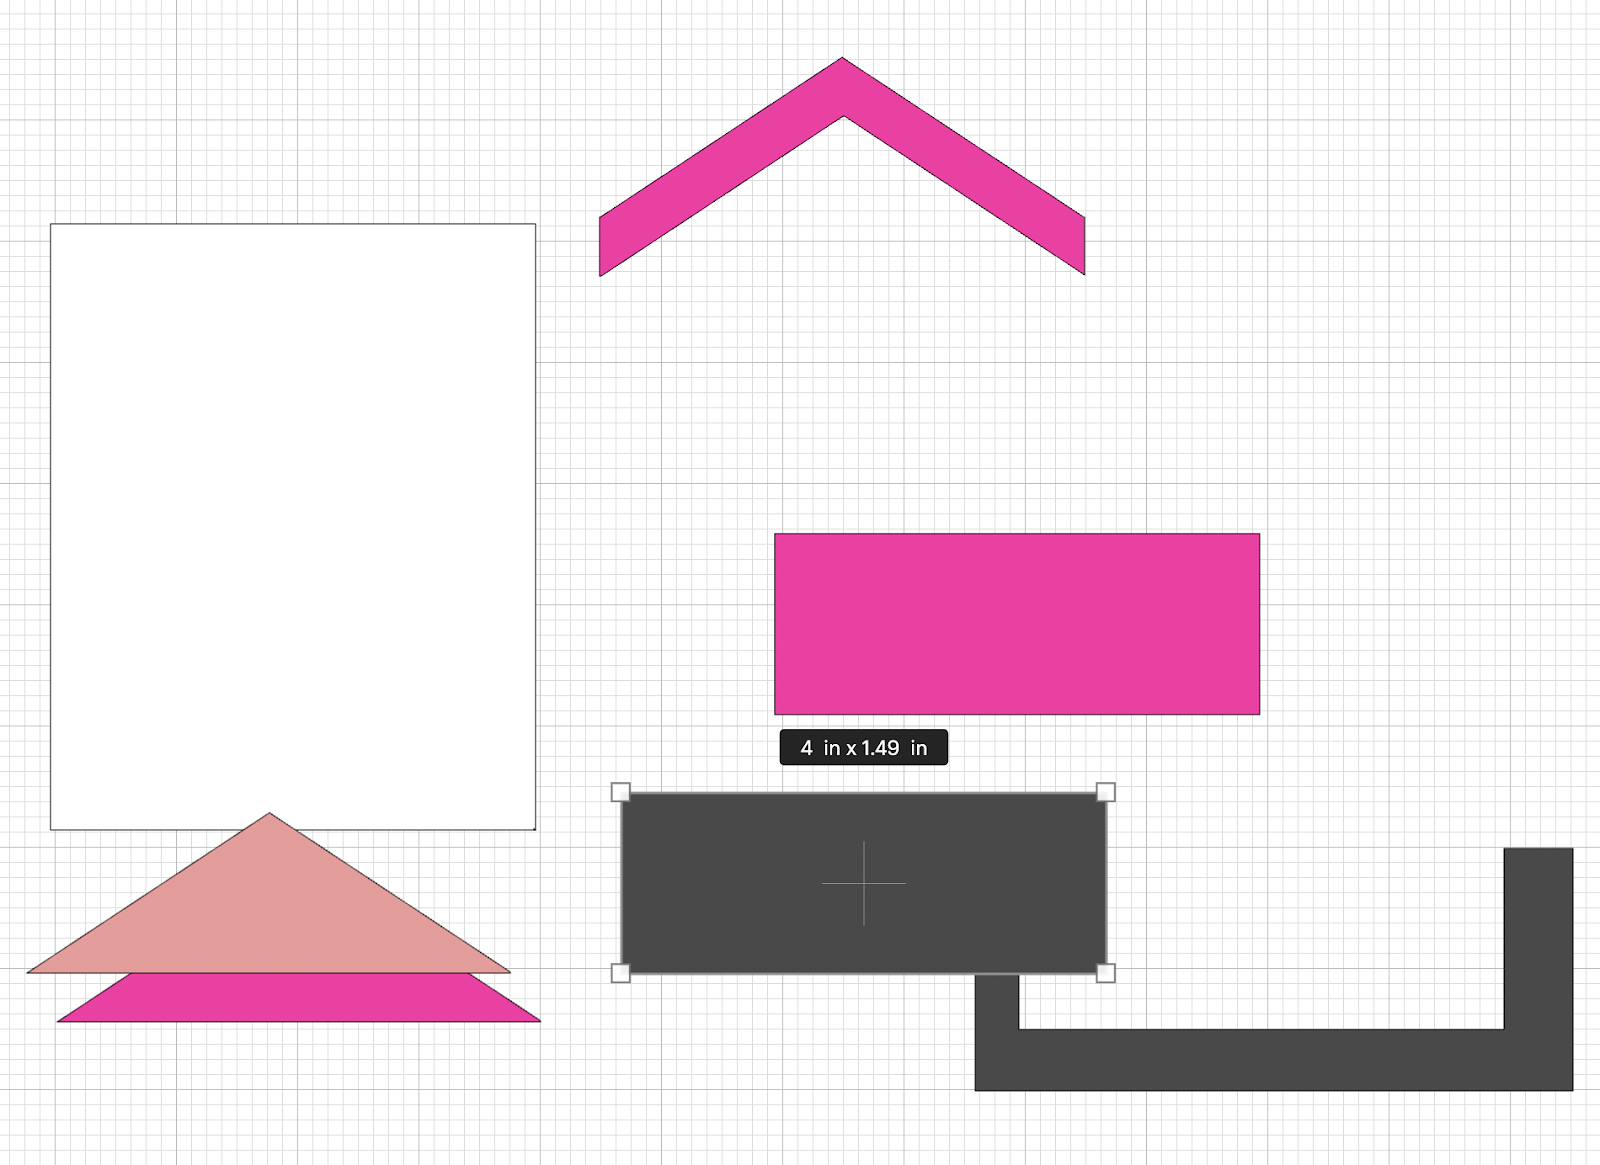
OPTIONAL: If you prefer you can have the whole fuchsia element together and only slice the bottom like this:
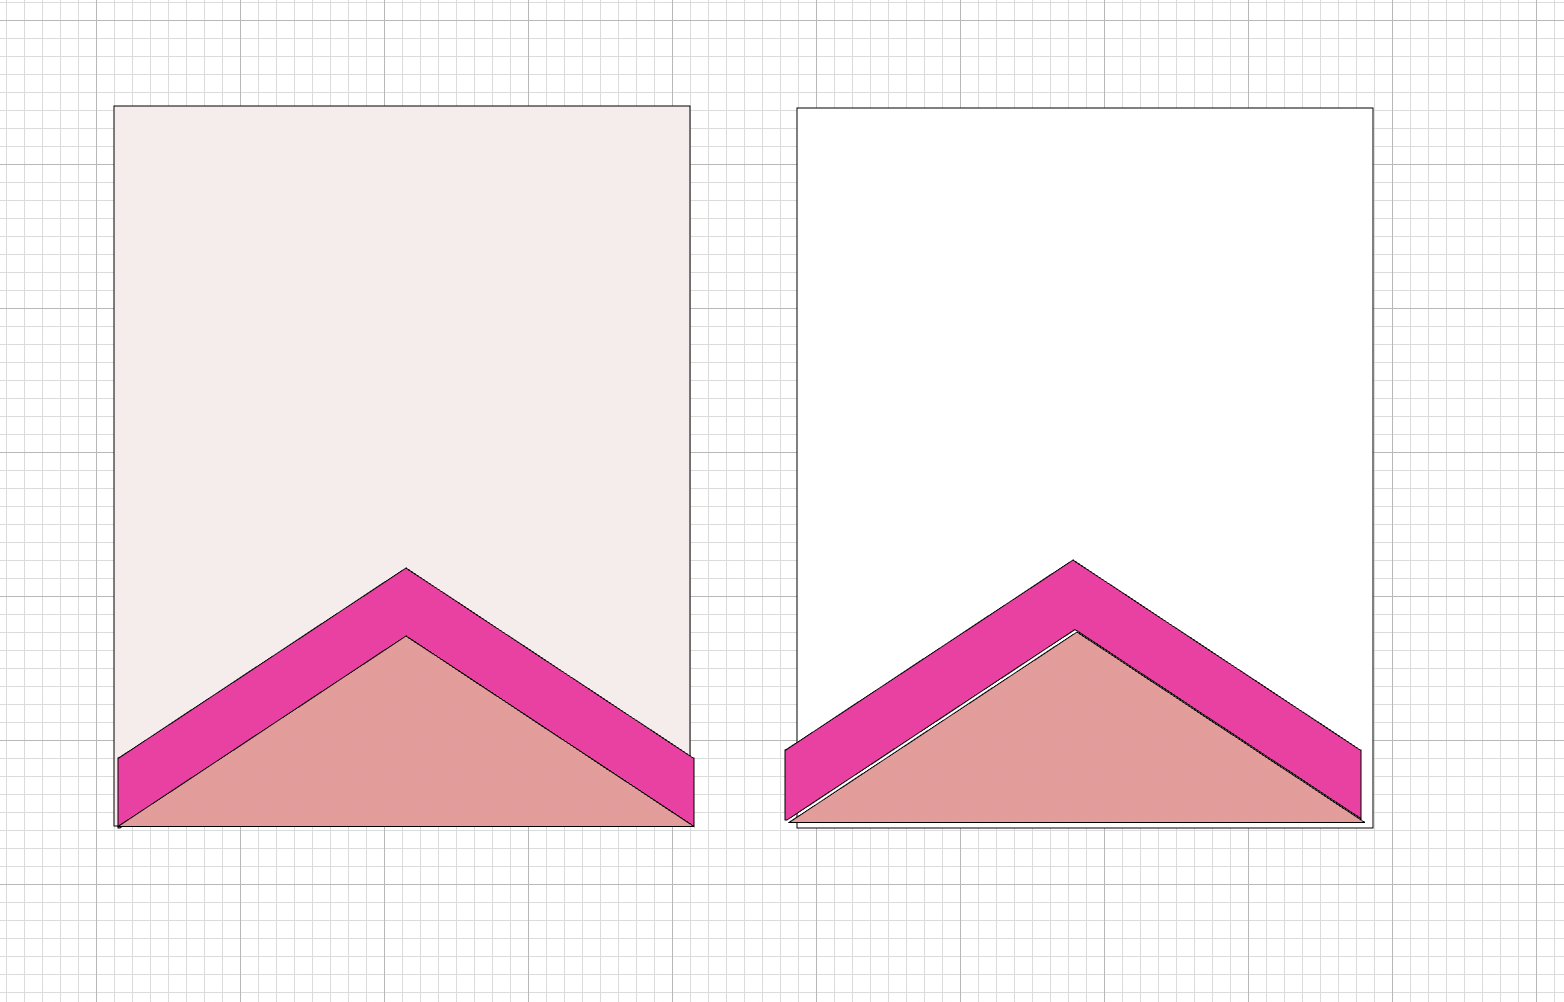
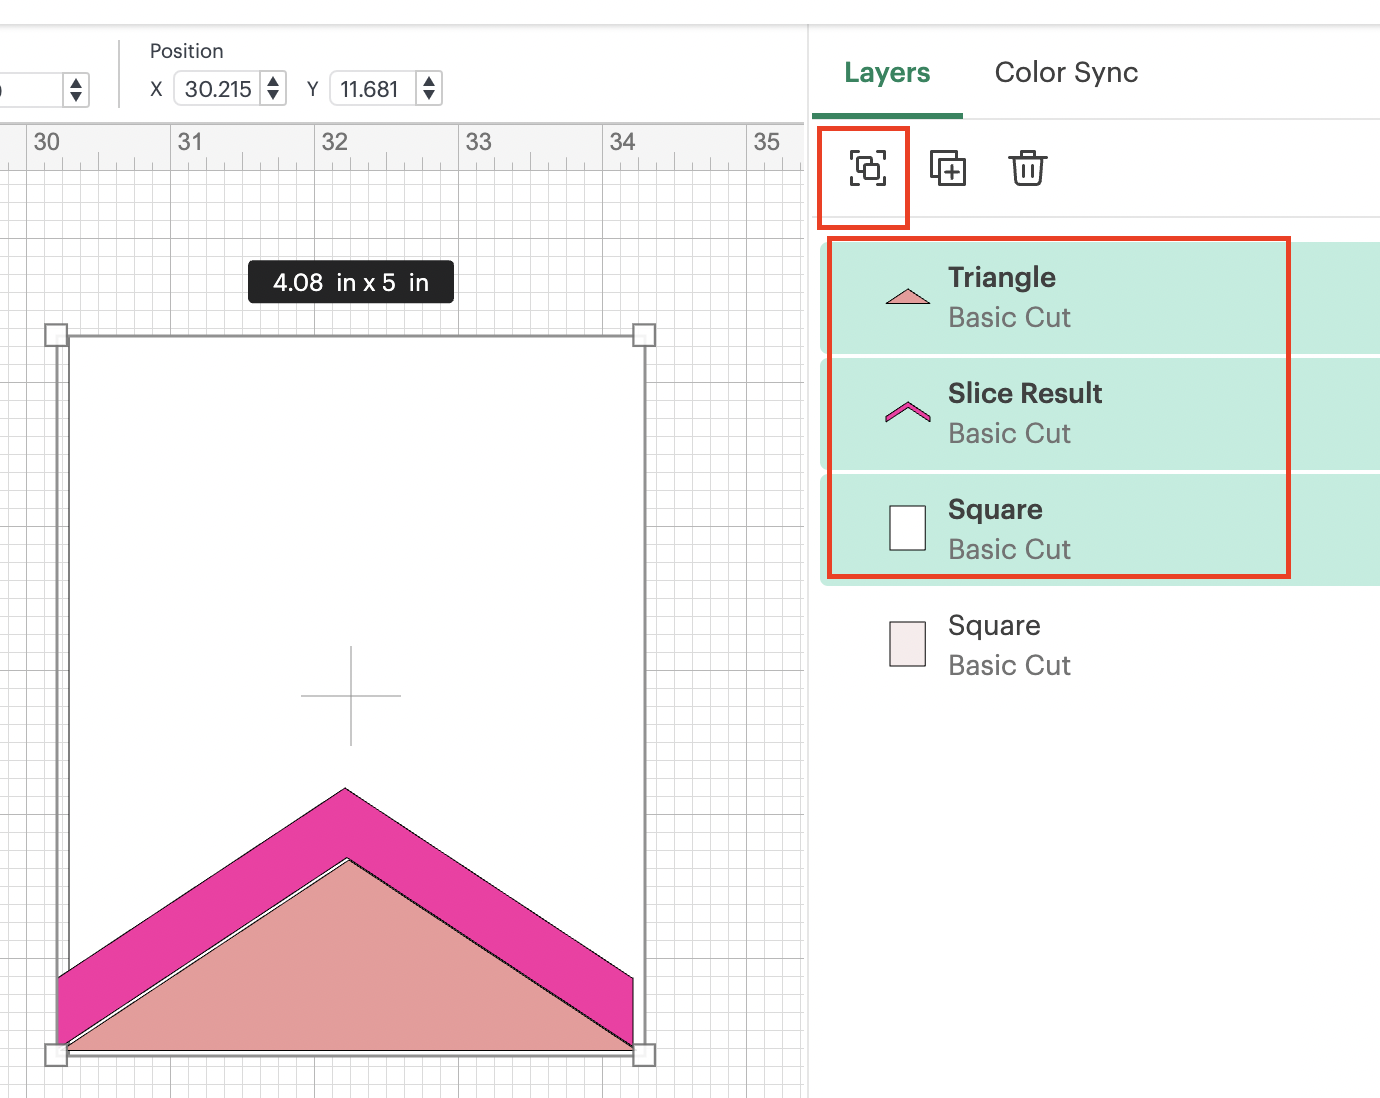
15: After any of the options that you decided to do, you are going to discard / delete all the elements except the ones that are showing as follow:
16: We are going to select the 2 color parts of our banner and we are going to duplicate them, and we are going to place them over our light pink base banner:
17: At this point you are going to have 2 base banners with the 2 pink elements:
You are going to select all the elements related to one of the base banners and you are going to group them:
Before grouping them:
After you group them:
You are going to apply the same process to the other base banner.
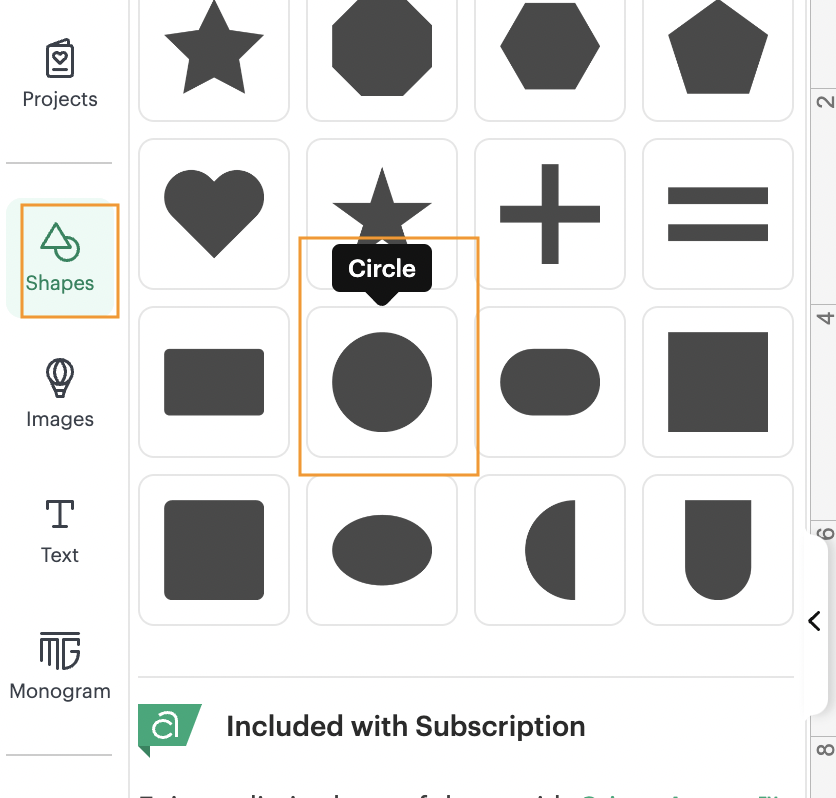
19:OPTIONAL: If you have a hole punch set you can SKIP STEP 19 and 20 and move to STEP 21.
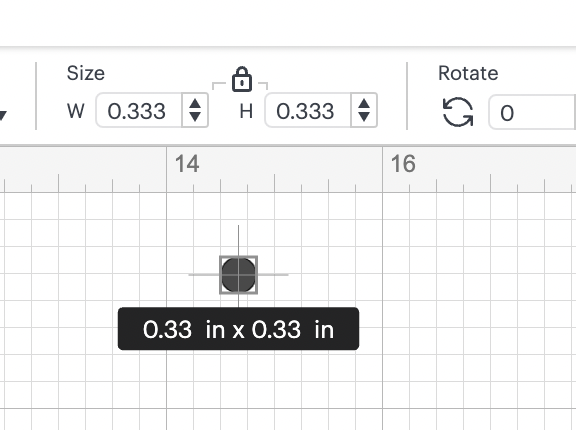
We are going to use the shapes functionality and we are going to add a circle, we are going to resize it to the following size:
20: We are going to duplicate the circle and we are going to place over our base banner on the top of the banner one on each side and we are going to select one circle at the time with the base card and we are going to apply the slice functionality in order to have:
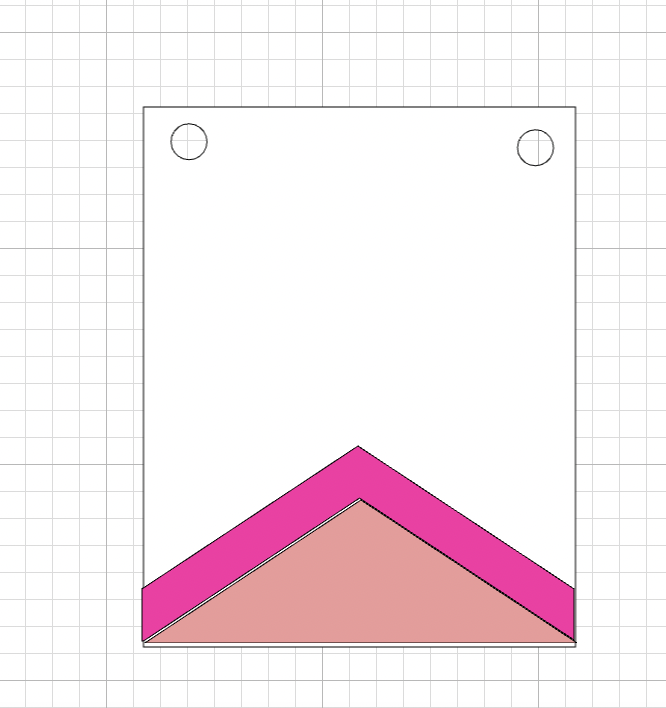
You are going to apply the same process to the other base banner (the one in light pink color).
💡Tip: You need to make sure that each circle is centered vertically.
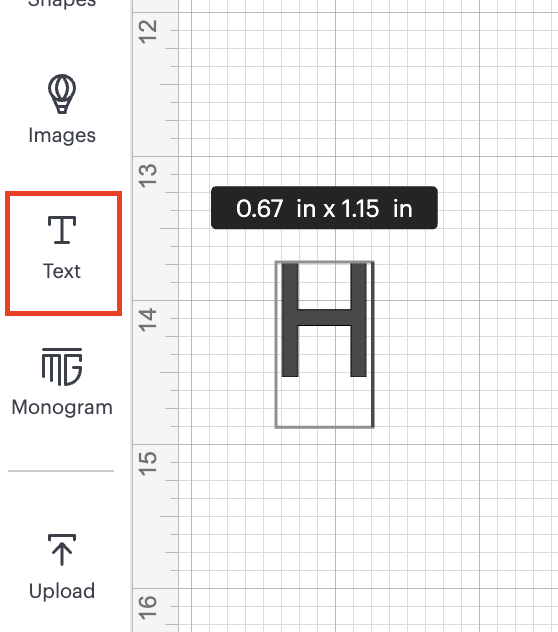
21: We are going to use the Text functionality and we are going to write just the letter H:
22: We are going to change the font of the text with the Agent Q cricut free font:
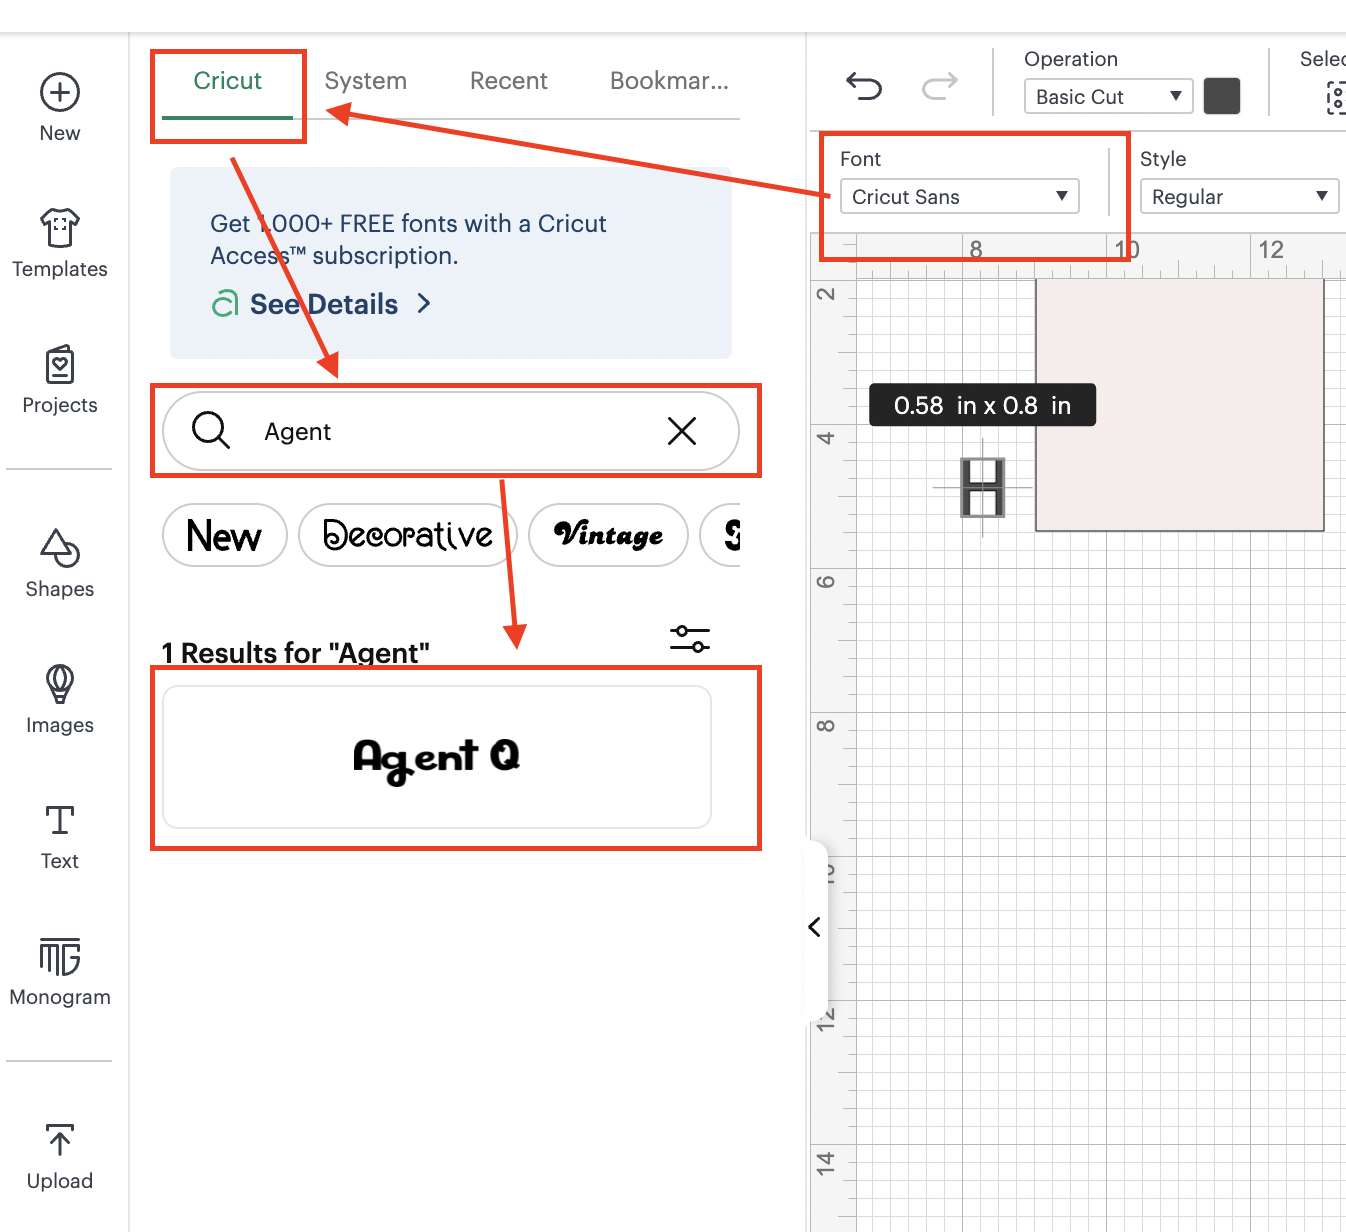
After applying the new font:

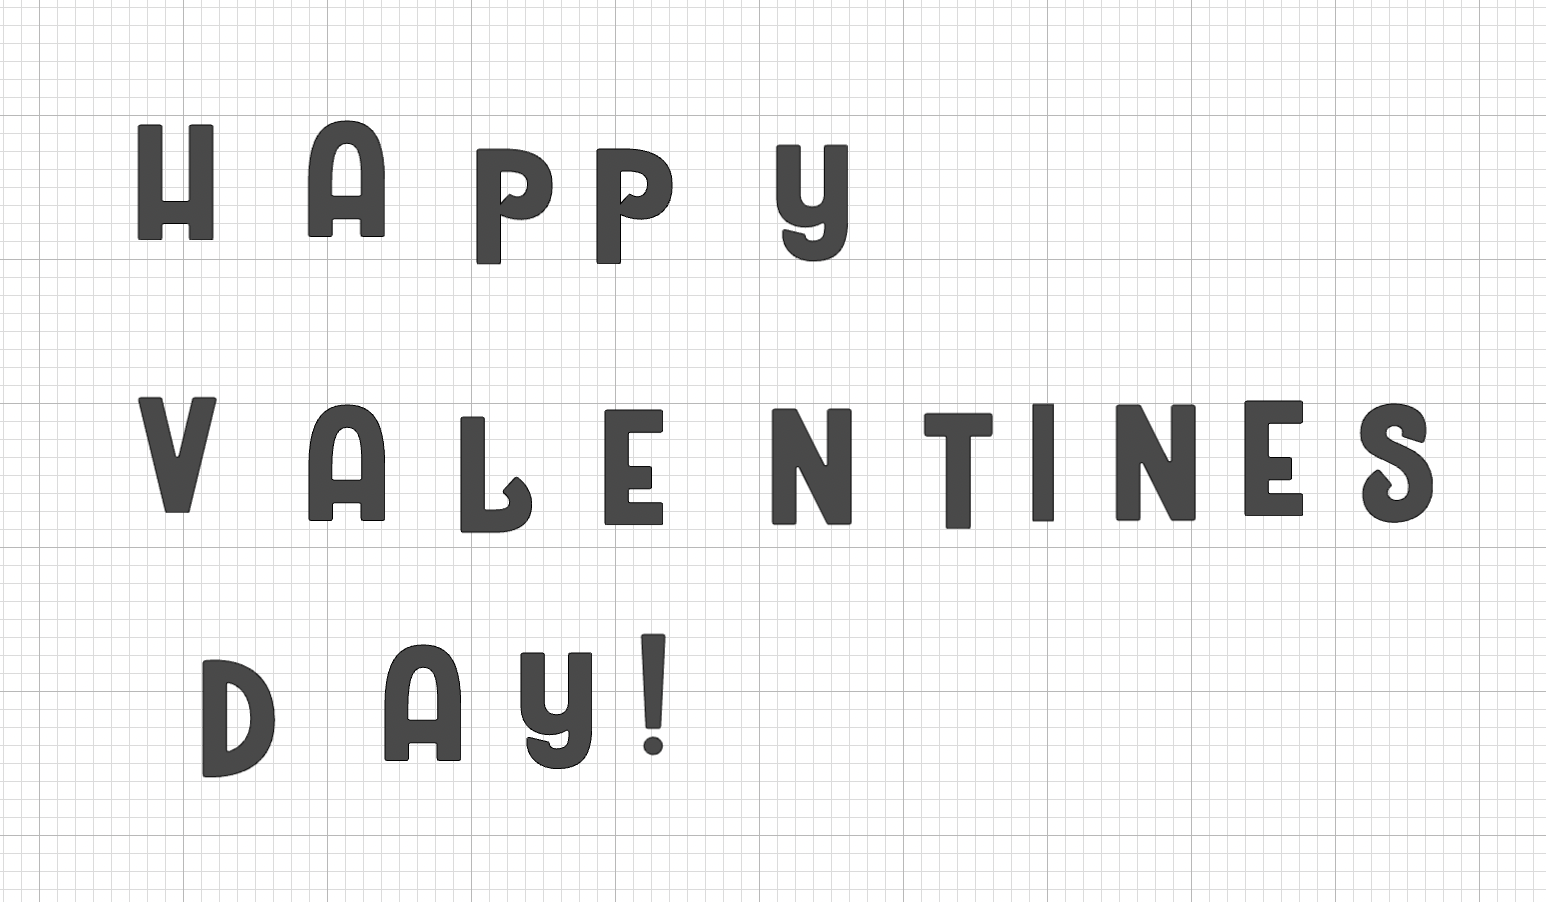
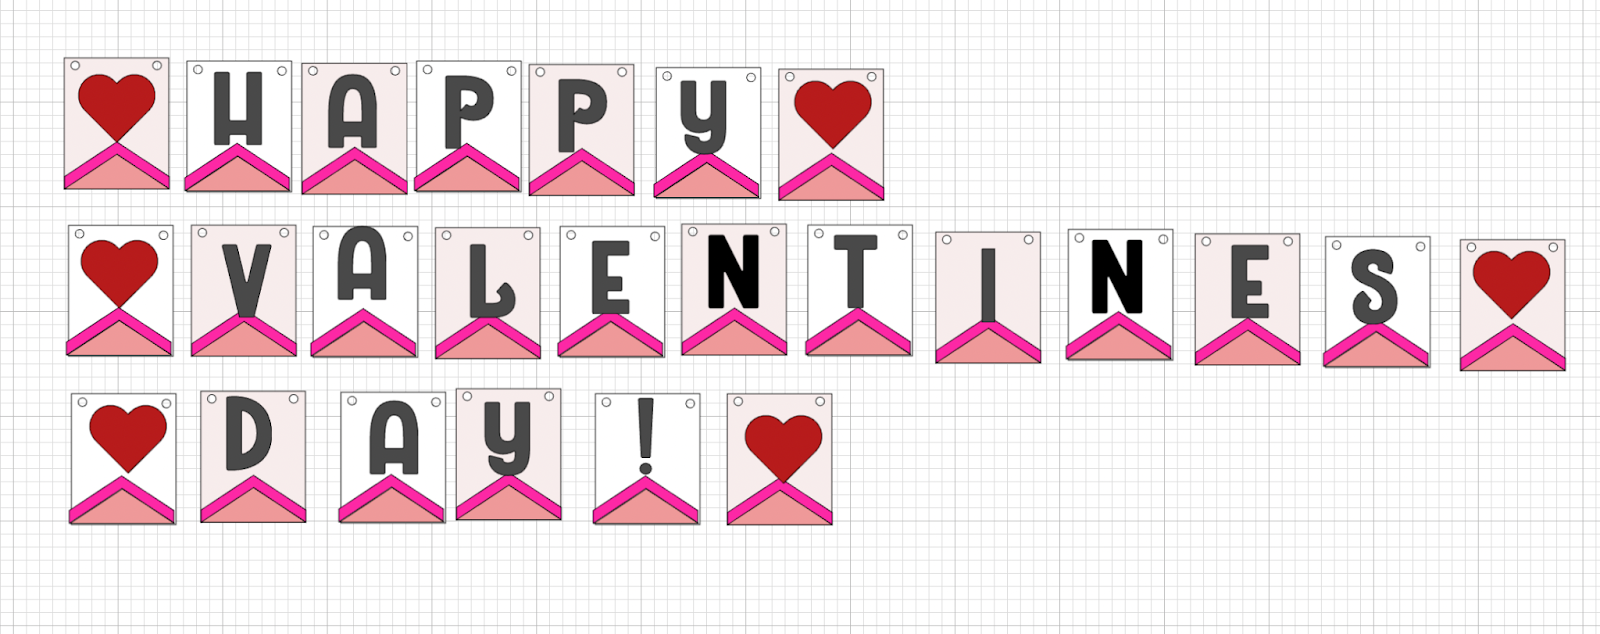
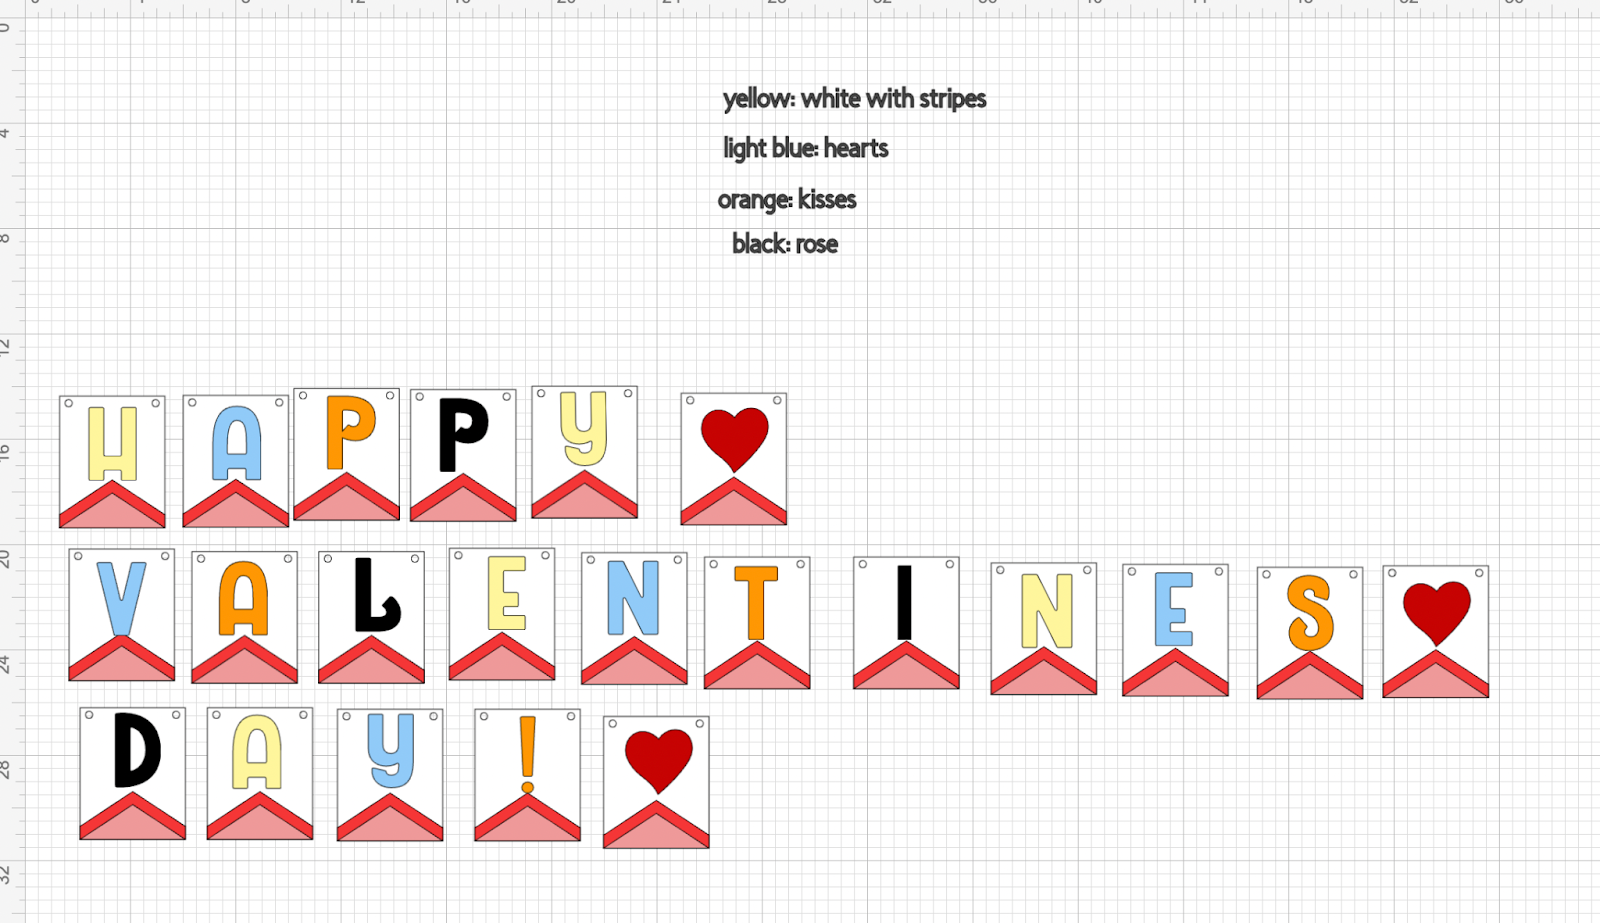
23: We are going to write one letter at a time in order to have the following phrase: Happy Valentine’s Day!
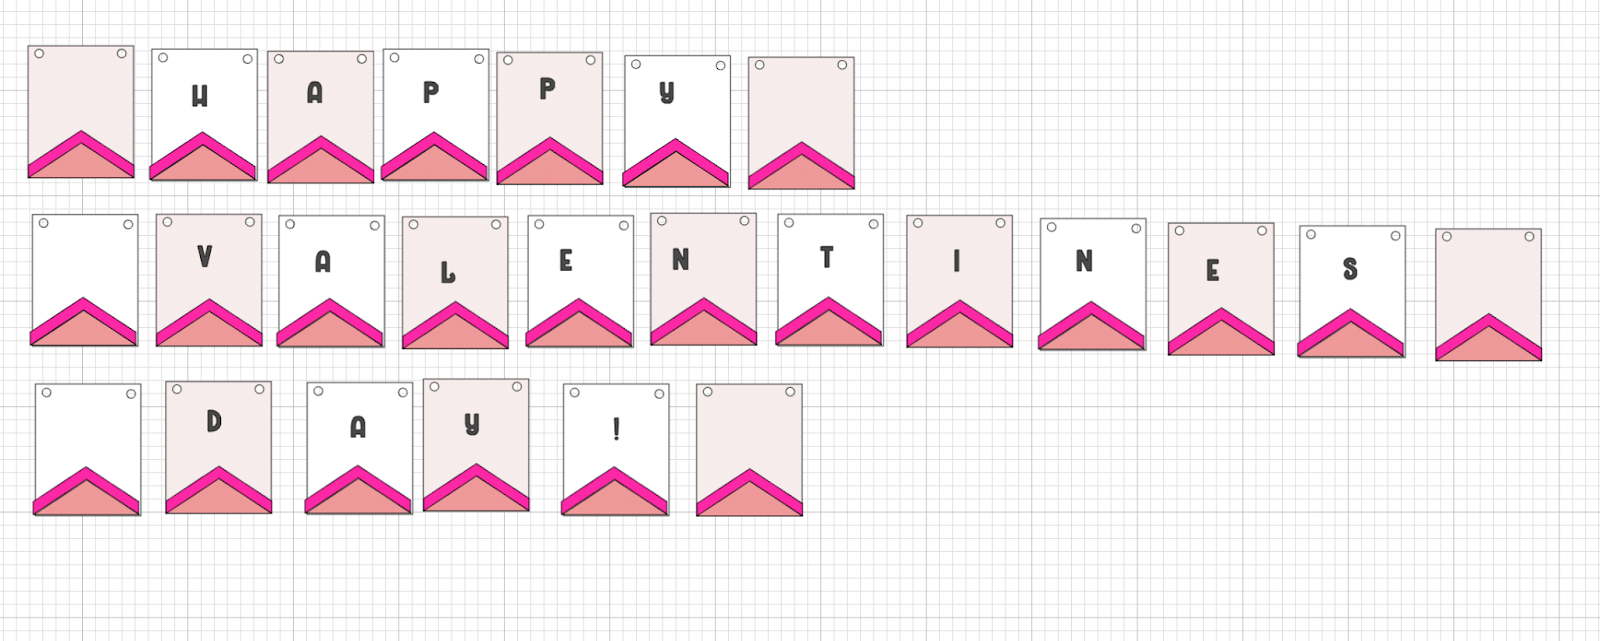
24: We are going to duplicate the banners with all the elements (the ones that we grouped in Step 17) the amount of letters that our phrase has, in our case we have: 18 letters, 1 special character (!) and we are going to add 6 more banners to add some details at the beginning and at the end of each sentence, so in total we have: 25 banners that we need to have and we are going to do it in 2 different colors (the white and the light pink) so we need to duplicate:
- white banners: 11 times in order to have 12 banners in total
- Light pink banners: 12 times in order to have 13 banners in total

💡Tip: You can have more than 2 colors for the banners and a different phrase so the numbers that we are providing are for reference to the design that we are creating in this tutorial.
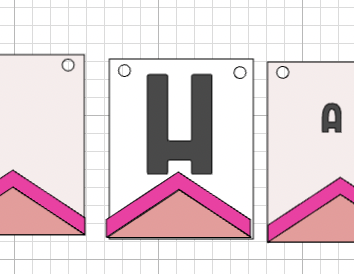
25: We are going to place each letter over each banner, and we are going to split the phrase in 3 lines and at the beginning and end of the line we are going to add an empty banner, , remember that if you are using more than one base color you need to alternate them, something like:
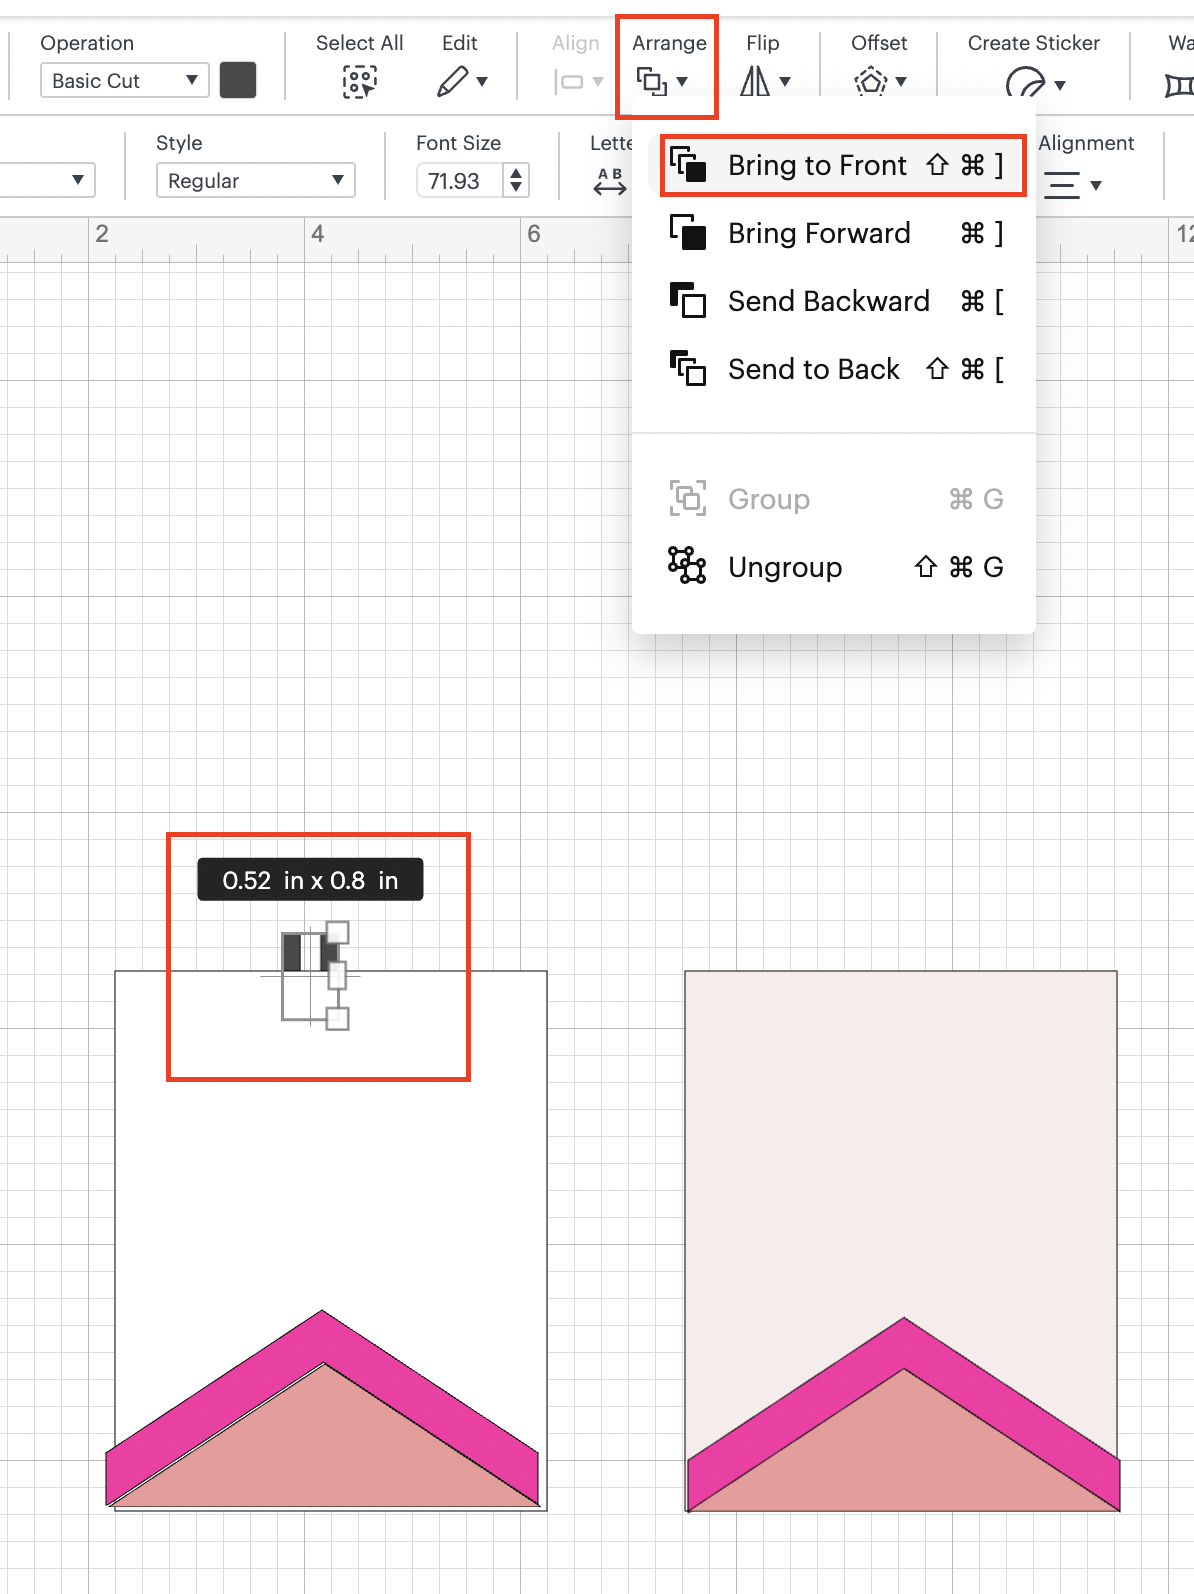
💡Tip: When moving the letter to your banner, if the letter is showing under the banner, you need to select the letter, click on Arrange and then select bring to Front:
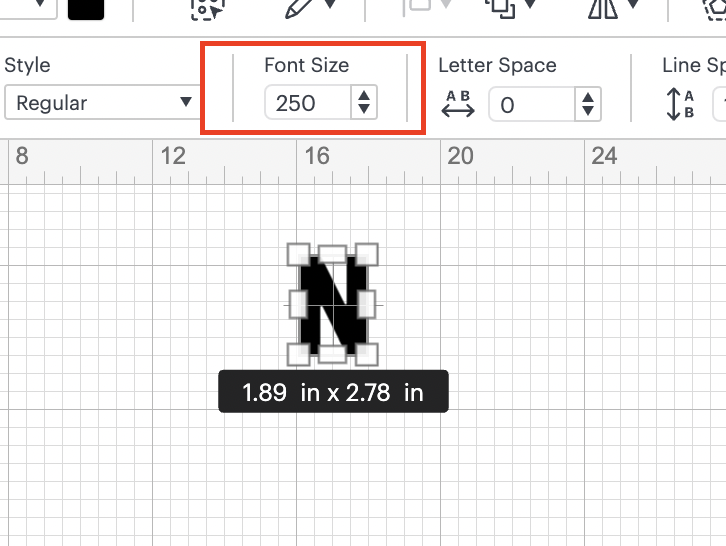
25: We are going to proceed and resize the letters accordingly to the size of your banner or the size that you like them to be, in our case we are going to increase the font size to 250:
So it’s going to look similar to this:
26: To the empty banners at the beginning and at the end of each sentence, we are going to add a heart using the shapes functionality, we are going to change the color to red and we are going to resize accordingly:
27:OPTIONAL: If you are planning on using plain cardstock for the letters, you can SKIP this Step and move to Step
If you are going to use different cardstock with different design, this is the moment to split the letters in different colors so you can make sure that you are cutting the ones that you want in certain cardstock, in our case we are going to split then as follows:
28: After you are happy with the design, you can start cutting it!
In this tutorial, you are going to learn/practice the following functionalities:
- Slice Images/shapes
- Add Shapes and Images
- Resize Elements
- Delete Elements
- Attach Elements
- Change colors
- Weld Elements