1- Launch Cricut Design Space, sign in, and open your Canvas. Click on Images. Choose any three shapes to work with. For this tutorial, we are using three squares.
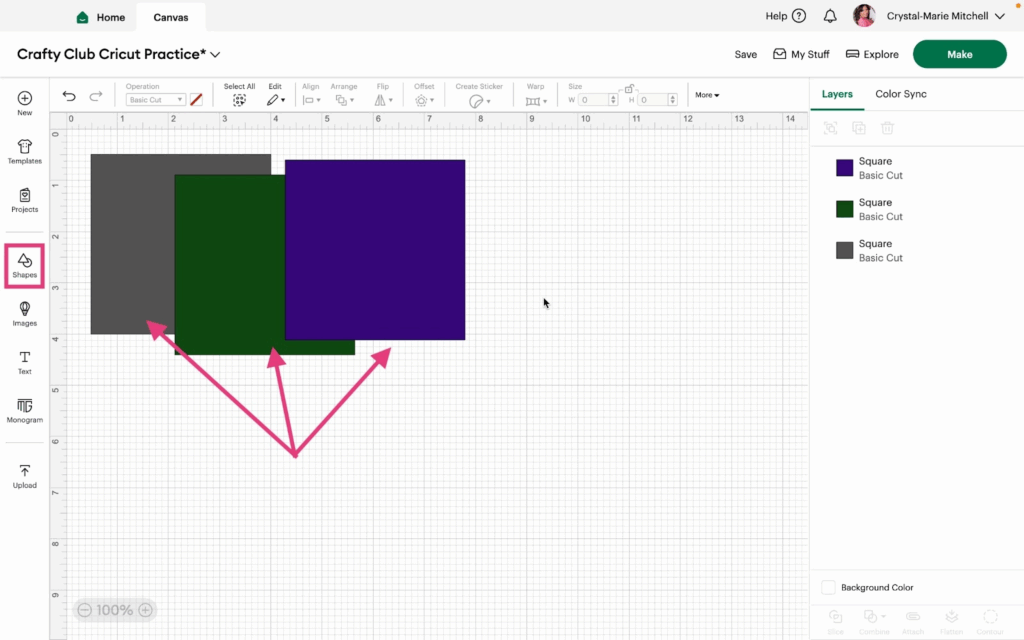
2- Arrange the shapes similar to what you see in this video/screenshot. Select the grey shape.
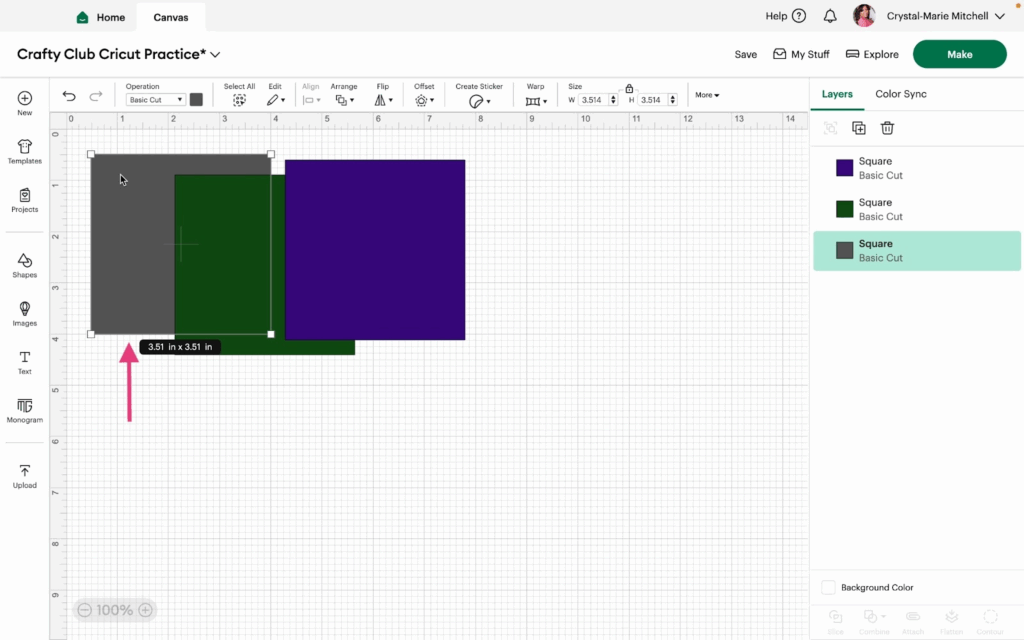
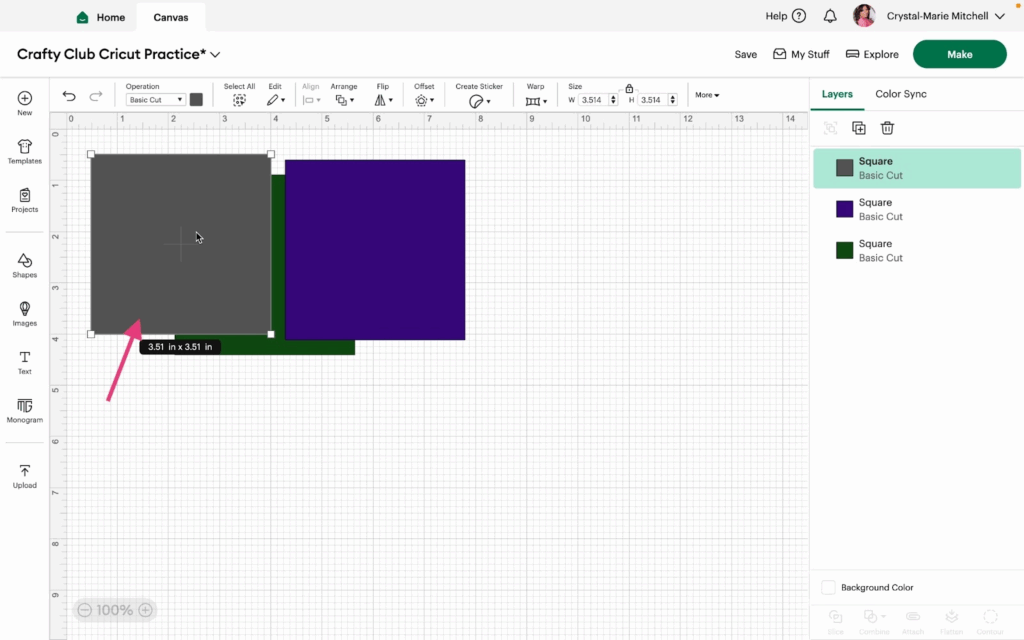
3- Click Arrange>Bring to Front or Shift, Command, Bracket on your keyboard. For PC use Control instead of Command.
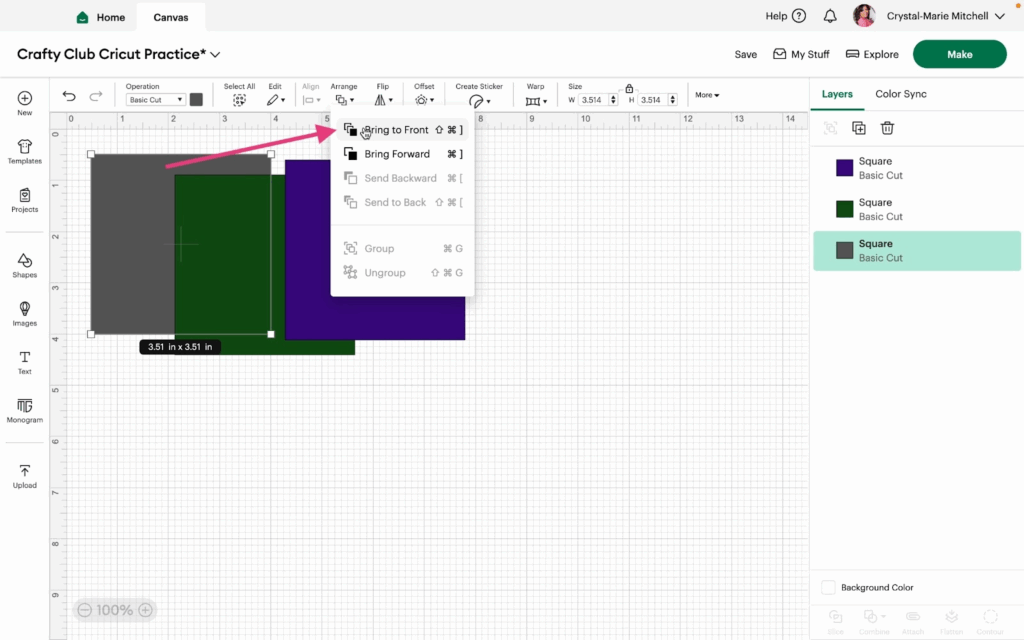
This brings the grey square one level up and places it on top of the green square. Move the purple square to overlap with the grey square.
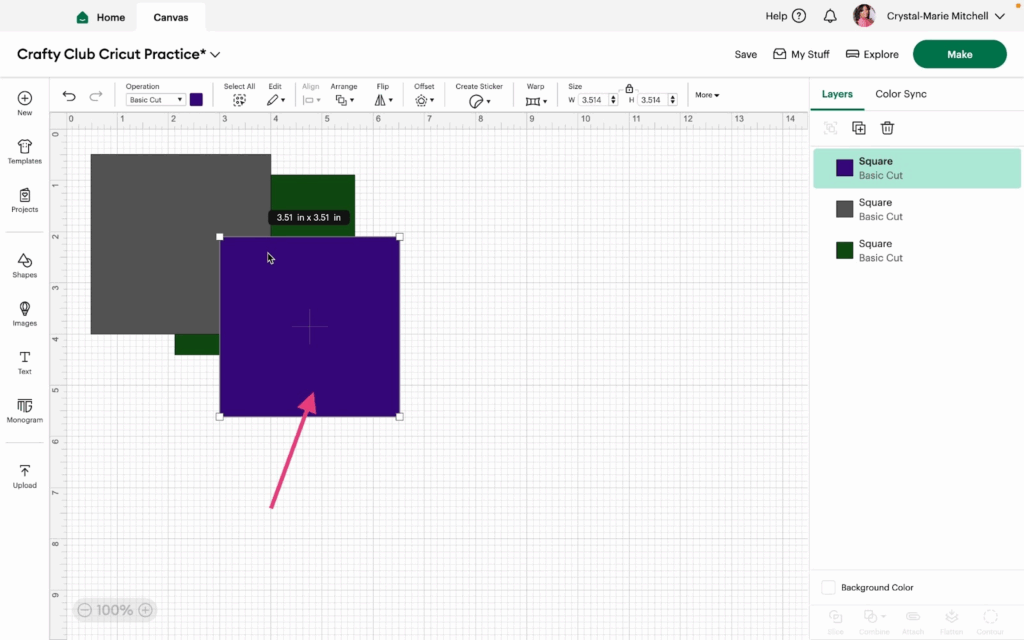
4- Notice the purple square falls behind the grey square. Select the purple square and then click Arrange>Bring Forward.

This will bring the purple square to the top layer and on top of both the green and grey squares.
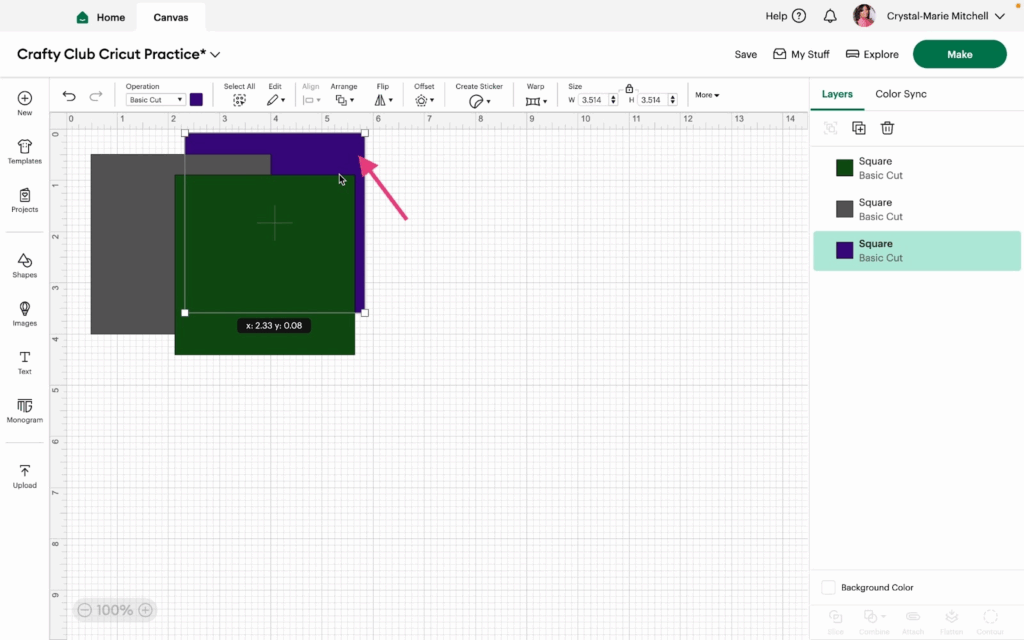
5- Select the green square and click Arrange>Bring Forward.
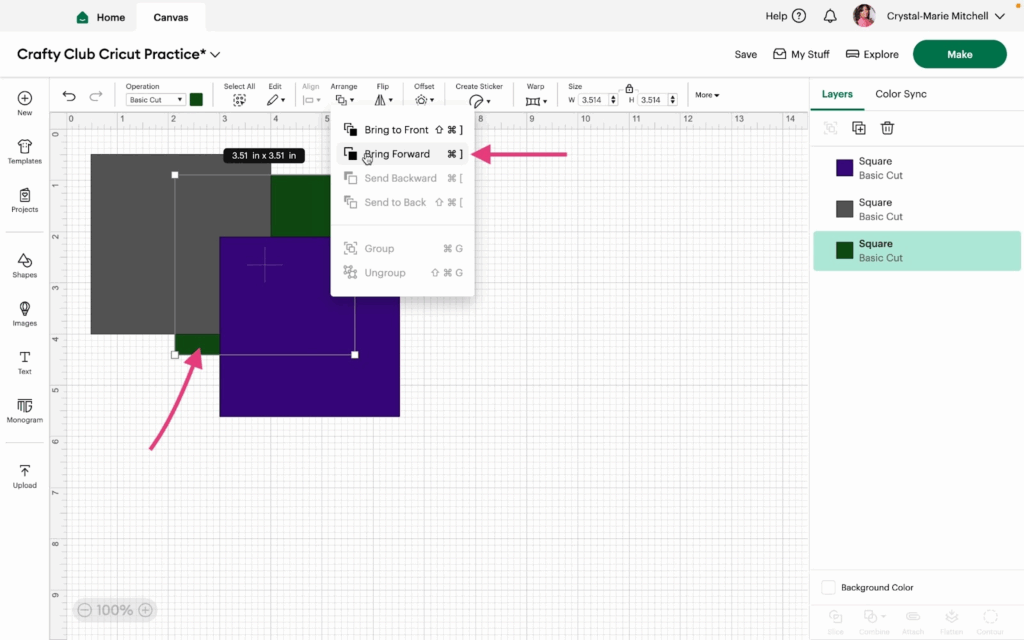
Notice this moves the green square above both the grey and purple squares.
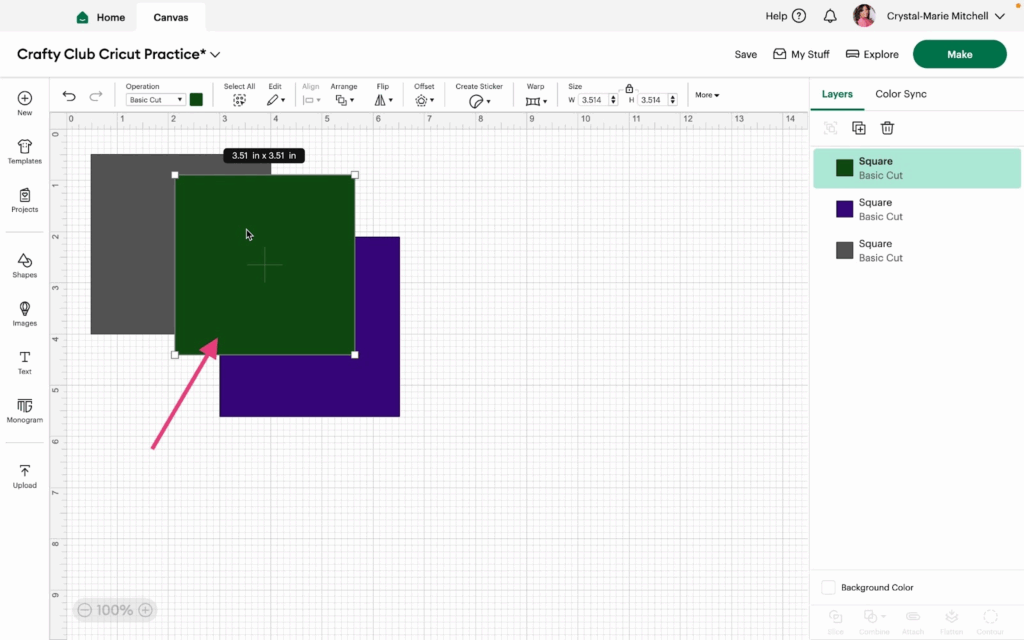
6- With the green square selected, click Arrange>Send to Backward.
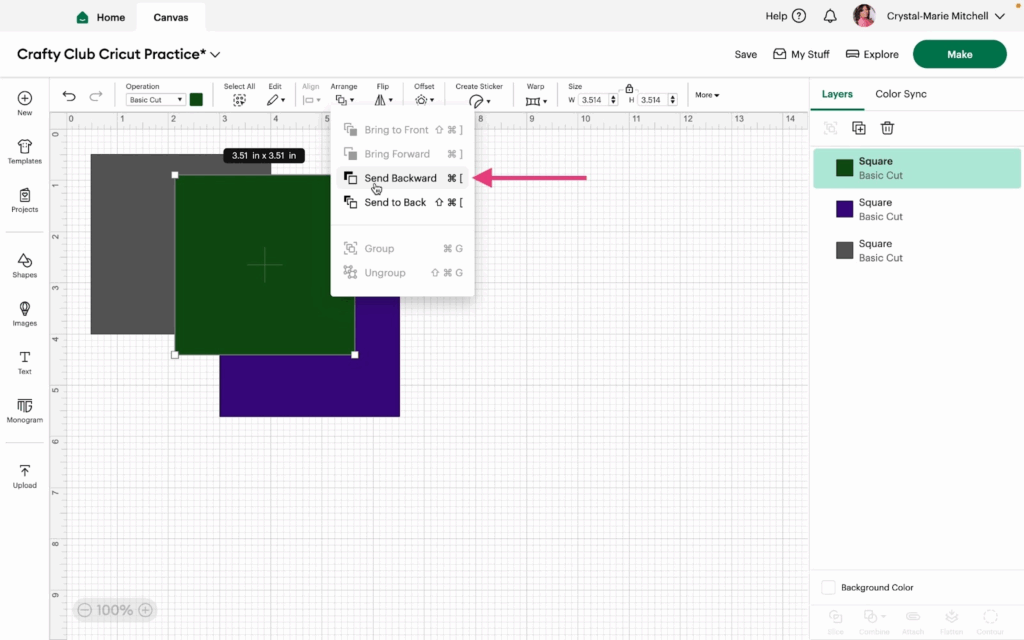
Now the green square is in the middle of the grey and purple squares.

7- With the purple square selected, click Arrange>Send to Back.
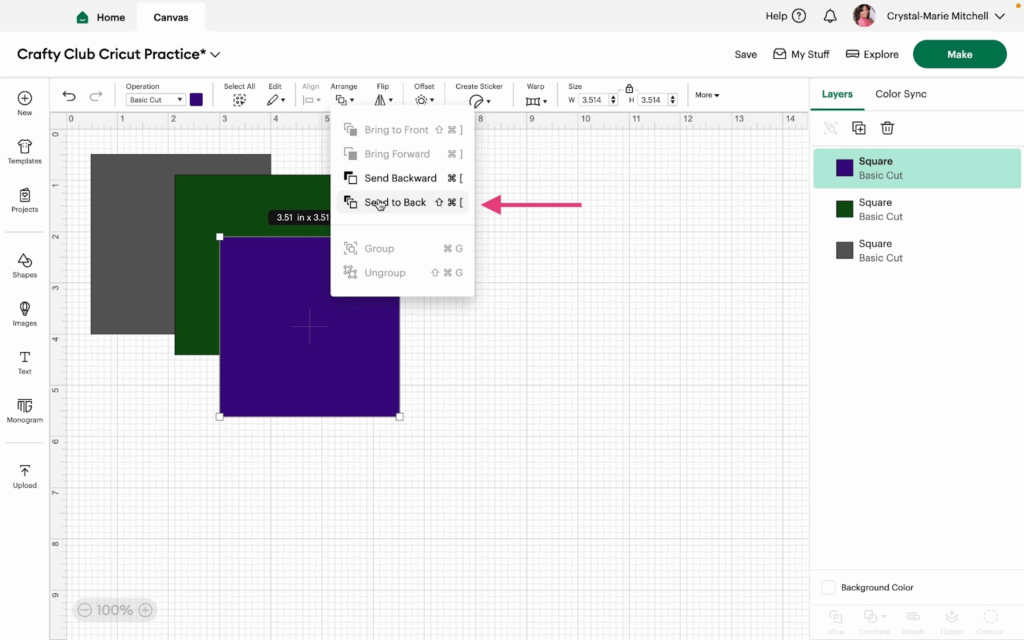
Now, the purple square is behind both the grey and green squares.
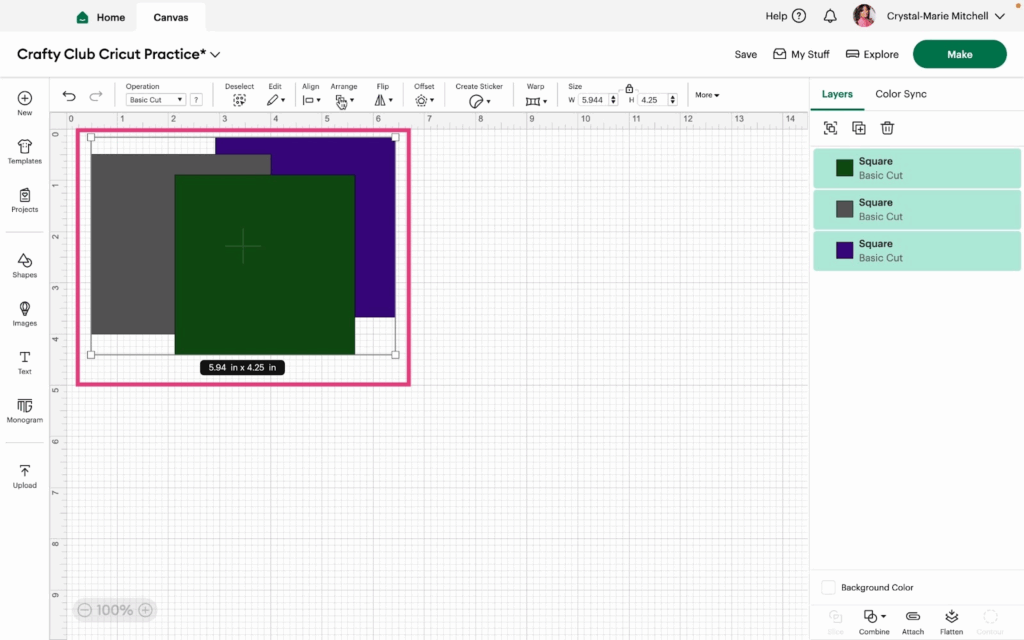
8- Now let’s look at how to group images. First select all the shapes on the canvas. Then click Arrange>Group or Command G.
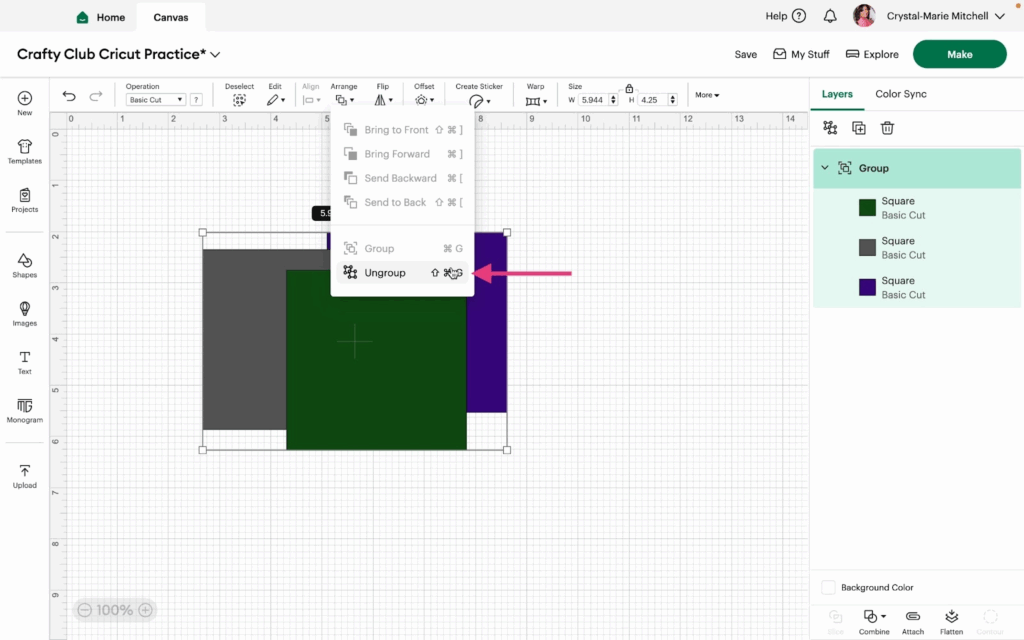
9- Now you can move all of the squares together as one image. To ungroup, select the grouped squares and click Arrange>Ungroup.
Note: Bringing a shape forward will move it forward one layer. Bringing a shape to the front will move it above all shapes on the canvas. The same is true for bringing shapes backward. Bringing a shape to the back will completely move it behind all images. Bringing it backward will move it back one layer.
Watch the video for more information.