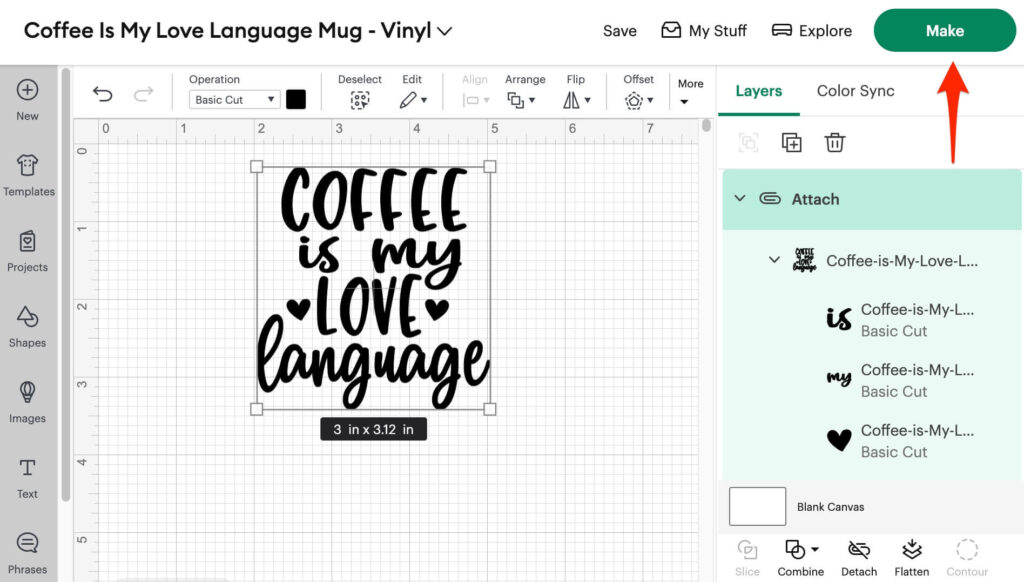
- Click Make in the top right corner
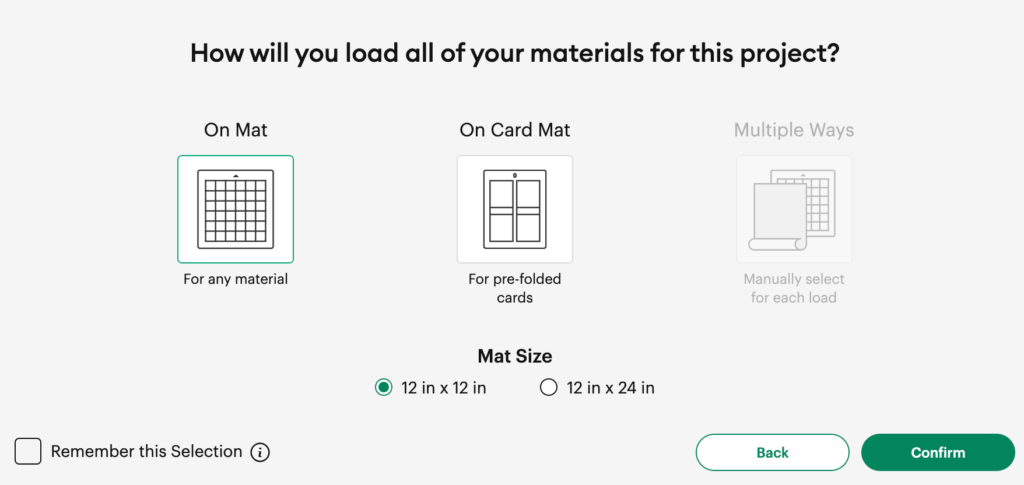
- Select how you will load your material. If in doubt, follow the settings below:
- On the Prepare screen, make sure your design looks correct. If the parts have been repositioned then you did not Attach the layers together. Go back to Step 10 from the previous section. If it all looks correct then c lick Continue.

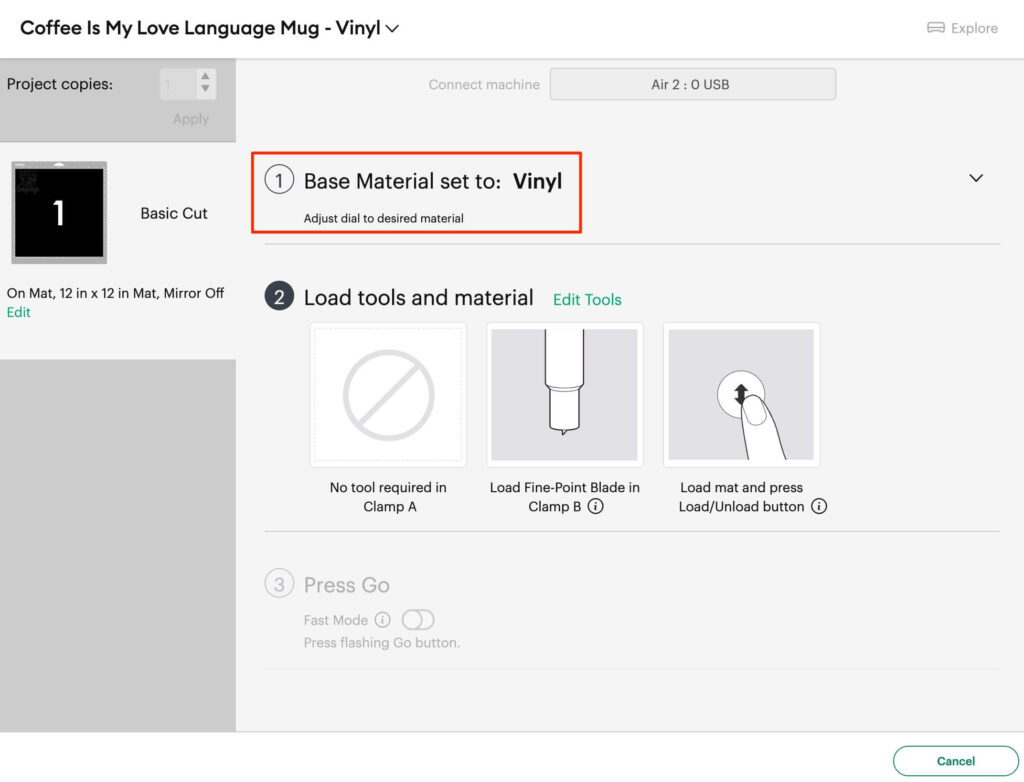
- Make sure you’ve selected the correct material. In this case we’re using Vinyl. Then make sure the Fine-Point Blade is in the correct clamp.
Now we need to get the mat set up correctly.
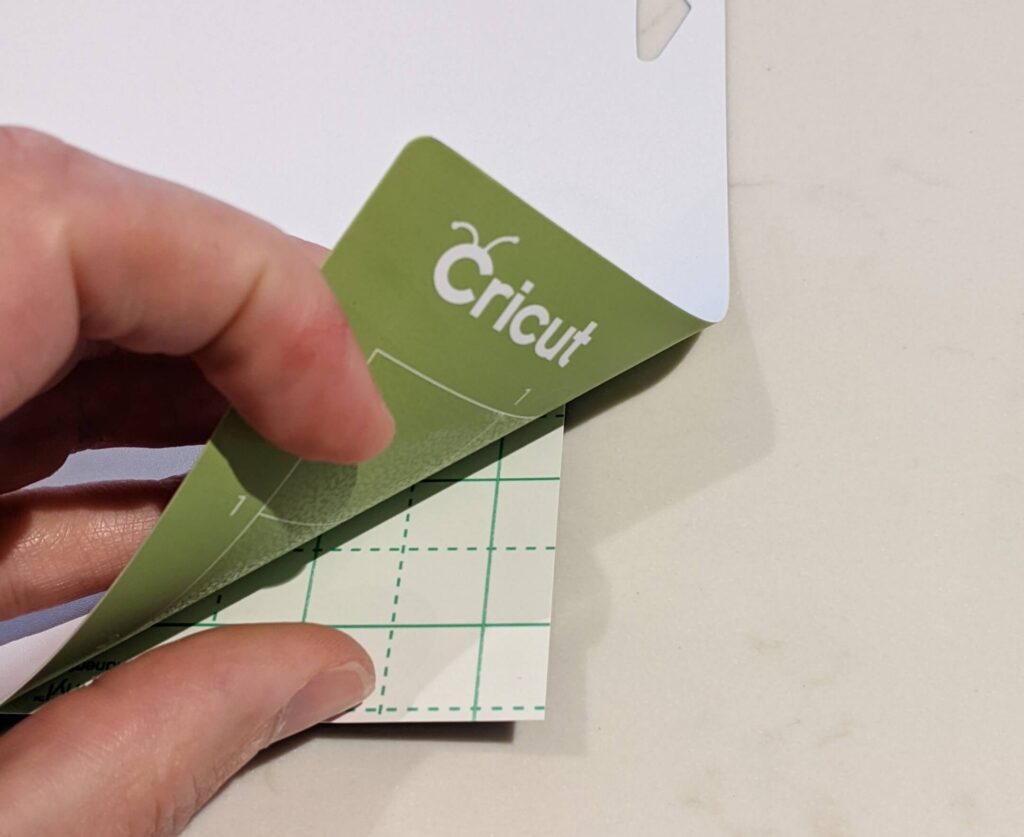
- Peel away the protective sheet of plastic from the StandardGrip (green) mat.
- Pre-cut a square from your vinyl. We’re going to cut 6 x 6”.
- Stick your vinyl to the top left of your Mat and load your mat into your cricut so it’s in contact with the rollers
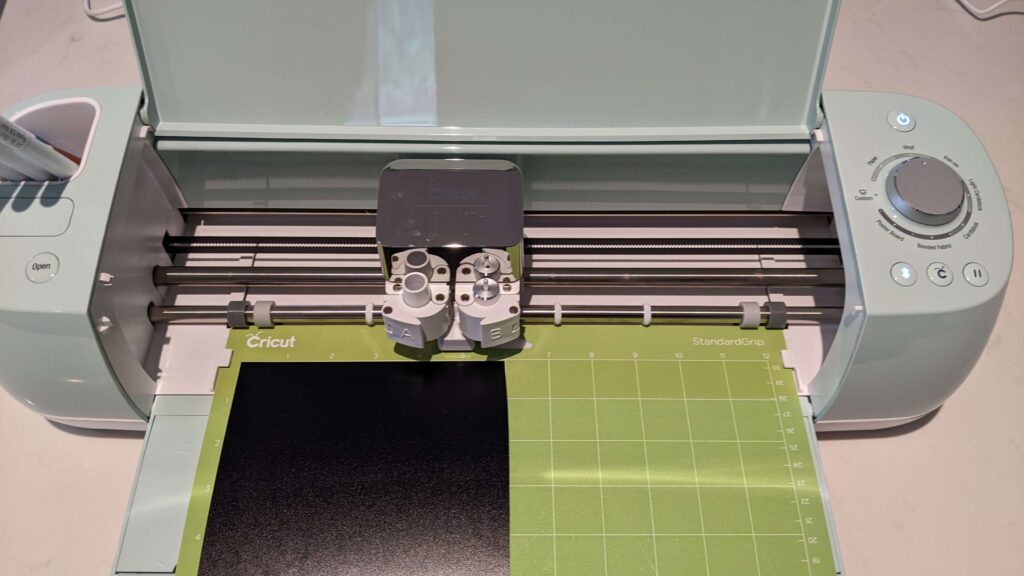
- Now gently push the mat into your Cricut and press the flashing load button. Your Cricut will move slightly and the rollers will bring the mat into the Cricut slightly. If the mat is not fed into the Cricut at all then you’ll need to reload it. Make sure you’re pushing it in slightly.
- Now press the flashing Go button
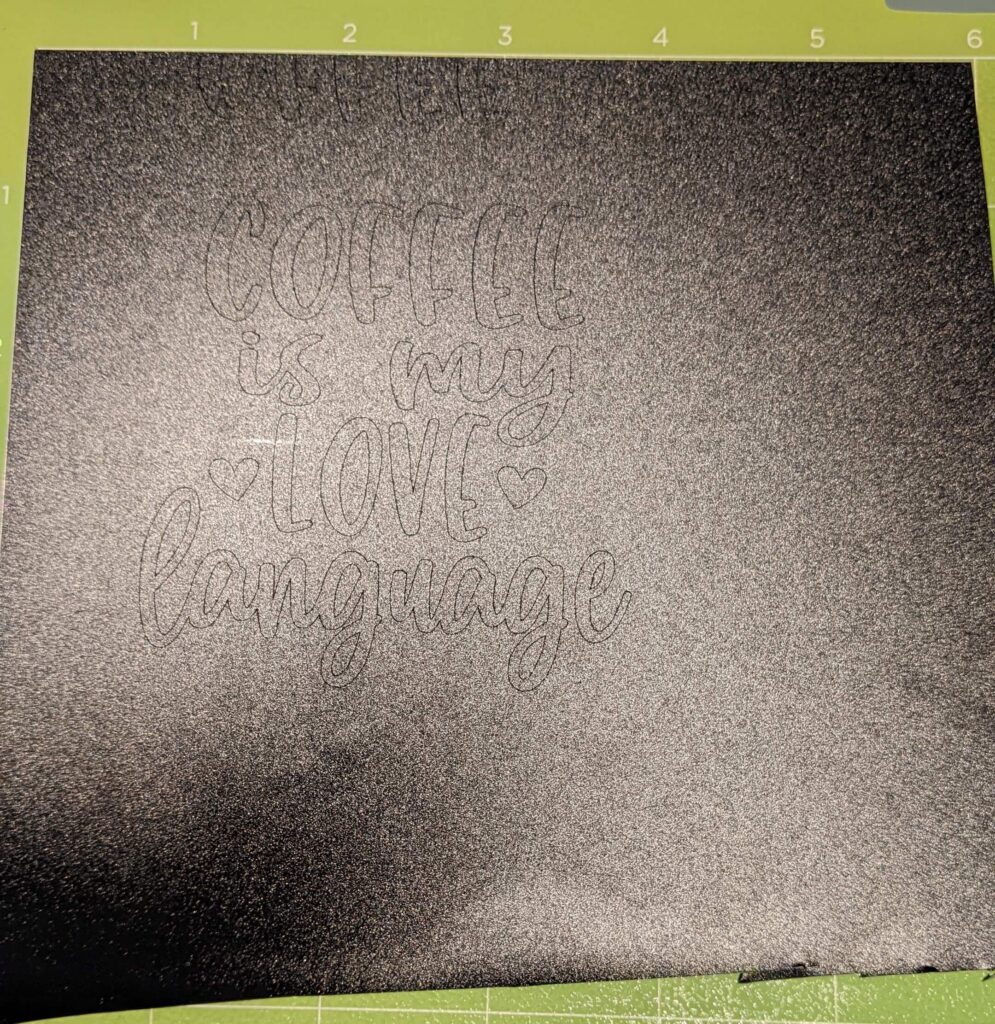
Your Cricut will begin to cut out the design. Once it’s done you can unload the mat via the Mat button. You should just be able to make out the cuts in the vinyl.
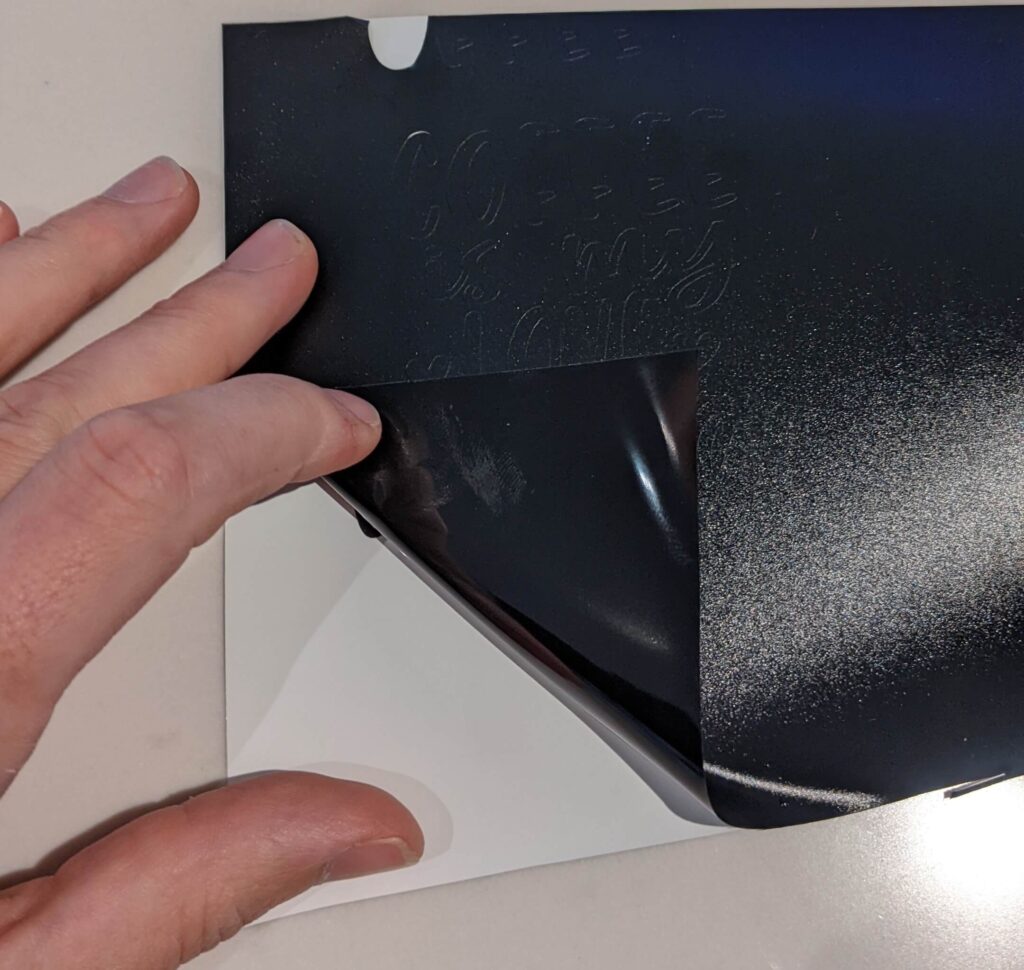
- Place the mat upside down and then begin to peel the mat upwards and away from the vinyl, keeping the vinyl as flat as possible.
Once you’re done, you’ll have the original square of vinyl.
- The next step is to now gently peel the surrounding areas of the vinyl away from the main design.
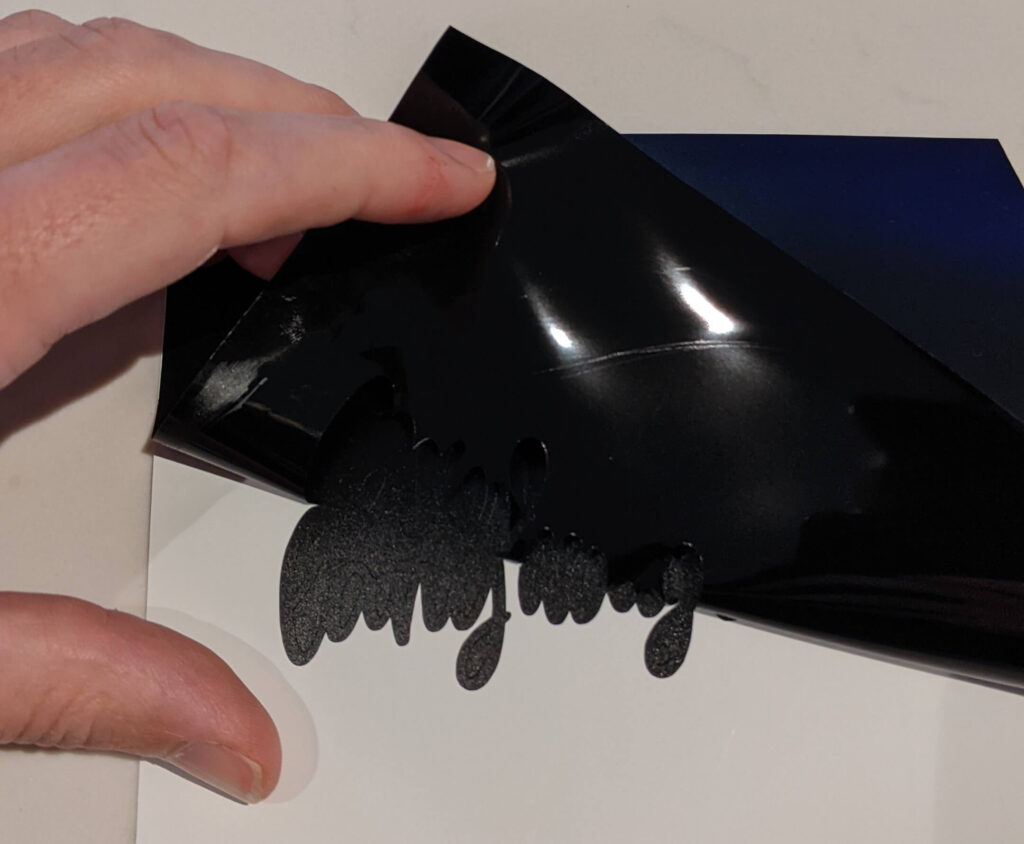
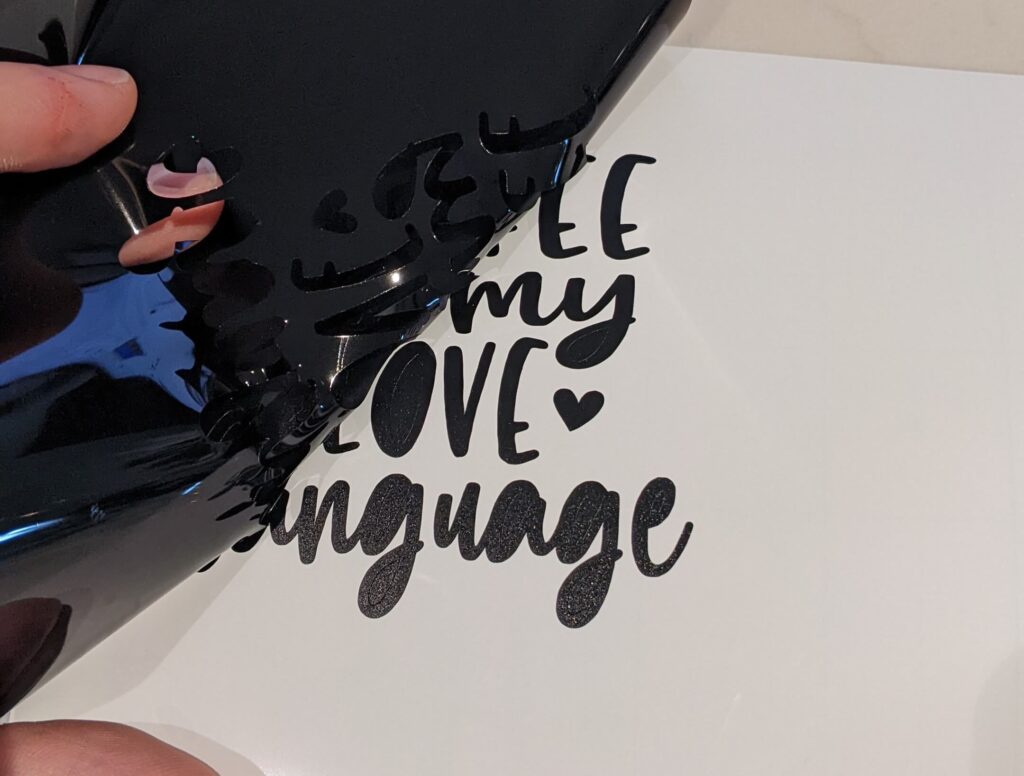

- Now use your weeding tool to remove the inner pieces of vinyl. The best way to use the weeding tool is to try to catch the piece of vinyl right at its uppermost edge. You don’t want to try to catch it from the center.


Now you’re left with your finished vinyl design. The next step is to use transfer tape to apply it to your mug which we’ll cover in the next Lesson.