The first step on your Cricut journey is installing the Design Space app on your Mac. It can be confusing, but we’re going to break down each step so it’s easy to follow along. Let’s get started!
Step 1: Click the link below to open Cricut’s Download page for Design Space: https://design.cricut.com/
Step 2: On the new page tick the checkbox and click the Download button.

The browser may ask you where you want to download the app to. I recommend your Downloads folder so it’s easy to locate in the next step. The app will then begin downloading
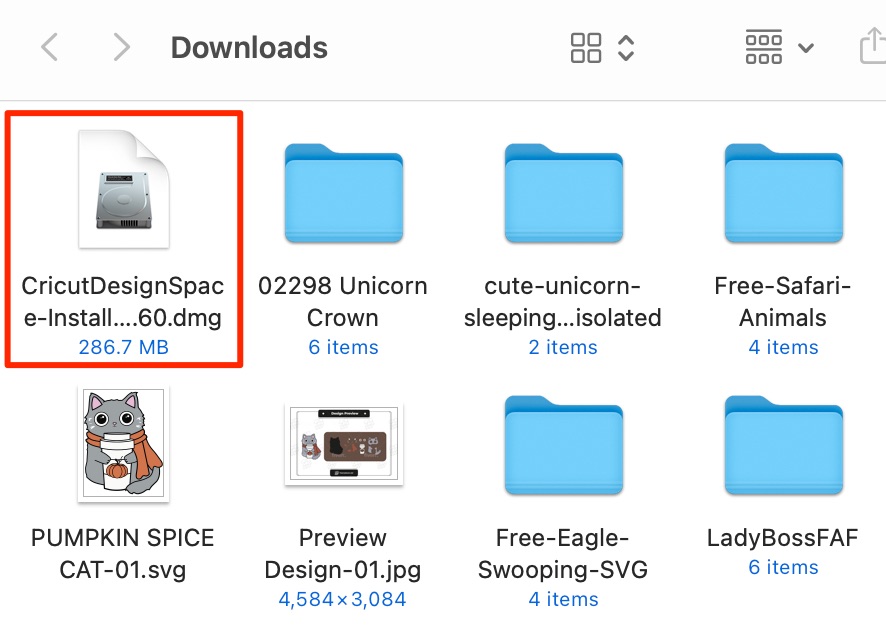
Step 3: Once complete, navigate to your Downloads folder. You should see a new file called something like: “CricutDesignSpace-Install-v8.3.52”. Double click on it to begin the installation process.

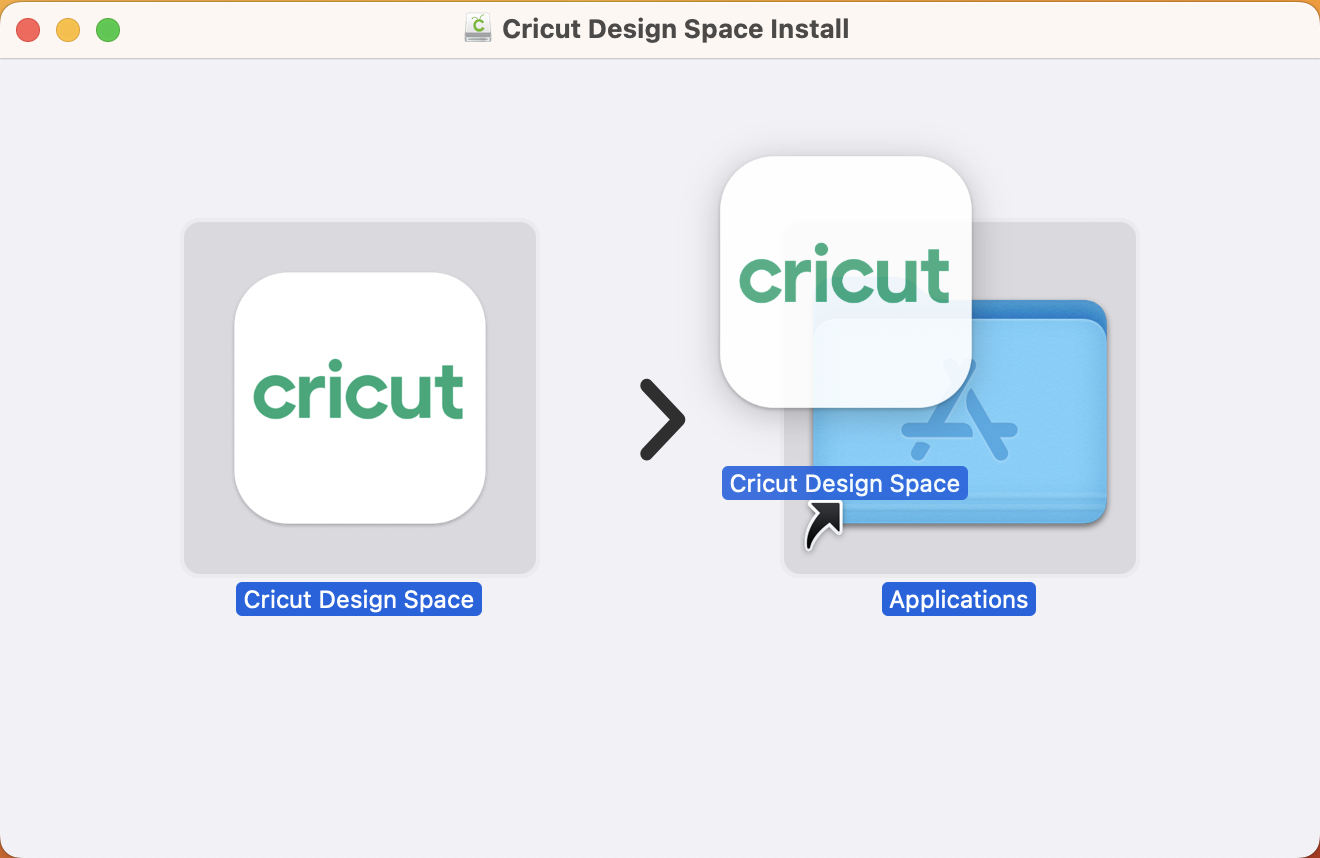
Step 4: A new window will open. Click, hold and drag the Cricut Design Space icon into your Applications and folder and then let go of your mouse to drop it.

Great work! Design Space is now installed on your Mac!
The next step involves launching Design Space and creating your Cricut ID, which is the profile and logins you’ll use to access the software. We’ll cover that in the next lesson.
